
The Arduino IDE
When you open up the Arduino IDE, it will look very similar to the image in Figure 1-13. If you are using Windows or Linux, there may be some slight differences but the IDE is pretty much the same no matter what OS you use.
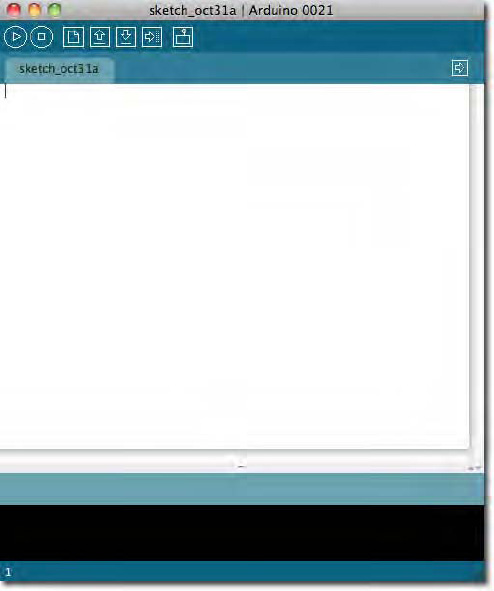
Figure 1-13. What the IDE looks like when the application opens
The IDE is split into three parts: the Toolbar across the top, the code or Sketch Window in the center, and the messages window in the bottom. The Toolbar consists of seven buttons. Underneath the Toolbar is a tab, or set of tabs, with the filename of the sketch within the tab. There is also one button on the far right hand side.
Along the top is the file menu with drop down menus labeled File, Edit, Sketch, Tools and Help. The buttons in the Toolbar (see Figure 1-14) provide convenient access to the most commonly used functions within this file menu.
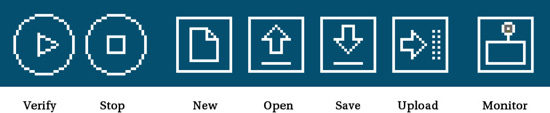
The Toolbar buttons and their functions are listed in Table 1-1.
Table 1-1. The Toolbar button functions
| Verify/Compile | Checks the code for errors |
| Stop | Stops the serial monitor, or un-highlights the other buttons |
| New | Creates a new blank sketch |
| Open | Shows a list of sketches in your Sketchbook to open |
| Save | Saves the current Sketch to your Sketchbook |
| Upload | Uploads the current Sketch to the Arduino |
| Serial Monitor | Displays serial data being sent from the Arduino |
The Verify/Compile button is used to check that your code is correct and error free before you upload it to your Arduino board.
The Stop button stops the serial monitor from operating. It also un-highlights other selected buttons. While the serial monitor is operating, you can press the Stop button to obtain a snapshot of the serial data so far to examine it. This is particularly useful if you are sending data out to the Serial Monitor quicker than you can read it.
The New button creates a new and blank sketch ready for you to enter your code into. The IDE asks you to enter a name and a location for your sketch (try to use the default location if possible) and then gives you a blank Sketch ready to be coded. The tab at the top of the sketch shows the name you have given to your new sketch.
The Open button presents you with a list of sketches stored within your sketchbook as well as a list of example sketches that you can try out with various peripherals. The example sketches are invaluable for beginners to use as a foundation for their own sketches. Open the appropriate sketch for the device you are connecting and then modify the code for your own needs.
The Save button saves the code within the sketch window to your sketch file. Once complete, you will get a “Done Saving” message at the bottom of your code window.
The Upload to I/O Board button uploads the code within the current sketch window to your Arduino. Make sure that you have the correct board and port selected (in the Tools menu) before uploading. It is essential that you save your sketch before you upload it to your board in case a strange error causes your system to hang or the IDE to crash. It is also advisable to hit the Verify/Compile button before you upload to ensure there are no errors that need to be debugged first.
The serial monitor is a very useful tool, especially for debugging your code. The monitor displays serial data being sent out from your Arduino (USB or serial board). You can also send serial data back to the Arduino using the serial monitor. Clicking the Serial Monitor button results in a window like the one in Figure 1-15.
On the bottom right side, you can select the Baud Rate that the serial data is to be sent to/from the Arduino. The Baud Rate is the rate per second that state changes or bits (data) are sent to/from the board. The default setting is 9600 baud, which means that if you were to send a text novel over the serial communications line (in this case, your USB cable) then 1200 letters or symbols of the novel would be sent per second (9600 bits/8 bits per character = 1200 bytes or characters). Note that bits and bytes will be explained later.

Figure 1-15. The serial window in use
At the top is a blank text box for you to enter text to send back to the Arduino and a Send button to make it happen. Note that the serial monitor can receive no serial data unless you have set up the code inside your sketch for it to do so. Similarly, the Arduino will not receive any data sent unless you have coded it to do so.
Finally, the black area is where your serial data will be displayed. In the image above, the Arduino is running the ASCIITable sketch (from the Communications example). This program outputs ASCII characters from the Arduino via serial (the USB cable) to the PC where the serial monitor then displays them.
To start the serial monitor, press the Serial Monitor button. To stop it, press the Stop button. On a Mac or in Linux, the Arduino board will reset itself (rerun the code from the beginning) when you click the Serial Monitor button.
Once you are proficient at communicating via serial to and from the Arduino, you can use other programs such as Processing, Flash, MaxMSP, etc. to communicate between the Arduino and your PC. You will make use of the serial monitor later when you read data from sensors and get the Arduino to send that data to the serial monitor in human readable form.
At the bottom of the IDE window is where you will see error messages (in red text) that the IDE will display when trying to connect to your board, upload code, or verify code. At the bottom left of the IDE you will see a number. This is the current location of the cursor within the program. If you have code in your window and you move down the lines of code (using the ↓ key on your keyboard), you will see the number increase as you move down the lines of code. This is useful for finding bugs highlighted by error messages.
Across the top of the IDE window (or across the top of your screen if you are using a Mac) you will see the various menus that you can click on to access more menu items (see Figure 1-16).
Figure 1-16. The IDE menus
The first menu is the Arduino menu (see Figure 1-17). The About Arduino option shows the current version number, a list of the people involved in making this amazing device, and some further information.
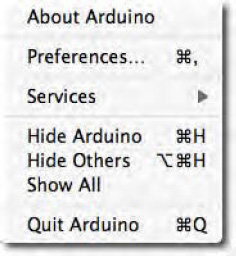
Figure 1-17. The Arduino menu
Underneath that is the Preferences option. This brings up the preferences window where you can change various IDE options, such as your default Sketchbook location, etc. The Quit option quits the program.

The File menu (see Figure 1-18) is where can access options to create a new sketch, take a look at sketches stored in your Sketchbook (as well as the example sketches), save your sketch or use the Save As option if you want to give it a different name, upload your sketch to the I/O Board (Arduino), or print out your code.

Figure 1-19. The Edit menu
The Edit menu (see Figure 1-19) offers options to let you to cut, copy, and paste sections of code. You can also Select All of your code or Find certain words or phrases within the code. The useful Undo and Redo options come in handy when you make a mistake.
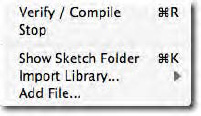
The Sketch menu (see Figure 1-20) contains the Verify/Compile functions and other useful functions including the Import Library option, which brings up a list of the available libraries stored within your libraries folder.
A library is a collection of code that you can include in your sketch to enhance the functionality of your project. It is a way of preventing you from re-inventing the wheel; instead, you can reuse code already written by someone else for various pieces of common hardware. For example, the Stepper library is a set of functions to control a stepper motor. Somebody else has kindly already created all of the functions necessary to control a stepper motor, so by including the Stepper library into your sketch, you can use those functions to control the motor. By storing commonly used code in a library, you can re-use that code over and over in different projects. You can also hide the complicated parts of the code from the user. I will go into greater detail concerning the use of libraries later on.
The Show Sketch Folder option opens the folder where your sketch is stored. The Add File option lets you to add another source file to your sketch, which allows you to split larger sketches into smaller files and then add them to the main sketch.
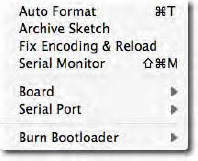
Figure 1-21. Tools menu
The Tools menu (see Figure 1-21) offers several options. You can select the Board and Serial Port, as you did when setting up the Arduino for the first time. The Auto Format function formats your code to make it look nicer. The Copy for Forum option copies the code within the sketch window, but in a format that, when pasted into the Arduino forum (or most other Forums for that matter), will show up the same as it is in the IDE, along with syntax coloring, etc. The Archive Sketch option lets you to compress your sketch into a ZIP file and will ask you where you want to store it. Finally, the Burn Bootloader option burns the Arduino Bootloader (the piece of code on the chip to make it compatible with the Arduino IDE) to the chip. This option can only be used if you have an AVR programmer and if you have replaced the chip in your Arduino or have bought blank chips to use in your own embedded project. Unless you plan on burning many chips, it's usually cheaper and easier to just buy an ATmega chip (see Figure 1-22) with the Arduino Bootloader already pre-programmed. Many online stores stock inexpensive pre-programmed chips.
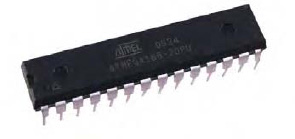
Figure 1-22. An Atmel ATmega chip, the heart of your Arduino. (image courtesy of Earthshine Electronics)
The final menu, Help, is where you can find more information about the IDE or links to the reference pages of the Arduino website and other useful pages.
The Arduino IDE is pretty basic and you will learn how to use it quickly and easily as you work through the projects. As you become more proficient at using an Arduino and programming in C (the programming language used to code on the Arduino), you may find the Arduino IDE is too basic. If you want something with better functionality, you can try one of the professional IDE programs (some of which are free) such as Eclipse, ArduIDE, GNU/Emacs, AVR-GCC, AVR Studio, and even Apple's XCode.
Now that you have your Arduino software installed, the board connected and working, and you have a basic understanding of how to use the IDE, let's jump right in with Project 1 – LED Flasher.