Now, we are going to use a much easier and faster method to do the unwrapping of the Armor: the Smart UV Project tool.
The first thing to do is to prepare the armor pieces for the unwrap process, so perform the following steps:
- Starting from the last
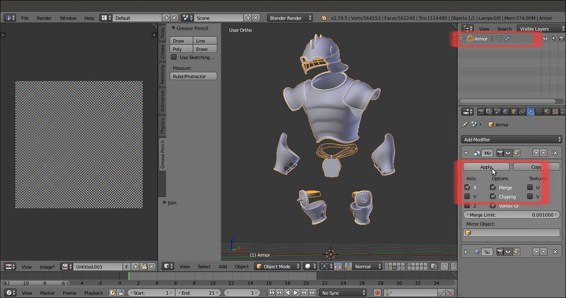
Gidiosaurus_unwrap.blendfile you saved, click on the 13th scene layer to reveal the armor and at the same time, hide the Gidiosaurus_lowres object. - Go to the Outliner and select the first item, the Breastplate; then, use Shift to multiselect all the other visible objects.
- Press Ctrl + J to join them into a single object, and then in the Outliner, rename the result as
Armor. - Go to the Object Modifiers window and expand the Mirror modifier subpanel; be sure that the Clipping item is activated and click on the Apply button:

The Armor as a single object and the Mirror modifier
Here is the unwrap process:
- Press Tab to go into Edit Mode and press the A key to select all the vertices of the Armor.
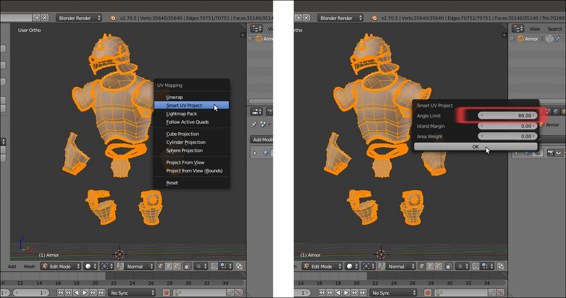
- With the mouse cursor in the 3D view, press the U key, and in the UV Mapping pop-up menu that just appeared, select the second item from the top, Smart UV Project.
- A second pop-up appears with some options that you can leave as they are, besides Angle Limit (the maximum angle in the mesh used by the tool to separate the islands), which by default is set to 66.00; raise it to the maximum, which is 89.00, and then click on the big OK button:

The Smart UV Project tool
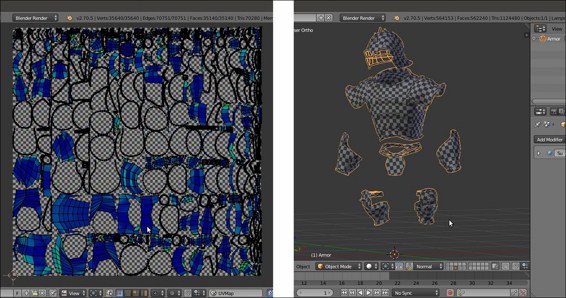
The mesh has been divided into several smaller unwrapped parts and is automatically packed inside the U0/V0 UV tile.
- Select all the islands in the UV/Image Editor window, click on the small double-arrow icon on the toolbar, close to the New and Open buttons, and select the Untitled.001 image (the same grid image we used for the Gidiosaurus unwrap).
- Press Tab to go out of Edit Mode:

The unwrapped Armor
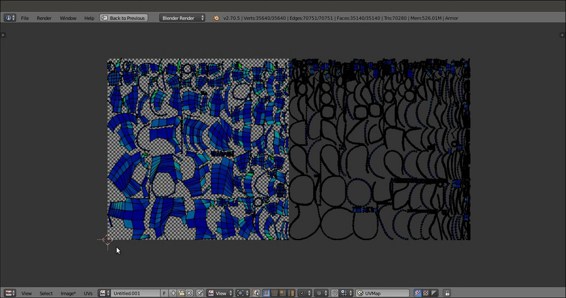
Considering the amount of tiny islands that the tool created, it's better to separate the big armor parts (basically, the plates) from the smaller ones (belts, borders, and so on) and re-unwrap them with the Smart UV Project tool, as we did for the Gidiosaurus body in the previous recipe; then, place them into two adjacent tiles:

The Armor islands inside the U0/V0 and U1/V0 tiles
