The habit of linking assets from library files is the most useful and used, I would say, not only in a Blender based workflow, but also in the industry. A linked asset, in our case a creature character, can be placed and animated even if not already completed in all its parts, thus it allows a team to work almost at the same time on the different aspects. In our case, the Gidiosaurus is still missing texturing and shaders, but can already be placed on stage and animated anyway.
To link an asset in Blender and keep the possibility of animating it through a rig, we must make a proxy of the rig itself. A proxy object overrides the animation controls of a linked object in a non-destructive way, so that an animator can animate it locally to the .blend file the rigged character has been linked to. This way, the linked character object retains all its original information and is only locally altered by the proxy object scene.
As the first thing, we must prepare the library, so open the Gidiosaurus_final_detailing.blend file:
- Go to the Outliner and select the Gidiosaurus_lowres mesh, then also Shift-select the Armor, the Armor_decorations, the rivets, the Eyes, and the Corneas objects.
- Press Ctrl + G, and all the selected objects are outlined in green to show that now they belong to a group, in this case, to the same group we created just now.
- Go to the Object window and in the Groups subpanel, change the generic default Group name to Gidiosaurus.
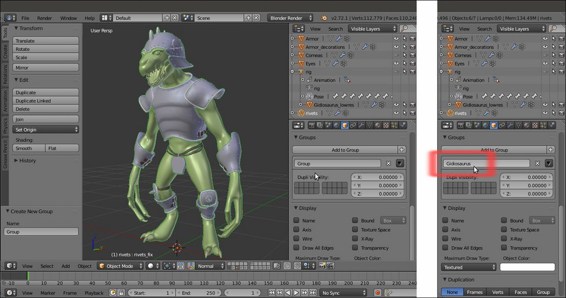
Creating a Group and assigning all the selected objects to it
- Go to the Outliner and click on the eye icon to the side of the rig item to make it visible again, and then click on the rig item itself to select it.
- Press Ctrl + Tab to go out of Pose Mode and go to the Groups subpanel under the Object window again. Click on the Add to Group button and in the pop-up menu, select the Gidiosaurus item (in this case, the only group already created). The rig is outlined in green as well:
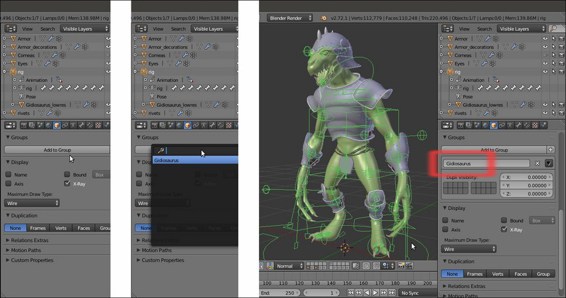
The rig assigned to the group as well
- Click again on the Restrict view-port visibility button (the one with the eye icon) to the side of the rig item to hide it and save the file as
Gidiosaurus_library.blend.
- Click on the File item in the main menu bar, select the New item, and confirm by clicking on the Reload Start-Up File pop-up (or just press Ctrl + N).
- Select the default Cube and delete it, then go to File | Link (or press Ctrl + Alt + O). Browse and click on the
Gidiosaurus_library.blendfile, then click on the Group folder item, and finally click on the Gidiosaurus item. Click on the Link from Library button to the top right of the screen.A new object has appeared at the 3D Cursor location (that should be placed at the center of the scene), and what we have got at this point is the linked Gidiosaurus group; this means that the character and any other object inside the Gidiosaurus group in the library file are now linked and instanced on an Empty that is named Gidiosaurus as well:
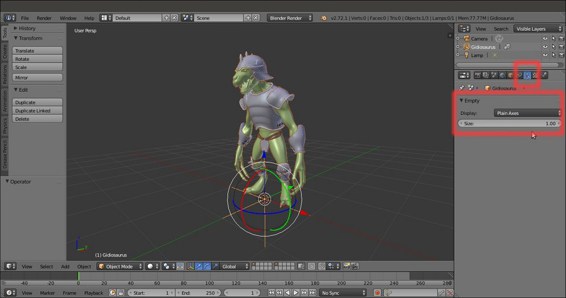
The Gidiosaurus group linked and instanced on the Empty
Remember that in the library file, inside the Gidiosaurus group we put also the rig, which for the moment is not visible in the linked group because it is hidden in the library file.
- Press Ctrl + Alt + P, and a new pop-up appears where we can select the item we want to proxify (although all the objects inside the group appear in the list, at the moment only an Armature can be proxified). Click on the rig item:
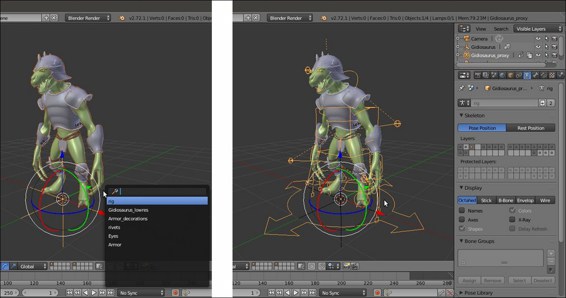
The proxified rig
The rig appears as a separate object in the Outliner, identified by the name Gidiosaurus_proxy; at this point, it is possible to only select the rig (which is still in Object Mode) and move it to a different layer.
- Select the Gidiosaurus_proxy object and move it to the 11th scene layer (use the M key). Shift-click to enable the layer and then go to the Display subpanel, under the Object Data window, to enable the X-Ray item.
- Press Ctrl + Tab to go into Pose Mode and the N key to call the viewport Properties sidepanel.
- Save the file as
Gidiosaurus_proxy.blend.At this point, looking at the viewport Properties sidepanel, we will see the Rig Layers interface usually created by the Rigify addon, but if we save the file and reopen it, the interface is gone.
This is because, at least for the moment, the Python script that draws the rig interface doesn't get automatically linked with the rig, so it's something we must do by hand. This is not a big issue, and by the way, the procedure is incredibly simple:
- Click again on File | Link in the main header menu (or press Ctrl + Alt + O).
- Browse to the
Gidiosaurus_library.blendfile, click on it, and then click on the Text item. Click on the rig_ui.py item (the Python script for the interface) and then on the Link from Library button. - Save the file and reopen it; the rig interface is visible again on the viewport Properties sidebar:
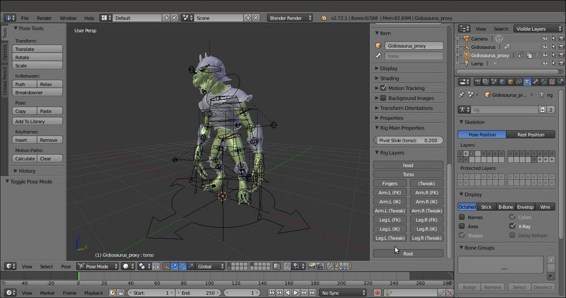
The rig interface at the bottom of the Properties sidepanel
