After having obtained the scales textures, we must now paint the diffuse color of the Gidiosaurus character.
Start Blender and open the Gidiosaurus_baking_scales.blend file:
- Go to the main Properties panel and be sure to have the UVMap coordinates layer selected and active, in the UV Maps subpanel under the Object Data window.
- Go to the Material window and select the
Material_U0V0slot, then go to the Texture window and be sure to have the scales_tiles texture slot selected; left-click on the X icon button to the right side of the name datablock to unlink it (Shift + left-click to remove it from the file):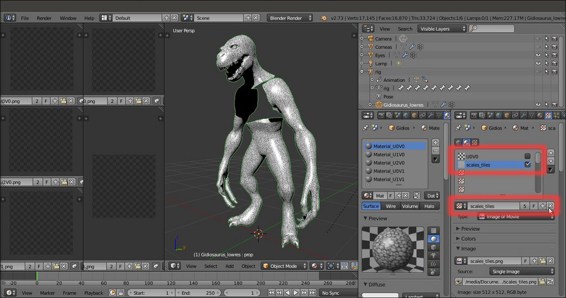
Unlinking the scales_tiles texture slot datablock
- Select and enable (by clicking on the checkbox to the right) the U0V0 texture slot. Repeat the procedure at steps 2 and 3 for all 5 materials.
I'll take for granted that you have preserved your blank images and that they are the ones loaded into the current file; otherwise, substitute them with new blank images (you have to do this both in the Texture window as well as in the UV/Image Editor windows) by following steps 5 and 7 of the Preparing the model to use the UDIM UV tiles recipe in this chapter.
- Minimize the image editor windows to the left and the Material and Texture panels to the right as much as possible, then click on the mode button (Sets the object interaction mode) on the toolbar to go into Texture Paint mode. Press T with the mouse pointer over the 3D view to call the Tool Shelf and click on the Viewport Shading button on the toolbar to switch to Solid mode:
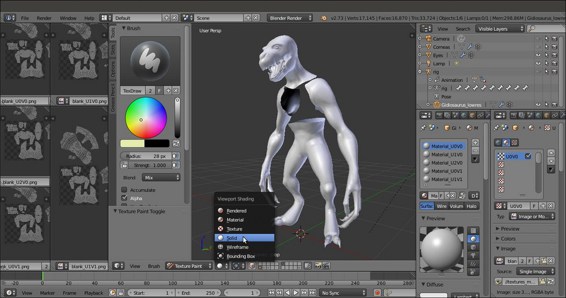
Switching to Solid viewport shading mode
- Just to verify that everything works correctly, select a black color (or any other one) in the color wheel under the Brush subpanel and trace a continuous stroke in the 3D viewport that envelopes all the Gidiosaurus body parts:
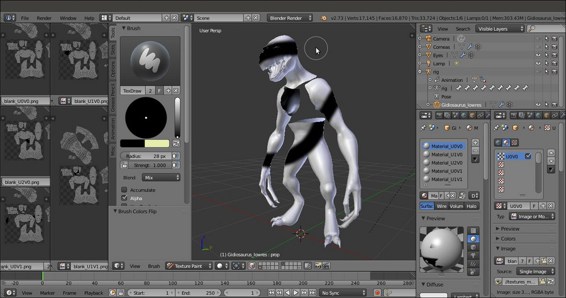
Testing that everything works correctly with a single stroke on the mesh
By enlarging the UV/Image Editor windows, you will see that after the stroke, each image has been updated with the corresponding painting (pay no attention to the over-imposed and repeated for each window UV islands):
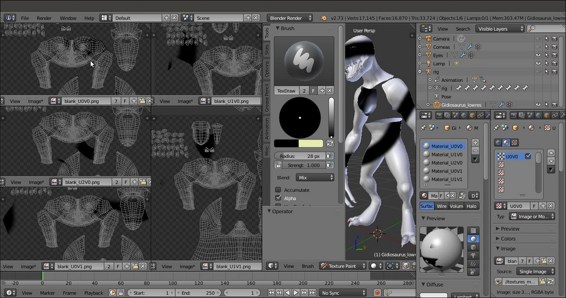
The test stroke correctly visible inside each one of the UV/Image Editor windows
- Rearrange the image editor windows, then press Ctrl + Z to undo the stroke and save the file as
Gidiosaurus_painting_BI.blend.
We are now ready to paint the basic color for the Gidiosaurus character. But first, one more little thing:
- Select the Gidiosaurus object and enter Edit Mode; select the vertices of all the teeth and all the talons, then assign a new vertex group renamed enamel; press Ctrl + I to invert the selection and go out of Edit Mode.
- Now, start by selecting a medium dark greenish color (R 0.349, G 0.510, B 0.435) in the color wheel under the Brush subpanel. Scroll down and go to the bottom of the subpanel and click on the New button to create a new palette, then click on the + icon button (Add Swatch) above the Foreground Color slot (the left one) to add the color to the palette. Rename the default Palette name as
Gidiosaurus_colors. - In the 3D viewport toolbar, click on the Face selection masking for painting button to enable the masking tool; now it's possible to paint only on the part of the mesh that has selected vertices in Edit Mode, so in this case we want to paint only on the skin, leaving the teeth and the talons blank.
- Click on the Brush window and select the Fill brush; if necessary, click on the greenish color box added to the palette (called Swatch) to load it as the foreground color (note that with the Fill brush, the background color swatch disappears and the foreground color swatch becomes the only one available). Set the Strength value to 1.000 and click on the Gidiosaurus object in the 3D viewport.
After a while, all the paintable parts of the mesh are filled with the active color (and therefore also the textures in the UV/Image Editor windows; there are weird straight lines, probably a bug, but not a problem in this case because they don't show on the mesh and we can fill in the texture's backgrounds later anyway). If any tiny part is left out, just click on one of the parts again to fill it:
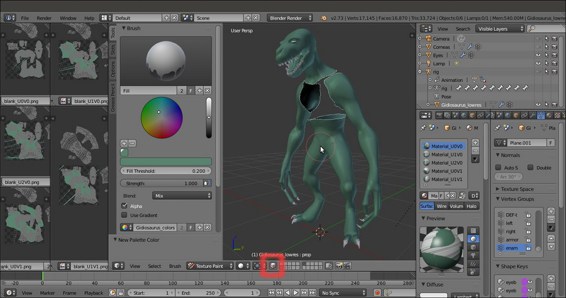
The Fill brush and the Mask button in the 3D view toolbar
- Now select the TexDraw brush and a darker and more saturated green color (R 0.129, G 0.275, B 0.125) as the foreground color, and add it to the palette.
- Under the Tool Shelf, go to the Options tab and be sure to have the Occlude, Cull and Normal items disabled still; then go into the Ortho Side view.
- Now it's time to use a tablet, if you have one; enable both the tablet pressure sensitivity buttons to the side of the Radius and Strength items and start to shade the Gidiosaurus body on the head, shoulders, arms, and legs:
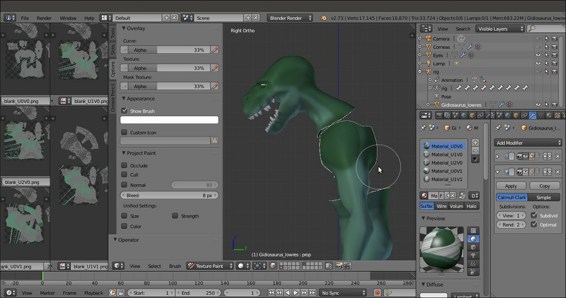
Painting colors on the model
- Select a brownish color (R 0.204, G 0.188, B 0.133) and add it to the palette; disable the tablet pressure sensitivity for Radius and lower the Strength to 0.500. Go into the Front view, maximize the 3D viewport (mouse pointer in the window and press Ctrl + Up Arrow), and keep on adding shades to the hands, feet, and legs:
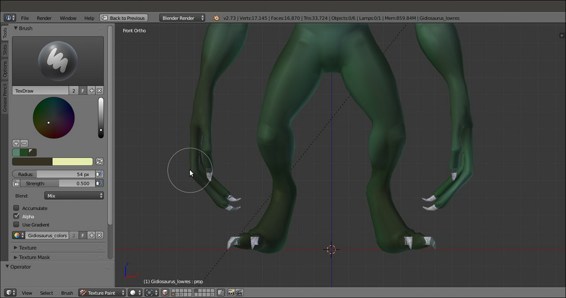
Shading the character's limbs with darker hues
- Increase the Radius value to 100 (using the slider or by pressing the F key and moving the mouse pointer in the 3D view) and painting on the head and the shoulders:
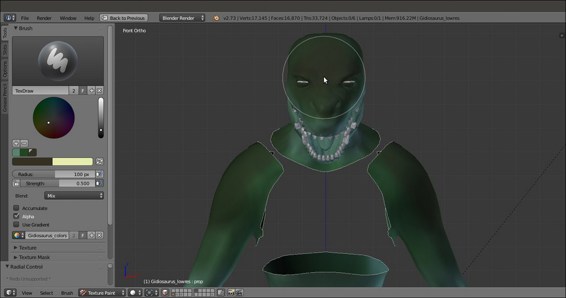
Shading the head and shoulders
- If, for any reason, it becomes difficult to paint directly on the model through the 3D viewport, you can maximize the involved UV/Image Editor window (mouse pointer in the window and press Ctrl + Up Arrow), click on the Mode button (Editing context being displayed) in the toolbar (which by default shows View), and switch it to Paint. Press T to call the Tool Shelf and go on with the painting, smudging, or whatever, directly on the texture image:
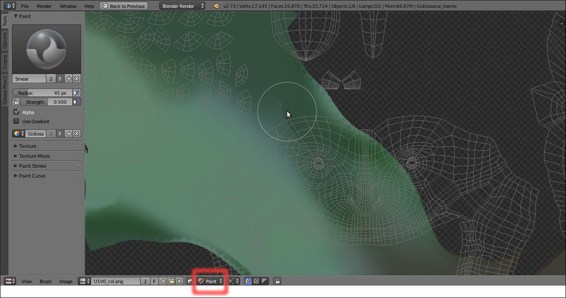
Painting directly on the image map in the UV/Image Editor window
For example, this is the way I painted the inside of the mouth and the tongue, then went back to the 3D viewport to smudge and soften the joining line of the pink tissue with the green skin at the borders:
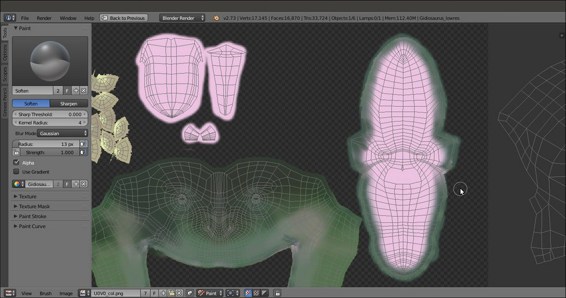
Working on the inside of the mouth in the UV/Image Editor window
I'm not going to show you every step in this process, but basically this is the procedure I used to paint the diffuse coloration for the character. I also added lighter and warmer colors for the face's areas close to the mouth and more bluish and colder hues to de-saturate the brownish hands and feet, and then inverting the enamel vertex group to paint in Edit Mode, through the use of the Mask tool, the teeth and talons as well:
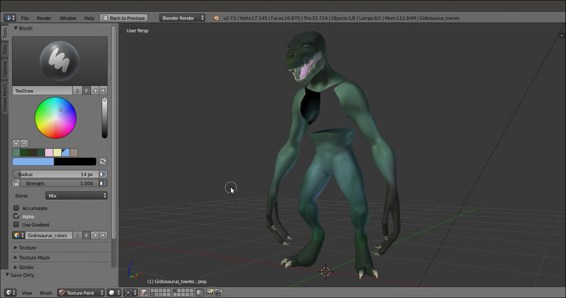
The completed Gidiosaurus diffuse color texturing
To have a look at the final Gidiosaurus_colors palette, open the
Gidiosaurus_painting_BI_02.blendfile provided. - When you are done, go to the top left UV/Image Editor window, blank_U0V0, and click on the Image item in the toolbar. Save the image texture in the
textures_makingfolder asU0V0_col.png, and do the same with the other 4 image textures. - To keep the palette, save the file.
There is not that much to explain about this recipe, except I just want to highlight the fact that we disabled the Occlude, Cull, and Normal items in the Options tab under the Tool Shelf. This is so we were able to paint (from the Side view) on both sides of the model at the same time; in fact, with these settings disabled, the mesh is not occluding itself. It seems that all three items must be disabled for this to work.
Instead, to smear and/or soften the texture on some parts, for example, the inside of the mouth, we had to re-enable them, in order to prevent our mouth-painting from accidentally overwriting our skin-painting.
Remember, the Occlude, Cull, and Normal items should always be enabled if you want to paint only on the model's surface right under your brush. You can disable them to paint on the front/outer and the back/inside of the mesh at the same time.
