Once we are satisfied with the reptile skin shader created for the character's head, we can copy it to the other parts of the body, that is to the other material slots, and then apply the necessary modifications. Those, in this case, just consist of different color and scales image textures.
This means that all the other shader parts can be reused as they are. In this recipe, in fact, we are going to make a node group of these parts so as to easily re-use the shader for the other materials slots.
Just start Blender and re-open the previously saved Gidiosaurus_skin_Cycles_01.blend file.
Let's start to create our skin node group:
- In the Material window, select the slot of the
Material_skin_U0V0. - Put the mouse pointer in the Node Editor window, press the B key and left-click to box-select all the nodes with their respective frames. Then, press the Shift key and right-click (twice for each one) to deselect the Attribute_UV1 node, the MAPPING frame, the COL node, the SCALES node, the TEXTURES frame, and the Material Output node:
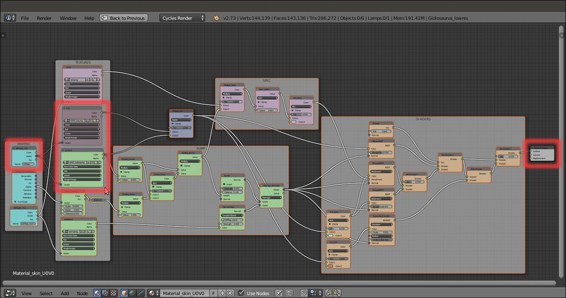
The box-selected nodes and the highlighted deselected ones
- Press Ctrl + G to make a node group of the selected nodes; automatically you are inside the group in Edit Mode:
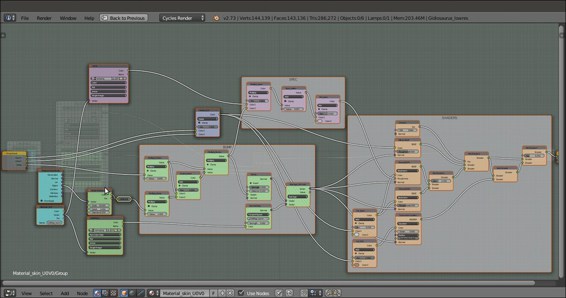
Inside the node group in Edit Mode
- Click on the Group Input node to select it and zoom in on it, then press N to call the Properties sidepanel. Connect the Color2 output socket to the first Value input socket of the Multiply_Scales node, replacing the connection coming from the Value output.
- Go to the Properties sidepanel and in the Interface subpanel, click on the Value item inside the little Inputs window; then go down to the Name slot and click on the X icon button to delete the socket from the Group Input node:
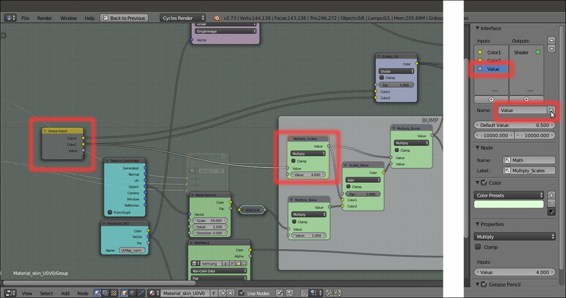
Tweaking the node group input socket connections
- Still in the Name slot in the Interface subpanel, select the Color1 item and rename it Color_Diff. Select the Color2 item and rename it Color_Scales:
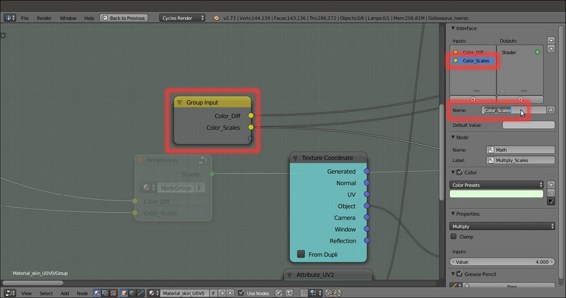
Renaming the node group input sockets
- Press Tab to exit out of Edit Mode and close the node group; rename it Gidiosaurus_skin and give it a bright yellow color:
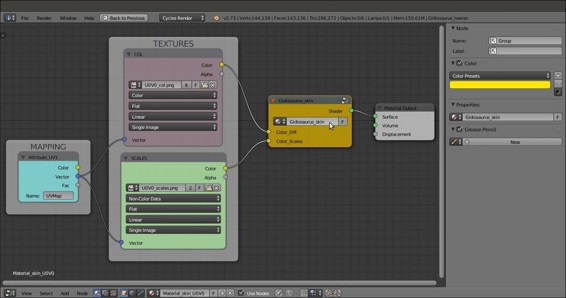
The "Gidiosaurus_skin" node group
- Now select everything by pressing the A key twice and then press Ctrl + C.
- In the Material window, select the
Material_U1V0, then click on the Use Nodes button in the Surface subpanel. - Put the mouse pointer in the Node Editor window and delete the already selected default nodes (the Diffuse BSDF connected to the Material Output nodes), then press Ctrl + V to paste all the copied nodes inside the window.
- Zoom on the COL and SCALES nodes. Click on the numbered button to the right side of the texture name to make them single users, then click on the folder icon buttons to browse to the
texturesfolder and load the proper images according to the material name, that is, theU1V0_col.pngandU1V0_scales.pngimage textures. - Rename the material as
Material_skin_U1V0: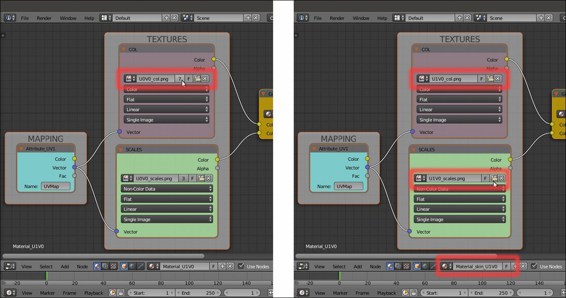
Making the copied textures single users and loading the right image textures for the "Material_skin_U1V0"
- Repeat step 8 to step 12 for the other remaining 3 material slots and then save the file as
Gidiosaurus_skin_Cycles_02.blend.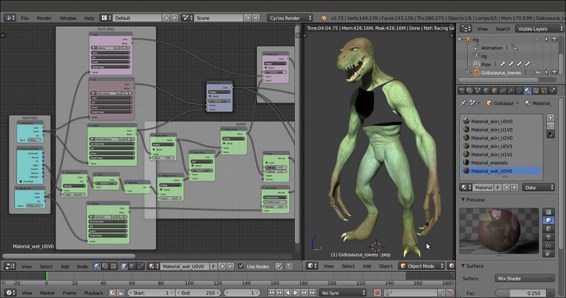
The "Material_wet_U0V0" network and the completed Gidiosaurus shading in the rendered preview
Of course, it wasn't mandatory to make a group of the skin shader to reuse it for the other material slots; we could just have selected, copied and pasted all the nodes and frames as they were at the end of the previous recipe.
The (quite big) advantage in having a node group instanced in different materials is that if you need to change something in the internal network, you don't have to repeat the modifications in the node group of each material. It's enough to do it in Edit Mode in one of the instances, and all the internal modifications will be reflected in all the instances of the node group used by the other materials.
