What we have to do now is to bake the scales_tiles.png image map (used in all the materials and mapped on the UVMap_scales coordinates layer) on the 5 tiles of the UVMap coordinates layer.
At this moment, Blender is not able to bake automatically outside of the default U0V0 tile space yet, so a bit of additional work is needed; nothing particularly difficult by the way. The steps are as follows:
- Press Tab to go into Edit Mode again and then put the mouse in the blank_U0V0 UV/Image Editor window; press the N key to call the Properties sidepanel and under the Display subpanel, check the Normalized item:
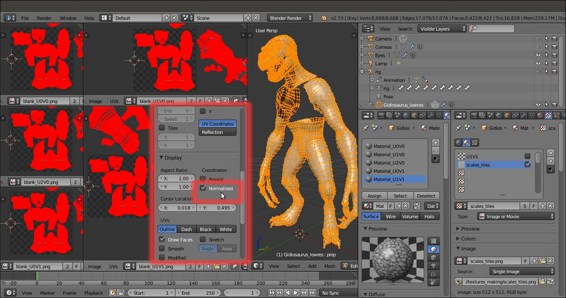
The Normalized item in the Display subpanel under the N Properties sidepanel of the UV/Image Editor window
- Press N again to hide the Properties sidepanel. Go to the UV Maps subpanel under the Object Data window and click on the + icon button to the right to add a new UV coordinates layer (UVMap.001), then rename it UVMap_temp (or whatever you prefer).
We are now going to create a new UV coordinates layer for the baking by moving all the islands in the outside tiles to the space of the default one; but before we go on, we must be sure about two things:
- In the toolbar of the blank_U0V0 image editor window, the Keep UV and edit mode mesh selection in sync button must now be disabled
- In the pop-up menu, accessible by clicking on the UVs item in the image editor toolbar, the Constrain to Image Bounds item must be deselected:
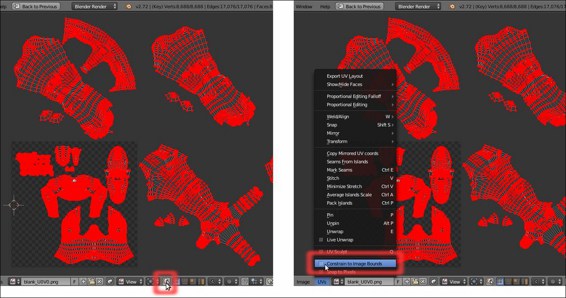
The "Keep UV and edit mode mesh selection in sync" button and the Constrain to Image Bounds item
Go to the blank_U0V0 image editor window; if you prefer, maximize it (mouse cursor into the window and press Ctrl + Up Arrow). If necessary, press A to deselect all the islands.
- Now, box-select the islands on the U1V0 tile, and move them to the default U0V0 tile space (G | X | -1 | Enter):
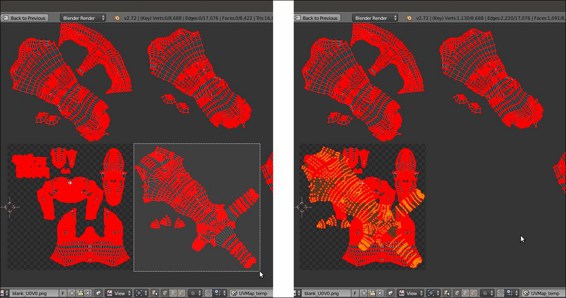
The UV islands of the U1V0 tile space, box-selected and moved to the default U0V0 tile space
- Deselect everything and box-select the islands at U2V0, then move them to the default space, which is the same as the previous one (G | X | -2 | Enter).
- Repeat for the last 2 islands tiles (G | Y | -1 | Enter) and (G | X | -1 | Enter and then G | Y | -1 | Enter), then rearrange the image editor windows.
- Go to the Object Data window and in the UV Maps subpanel, be sure to have the UVMap_temp layer, the last one, enabled as the active one, that is, the camera icon to the right side of the UVMap_temp item must be the one enabled and visible (Set the map active for rendering):
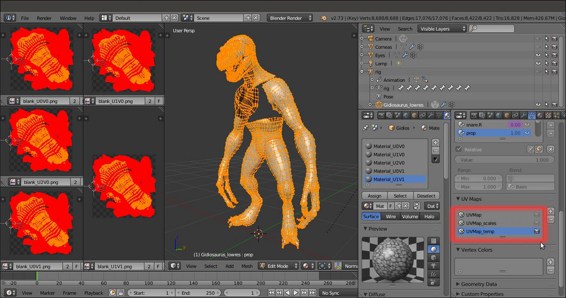
The new UVMap_temp coordinates layer
- Out of Edit Mode, go to the Render window and then go to the Bake subpanel (usually at the bottom of the panel). If necessary, click on the Bake Mode slot to select Textures, then set the Margin value to 8 or higher; and check the Clear item flag. Be sure to have the Gidiosaurus object still selected and press the Bake button.
After a while, the baked scales textures appear on the 5 PNG images, baked according to the UV islands of the 5 tiles of the UVMap layer:
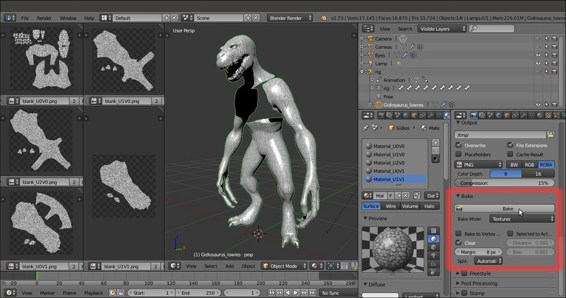
The 5 baked images and the Bake subpanel under the Render window
- Click on the Image item on the UV/Image Editor toolbar and from the pop-up menu, select the Save All Images item or if you want to preserve your blank images (we are going to use them again later), just save each image at a time (Save As Image item or F3 key) with the names
baked_U0V0.png,baked_U1V0.png, and so on: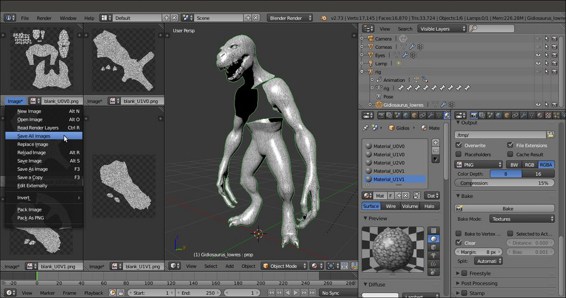
Saving the baked image maps
Opening the texture_making folder on your desktop, you will now find the baked textures:
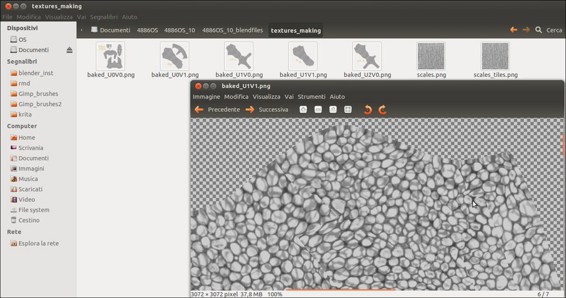
The baked textures saved inside the "texture_making" folder
As you can see in the information bar at the bottom of the GNOME image viewer (I'm working in Linux Ubuntu), each image saved from Blender is 37.8 megabytes.
The large size of the images can of course be reduced (a lot) by opening them in Gimp (or any other 2D application) and re-saving.
All the UV islands have been moved to the default U0V0 tile space, which is the only one where the baking happens, but because each image is associated with a different part of the mesh, each image is correctly baked with the right islands and textures.
In fact, inside Blender, and in our case, the location of each tile in the UV space doesn't actually matter; we made a new UV coordinates layer and kept the old one just in case the model should be exported to a different 3D application.
To move the islands exactly by the correct number of pixels, we enabled the Normalized item in the Display subpanel of the image editor N sidepanel to display the UV coordinates from 0.0 to 1.0, rather than in pixels. Anyway, without the Normalized item enabled, it would have been enough to move the islands by 3072 pixels, that is, the width (or/and height) in pixels of the assigned blank image.
As with any other software, Blender is not free from bugs; particularly, the baking section seems to have an annoying bug, which is very difficult to fix because it happens very rarely and randomly, so that it cannot easily be reproduced and consequently submitted to the Blender bug tracker (https://developer.blender.org/maniphest/project/2/type/Bug/).
It's difficult to understand the reason for this, but sometimes the software refuses to do the baking, claiming that No objects or images (are) found to bake to (the message appears on the top right main header and in the Terminal panel as well); in our case, this seems to happen when you switch the active for rendering UV coordinates layers.
If this happens, one thing you can do is check that all the images assigned in the UV/Image Editor windows to the different materials under one UV layer, also appear correctly assigned under the other UV layer (it shouldn't make a difference, but who knows), eventually re-assigning them one at a time.
If the baking still fails, there is a simple workaround; switch to the UVMap coordinates layer instead, rather than the UVMap_temp one, and just move the islands to the default U0V0 space and bake them one at a time. To do this, first bake the islands of the U0V0 tile space and save the image, then move the islands of the U1V0 tile space to the U0V0 tile space, bake and save as a different image, and so on with the islands of all the tiles.
