
Google Checkout
Ecommerce is another area where I had been traditionally intimidated, just like I was with online advertising. But for beginners, there are some options, and one of the reasons I chose Google Checkout as an example is because it is free and simplifies a lot of the process of setting things up. Sometimes I wonder if I’m doing learners an injustice by trying to find the easiest possible solution, because you don’t end up with an appreciation of just how much hassle such solutions can remove. I also wonder this particularly with classes. So I’m going to mention again (with apologies to students) that teachers might want to have students start by using an open source shopping cart system mentioned at the end of this chapter and setting up ecommerce that way. Then come back and try Google Checkout.
So we’re going to approach this like some other tours, to give you a taste of what you can try, without being comprehensive. It’s definitely one of those things that an entire book could be based on. (And yes, there are plans to make a Google Checkout Primer.)
I do recommend that you try it out and then bookmark some of the resources that Google offers as far as documentation goes, so that you can come back and learn more if you’re interested.
Creating an Account
To start with, you’ll need to create a Google Checkout account: http://checkout.google.com/sell.
When you’re ready, just sign in with your Gmail account. It will be easier if you have already created a Gmail address for your site/business/organization at http://mail.google.com.
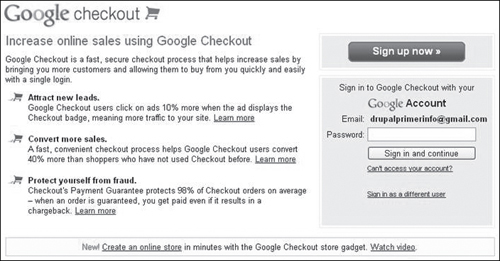
Be sure to click on some of the links on the intro page and bookmark them:
Next, you’ll get this screen, and you’ll want to click the first radio button—“Yes, we have a login email . . .”:

When you click it, another question will appear, and you’ll click “Yes, we’d like to use our existing Google Account”:

When you do click on Yes under the lower of the two questions, you’ll get a box where you can log in (see Figure 16.1).
Figure 16.1. Just sign in with a Gmail account. You can start one at http://mail.google.com.

Then you’ll enter private contact information:

And then your public contact information:

The next section is where you’ll enter some financial information. The way that Google Checkout works is that not only is Google providing the shopping cart, but it is also providing an integrated merchant account solution. This means Google will process credit card orders for you. Since it will be taking money in, and paying money out (to you), there are different options of how the money can be handled.

The reason it asks for your information is to identify you, and there’s also an option to provide a Social Security number. Google is asking that because you might end up in a situation where you have $1,000 in orders, for example, and you want to get paid immediately. So you might request a payment from Google into your bank account, and maybe all the money from your orders hasn’t come into Google yet, so for accounting purposes it ends up sending out the payment before all the orders have processed. Or something like that.
Anyway, you can provide Credit card only and switch it later. In that case, it is just for identification purposes.
Here’s a blurb Google provides:

So you fill out the rest of the info, and then I would actually recommend clicking on the “Send me. . .” checkbox if you think you want to learn more about ecommerce. Then click the “I have . . .” checkbox and click Complete sign up:

Checkout Store Gadget
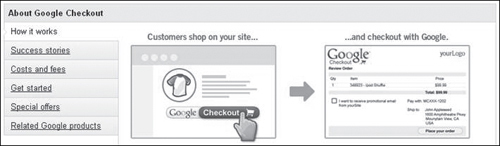
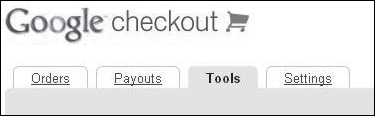
After you create an account, the next step is to use the Google Checkout store gadget to create your test shopping cart. It’s located on the screen that comes up after you sign up, but if you need to get to it directly, you can visit http://checkout.google.com/sell and go to the Tools tab:
To get started, click on the “Google Checkout store gadget” link:
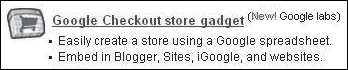
It’s basically a wizard that guides you through a series of steps to get your shopping cart up and running. You can come back and create a “serious” store later if you like. You’ll definitely want to read more about all the options involved. We’ll just take a quick tour, and you might like to follow along to build up your confidence and have some fun. It’s really quite amazing how quickly you can get a live store up, relative to traditional methods.
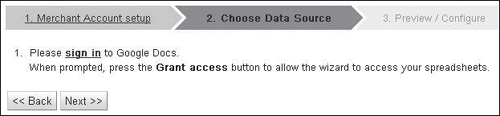
To begin, click the “store gadget wizard” link:

Then click the Grant access button:

It will confirm that the merchant account is linked with the store gadget, and you can select currency and click Next:

In this next stop, Google has leveraged the power of Google Docs to give you an easy central way to keep track of ecommerce information through an inventory spreadsheet. In this case, Google has set up a nice system where you can adjust/create/manage items through a spreadsheet tied to a Google account, to make it easy to go in and change things.
In the cart creation process, it asks you to “sign in” to Google Docs. So click the “sign in” link:
Then click the Grant access button:

And click the “Create a new inventory spreadsheet” link:
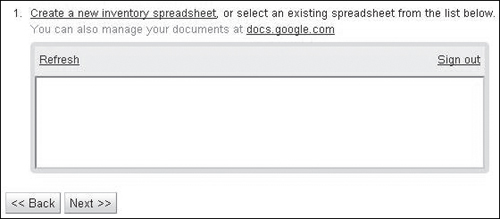
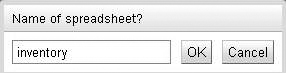
You can just click OK:
The new spreadsheet will show up in the area below step 1:

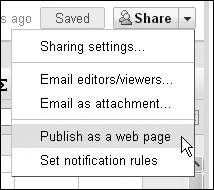
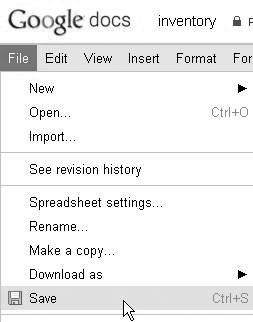
And step 2 asks you to do a couple things, which we’ll do. First, click the downward-facing arrow next to the Share button (see Figure 16.2). (Note that the documentation Google provides is actually wrong at the time of writing—it may say to click the Share button, but you need to click the arrow to the right of the Share button.)

And choose Publish as a web page:
Then click the Start publishing button (and make sure “Automatically republish when changes are made” is checked):

Then click the Close button in the screen you’re on:
![]()
You should get a “verified” message:
Then at the bottom of the spreadsheet, click Next:

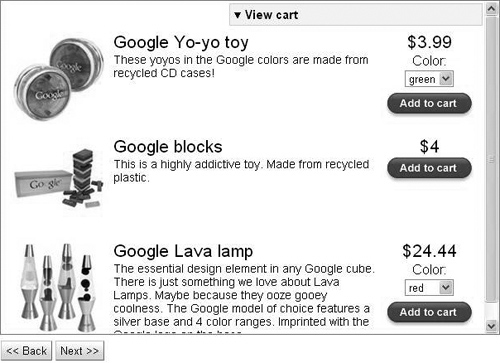
Next you get to have some fun. There’s a screen that gives a preview of the shopping cart, based on dummy data Google has provided:

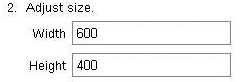
I recommend setting a smaller size. In our example, I tried 600 and eventually went to 300 for width:
Below you’ll see the results. When you’re ready, click Next (see Figure 16.3).
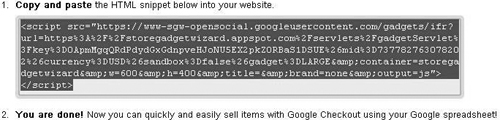
Then you’ll end up on a screen with some code. You’ll want to make sure you’re on the Website (HTML) tab. This is the code you’ll want to copy and paste into Drupal (see Figure 16.4).
Figure 16.4. Underneath the Website (HTML) tab, there’s code that you copy and paste into Drupal.

So select the code, copy it, and have it ready, or be in a position where you can come back to this window/tab to get the code. I suggest opening up Drupal in another tab or another browser entirely.
Implementing Store Gadget in Drupal
To try this in Drupal, visit Content and click Add content:

And click Basic page:
![]()
Rich Text Editor—Source Button
For the steps below, if you have the CKEDITOR rich text editor installed from Chapter 12 (which gives you more formatting options for text), before pasting the code in, you’ll need to click the Source button.
Then give the page a title (for example, “Store”) and paste the code in the Body area:

(Or if you have the CKEDITOR rich text editor installed, click the Source button before you paste the code in.)

Be sure the Text format is set to Full HTML:
![]()
Click the “Provide a menu link” checkbox:

And be sure to click Save:
![]()
Then theoretically you’ll see something like this:
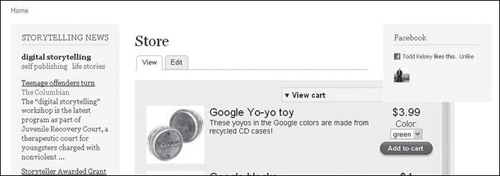
If things are overlapping, or you otherwise would like to make adjustments to the size of your store, you can go back into Content and click “edit”:
What I did is to very carefully change the w=600 to w=300:

Ah, much better.

And there’s the Store tab:
Super cool that you can get a live store going so quickly:

Adjusting Inventory/Pricing
Test Order—Separate Gmail
For the steps below, if you want to generate a test order, when posing as a customer, you may need to sign in using a different Google Account/Gmail address than the one you used for setting up the shopping cart. To create a separate one, just go to http://mail.google.com.
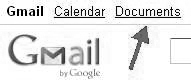
This is the cool thing. So you’ll probably want to make a test order, and you probably will want to change the price, because it is a dummy item, and it is a live site. It’s as easy as signing into the Gmail account of the account you used for Google Checkout and clicking on “Documents”:
Then you look for your spreadsheet and click it:
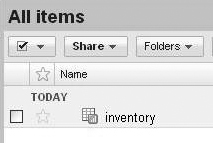
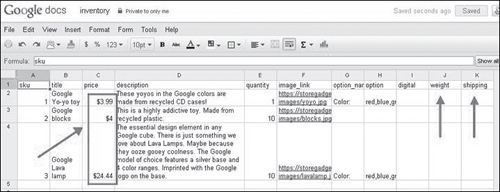
This is where all the information is stored. Again, there’s a lot of options and information at work here. You’ll definitely want to look into the Help section in Google checkout, if you plan on pursuing this. But suffice it to say that what you enter in this spreadsheet dynamically updates your store. This is where you handle weight, shipping, options, and so on (see Figure 16.5).
Figure 16.5. On the left, you can click and adjust the prices. Try it! You won’t hurt anything. What they’re using to store information is Google Docs – Spreadsheet, which is like an online (free) Microsoft Excel.
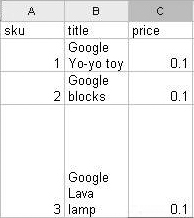
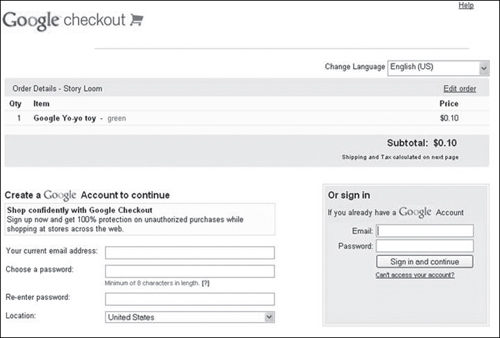
And right now, what you’ll want to do is change the price to 10 cents for everything (see Figure 16.6). Just click the cells in the price column (just click on the prices) and replace them one by one with 0.1.
Figure 16.6. Click underneath the word “price” and change the price to 0.1. Then your credit card will only be charged 10 cents when you run a test order (which is a nice thing to do, to go through the whole process, to see it all in action).
And when you go back to your site, the prices will be updated, and you can click Add to cart:


And you’ll probably have an experience like mine, where my personal phone number had been copied over to the shopping cart (a bug that hopefully will be fixed):
So to fix this, go lickety split back to http://checkout.google.com/sell and click Settings:
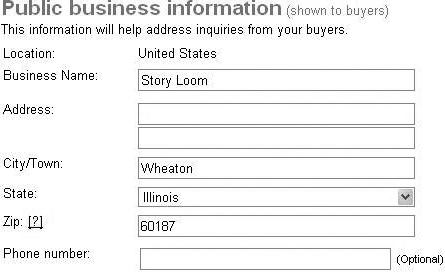
Then delete your phone number from the Public business information field, and make sure the address is as you want it. (I recommend a P.O. Box, not your personal house address.)
![]()
Ah, much better, no more personal phone number (see Figure 16.7).
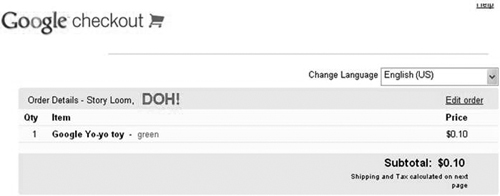
Then, to see your test order, go to http://checkout.google.com/sell and visit the Orders tab. You have an order. Woohoo!

Congratulations on trying out Google Checkout. I definitely recommend investigating the documentation further within the checkout.google.com/ sell site.
If you’re experimenting with the Google items, you’ll probably want to make sure to disable the content block/page/etc. where you have them listed, lest people come by and buy something and expect something. You can always credit their account if something happens, but I’d recommend disabling the block as soon as you’re done trying it out.
To disable it, in Content, click the “edit” link in the Store row (if that’s what you called it):
Then uncheck Published and click Save (see Figure 16.8).
Figure 16.8. Disabling the store after you try it out with dummy items.
