Installing Drupal with QuickInstall
This quick installation stuff is really quite fantastic. So you can use your control panel to log directly into your account, or you might be able to visit your website name and then click the cPanel Login on a screen that looks something like the one in Figure 5.8.

Then use the username and password provided in the email. You might also want to bookmark the control panel login (see Figure 5.9).
Figure 5.9. The Login screen.

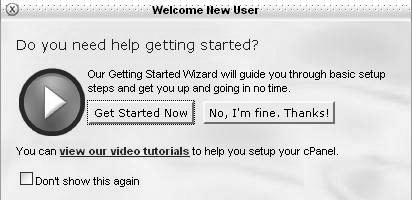
The first time you log in, if you want to learn more about your hosting account, you can click the Get Started Now button when this little window pops up, or the “view our video tutorials” link (see Figure 5.10).
Figure 5.10. A Welcome pop-up screen.
The CPanel screen has lots of goodies on it, so scroll all the way down to the Software/Services section and click QuickInstall (see Figure 5.11).
Figure 5.11. The Software/Services section on the CPanel screen.

The QuickInstall logo appears at the top of the screen, and it’s worth noting that this is one area where you can come back and manage your quick installations (see Figure 5.12). You might want to bookmark it.
Then scroll down to the Content Management Software section and click on Drupal 7 (see Figure 5.13). Important: If you want to work with Drupal 7, be sure to go to the “Drupal 7” link.
Figure 5.13. Searching for the Drupal 7 icon.

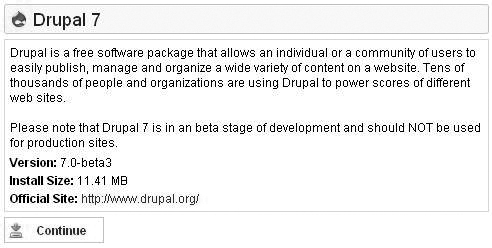
Then when this next screen comes up, click the Continue button (see Figure 5.14).
Figure 5.14. The Drupal 7 panel.
This next screen gives you some different options, like installation (see Figure 5.15).
Figure 5.15. Installing Drupal 7.

If your website name hasn’t been connected yet, there might be a temporary address you can use. The section that starts with http:// allows you to place Drupal at a specific address. If you leave the field on the right blank, Drupal will be installed at your website address. In my case, that’s fine—when someone types in storyloom.org, it will go right to Drupal.
But if you want, you could also enter in something like Drupal on the right. If I’d done that, then the QuickInstall would place Drupal at http://storyloom.org/drupal. Generally speaking, if you’re experimenting, you could place some test installations at addresses like “drupal,” “joomla,” “cms,” and then access them at those addresses (such as, websitename.com/drupal, websitename.com/joomla, etc.). There may be limitations on how many you can do, but you can delete quick installations, too—and it might be a way to have some fun by trying different systems out.
Then enter in an email address for the Admin email—that is, the main one to be used with the Drupal account. Choose your country, default time zone, and give a name to the website. Then click the Install Now! button.
A progress bar displays:
![]()
And you should get a congratulations message. You’ll probably want to click the “here” link, bookmark it, and then go check your email address.

You should get an email that looks something like this:
And the email itself will look something like Figure 5.16.
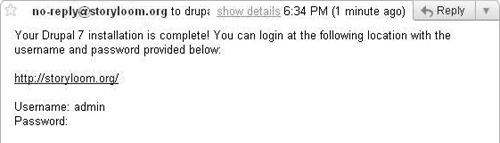
It will have a username and password, and this is your Drupal username/password. This is what you use to log into Drupal. Drupal is successfully installed.
Logging into Drupal
So visit the link provided in the confirmation email and enter in your username and password to log into Drupal. It should look something like this basic screen shown in Figure 5.17.

When you’re logged in, some menu options will appear at the top of the screen (see Figure 5.18), and you’re ready to go.

In the next chapter, we’ll take a look at a super critical thing: security. It’s important to know how to upgrade Drupal 7, because if you don’t, a hacker could compromise your website, and you could lose everything. Drupal 7 makes it easier to update the security when new versions are added.
Then in the next chapter after that, we’ll look at some basic configurations and a couple of tasks you can do to get going. The rest of this chapter is devoted to some “extras.” If you’ve followed along and started an account in Hostgator, and if it’s still running a promotion to get free Adwords credit, the next section will explain how to do it. Don’t put it off because sometimes the promotions have expiration dates.
The reason why you’ll probably want to start an Adwords account is that it can be a way to promote your website. And there are a variety of ways to learn how to use Adwords, such as the help section in Google Adwords or the book Adwords Primer (www.adwordsprimer.com).