
Downloading/Installing Google Analytics in Drupal
In this section, we’ll try installing a module in Drupal. The Google Analytics module is one of the top rated modules for Drupal—for good reason! It can be very helpful (see Figure 9.10). To get started, visit http://drupalmodules.com.

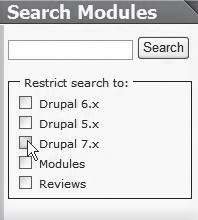
If you end up exploring around or searching for modules, be aware of the version requirements. If you’re using Drupal 7, look for modules that are designed for Drupal 7 (see Figure 9.11).
Figure 9.11. Choosing a version of Drupal.
To find the Google Analytics module, search for it, or just click on Top Rated:
![]()
Somewhere in the list, you’ll find Google Analytics, and you’ll see that it is compatible with Drupal 7. To download it, just click on the blue Google Analytics title/link:

Then on the module page, you’ll need to look for the latest version; make sure that you’re downloading the one that’s compatible with Drupal 7. The downloads section will look something like Figure 9.12. There will be versions for Drupal 5 and 6, and then somewhere in the list there will be one for Drupal 7.
Figure 9.12. Looking for the latest release. Typically, you go for the “Recommended” release, unless the Drupal 7 version isn’t available yet and then “dev” may be okay. Welcome to the Wild, Wild West.

At the moment, the D7 version is “7.1-1.x-dev,” so it is “under development.” By the time you read this, it may be something like 7.x-1.5 or whatever. What you will want is the one that is for 7, but is recommended. If there’s not one for 7 that says “Recommended” by the time you read this, then just try the “dev” version. To download, click the “Download” link.
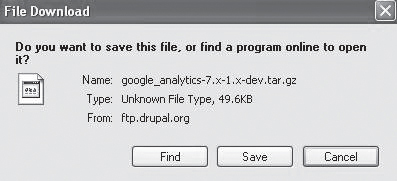
Depending on your operating system, some kind of download window will open up. Just download the file to your computer in a location you’ll remember. I recommend creating a folder like “Drupal Modules” and saving module files in it (see Figure 9.13).
Figure 9.13. Downloading a dev.tar.gz.something.whatever.dot.something.
Don’t “unpack” the module file. Tar.gz is a compressed format, and what you’ll be doing is uploading the archive right into Drupal.
Installing the Module in Drupal
To install the module in Drupal, log into your Drupal site and click the “Modules” link:
![]()
Then click Install new module:
![]()
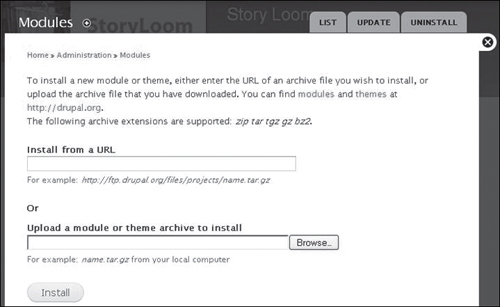
In the Modules window, you’ll click the Browse button and locate the file you just downloaded and double-click it to select it. Then click the Install button (see Figure 9.14).
Figure 9.14. Drupal provides a nice screen for uploading modules. It used to be that you had to upload on your own (using FTP software, or your hosting company’s “control panel”).
You’ll still need to be in the Modules window, under the List tab:
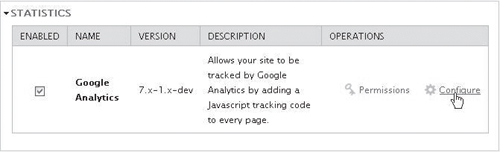
Scroll down to the Statistics area, where you should see something like the next graphic. (If you don’t, make sure you have the right version of the module [7, not 6 or 5], and if you do, then I’d suggest calling tech support for your hosting company and seeing if they can help you.)
To install modules, you’ll have to enable them, so you’ll want to click the checkbox in the Enabled column:

And then click Save configuration:
![]()
You’re done with installing the module! Now it’s time to configure it.
Configuring Google Analytics in Drupal
After you’ve enabled the module, additional links will appear on the right. Click “Configure,” as shown in Figure 9.15.
This is where you’ll paste or type in your Web Property ID (see Figure 9.16).
Figure 9.16. This is where you need to put in the ID that corresponds to the site you want to track.
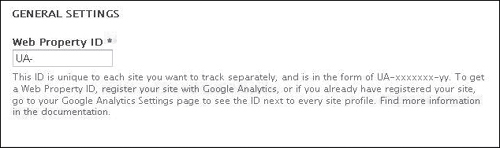
This is the number that shows up in Google Analytics. You can select and copy it from one window into another or one browser tab into another. (If you’re not familiar with tabs, I’d suggest downloading/using Firefox from www.firefox.com, checking the Help section, and learning how to use tabs. It can make working with multiple websites at the same time much easier):
![]()
So paste or type your Web Property ID into Google Analytics:
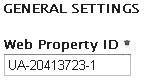
And click the Save configuration button:
![]()
If you already have a Google Analytics account, and you already have a Web Property ID that was created for a different address, you’ll want to create a new profile in Google Analytics. You can use the same overall account. You just need to create a new profile. To do so, click “Add Website Profile” on the overview screen (see Figure 9.17).
Figure 9.17. Whenever you want to track a new website in Google Analytics, you create a new profile and use a new ID. Not “parts” of a site, like site.com/blah or site.com/bling, but entire sites, like site.com, smite.com, mite.com, etc.
