
Learning how to use a computer language such as C or C++ can be more complex and difficult than learning shell scripting. You must learn to think in terms of machine resources and the way actions are accomplished within the computer, taking into account the operating system, language syntax, and assorted development tools, rather than think in terms of user-oriented commands.
Of course, the main benefit of learning C or C++ is that Linux and nearly all its related software is open source—if a program doesn’t work the way you want it to, you can change it as long as you have the source code! You can also find a lot of “hidden” documentation in programmer comments inside the source to nearly all Linux programs.
This chapter focuses on C- and C++-related tools for Linux, such as the GNU C Compiler Collection (gcc) system, and prototyping environments for GNOME and the K Desktop Environment (KDE). The information presented here introduces some of the commands used to compile C and C++ programs, along with information about related programming tools.
C is the programming language most frequently associated with UNIX-like operating systems such as Linux or BSD. Since the 1970s, the bulk of the UNIX operating system and its applications have been written in C. Because the C language doesn’t directly rely on any specific hardware architecture, UNIX was one of the first portable operating systems. In other words, the majority of the code that makes up UNIX does not know and doesn’t care which computer it is actually running on. Machine-specific features are isolated in a few modules within the Unix kernel, which makes it easy for you to modify them when you are porting to different hardware architectures.
C is a compiled language, which means that your C source code is first analyzed by the preprocessor. It is then translated into assembly language and then into machine instructions that are appropriate to the target CPU. An assembler then creates a binary, or object, file from the machine instructions. Finally, the object file is linked to any required external software support by the linker. A C program is stored in a text file that ends with a .c extension and always contains at least one routine, or function, such as main(), unless the file is an include file (with an .h extension, also known as a header file) containing shared variable definitions or other data or declarations. Functions are the commands that perform each step of the task that the C program was written to accomplish.
Note
The Linux kernel is mostly written in C, which is why Linux works with so many different CPUs. To learn more about building the Linux kernel from source, see Chapter 40, “Kernel and Module Management.”
C++ is an object-oriented extension to C. Because C++ is a superset of C, C++ compilers compile C programs correctly, and it is possible to write non–object-oriented code in C++. The reverse is not true: C compilers cannot compile C++ code.
C++ extends the capabilities of C by providing the necessary features for object-oriented design and code. C++ also provides some features, such as the capability to associate functions with data structures, that do not require the use of class-based object-oriented techniques. For these reasons, the C++ language enables existing UNIX programs to migrate toward the adoption of object orientation over time.
Support for C++ programming using Fedora is provided by gcc, which you run with the name g++ when you are compiling C++ code. KDE includes some intermediate C++ tools, such as moc (the Meta Object Compiler) for use when building KDE applications.
Writing C programs for Linux requires that you understand C syntax, have some understanding of how to interface with the Linux kernel (by using one or more of 1,100 different C functions, known as system calls), and know how to use Linux programming tools such as gcc and make. You’ll learn about each of these concepts and processes in this chapter.
To get started, you need to make sure that you have installed all the necessary software development packages (perhaps by using the system-config-packages client; refer to Chapter 7, “Managing Software”) to support your project. Installation of basic development software requires more than 50 different software packages and 110MB of hard drive space. If you plan to build programs for the Linux kernel, you need the Kernel development packages and an additional 180MB of storage space (not counting temporary disk space required when building a new kernel).
You should also become familiar with a good text editor. Although GNU purists use the emacs editing environment to write, edit, and compile programs, many other developers do just fine with an editor such as vi or nano for editing source and then use the command line to run development tools.
When programming for GNOME or KDE, you might find it most convenient to use a graphical development project manager, such as GNOME’s Glade (the GTK+ User Interface Builder, glade-2), Trolltech’s Qt Designer (designer), or KDE’s KDevelop (the KDE development environment, kdevelop). These clients allow you to prototype an application with graphical drawing tools, which frees you to concentrate on your client’s interface. You can use either to automatically generate all necessary project and source code files for skeletal applications. See the “Graphical Development Tools” section, later in this chapter, for more information.
Many Linux C programmers start by writing a program that solves an immediate need, such as a simple command-line program to download or upload phone numbers or other data to a cellular phone or handheld computer. Many beginners get started by becoming proficient in using a Linux text editor, researching any required software routines and reading documentation, browsing available Linux source code, learning how to run a compiler (such as gcc, discussed later in this chapter), and then launching into the iterative process of editing, compiling, executing, and testing.
The following sections in this chapter discuss some of the required or helpful software tools included with Fedora Core. You also see how to create, compile, and run a simple C program and how to use several graphical prototyping tools (such as Glade, Designer, or KDevelop) to shorten the process of developing a user interface for graphical programs. These tools can free up time and effort on those tasks, allowing you to concentrate on the core functions of your new program.
The C programming language has its own syntax—a specific form in which all commands and code must be written in order to be understood and processed by the computer system. The syntax you should understand when beginning to program in C includes the following:
Comments—. Comments are statements that document code and describe the program. A comment begins and ends with special characters, such as
/*and*/, that tell the compiler to ignore all content between those characters.Identifiers—. You need to know how to properly name values, variables, and subroutines, such as
&a,*p, andmy_func().Keywords—. Keywords are words that have special meaning to C and are therefore reserved for commands or parameters. The keywords
int,char, andstruct, for example, are used to declare variables, arrays, structures, and so on.Constants—. You need to know how to use constants such as integers, floating-point numbers, characters, and character strings, such as
10,a, and"hello", and you need to know how to define symbolic constants, such as#define NULL 0.Syntax notation—. You need to know how to use operators in expressions, which are used for calculations, retrieval, or assignment of values, such as
for (;;)andline[n++] = a;.
You should also learn more about the software tools you will use for programming and the idiosyncrasies and features of the tools, such as GNU’s gcc compiler system. (See the “Using the GNU C Compiler” section, later in this chapter, for an overview of gcc.)
Fedora Core is replete with tools that make your life as a C/C++ programmer easier. There are tools to create programs (editors), compile programs (gcc), create libraries (ar), control the source (Revision Control System [RCS] and the Concurrent Versions System [CVS]), automate builds (make), debug programs (gdb and ddd), and determine where inefficiencies lie (gprof).
The following sections introduce some of the programming and project management tools included with Fedora. The DVD included with this book contains many of these tools, which you can use to help automate software development projects. If you have some previous UNIX experience, you will be familiar with most of these programs because they are traditional complements to a programmer’s suite of software.
You use the make command to automatically build and install a C program, and for that use it is an easy tool. If you want to create your own automated builds, however, you need to learn the special syntax that make uses; the following sections walk you through a basic make setup.
The make command automatically builds and updates applications by using a makefile. A makefile is a text file that contains instructions about which options to pass on to the compiler preprocessor, the compiler, the assembler, and the linker. The makefile also specifies, among other things, which source code files have to be compiled (and the compiler command line) for a particular code module and which code modules are required to build the program—a mechanism called dependency checking.
The beauty of the make command is its flexibility. You can use make with a simple makefile, or you can write complex makefiles that contain numerous macros, rules, or commands that work in a single directory or traverse your file system recursively to build programs, update your system, and even function as document management systems. The make command works with nearly any program, including text processing systems such as TeX.
You could use make to compile, build, and install a software package using a simple command like this:
# make install
You can use the default makefile (usually called Makefile, with a capital M), or you can use make’s -f option to specify any makefile, such as MyMakeFile, like this:
# make -f MyMakeFile
Other options might be available, depending on the contents of your makefile.
Using make with macros can make a program portable. Macros allow users of other operating systems to easily configure a program build by specifying local values, such as the names and locations, or pathnames, of any required software tools. In the following example, macros define the name of the compiler (CC), the installer program (INS), where the program should be installed (INSDIR), where the linker should look for required libraries (LIBDIR), the names of required libraries (LIBS), a source code file (SRC), the intermediate object code file (OBS), and the name of the final program (PROG):
# a sample makefile for a skeleton program
CC= gcc
INS= install
INSDIR = /usr/local/bin
LIBDIR= -L/usr/X11R6/lib
LIBS= -lXm -lSM -lICE -lXt -lX11
SRC= skel.c
OBJS= skel.o
PROG= skel

skel:  ${OBJS}
        ${CC} -o ${PROG} ${SRC} ${LIBDIR} ${LIBS}

install: ${PROG}
        ${INS} -g root -o root ${PROG} ${INSDIR}
Note
The indented lines in the previous example are indented with tabs, not spaces. This is very important to remember! It is difficult for a person to see the difference, but make can tell. If make reports confusing errors when you first start building programs under Linux, you should check your project’s makefile for the use of tabs and other proper formatting.
Using the makefile from the preceding example, you can build a program like this:
# make
To build a specified component of a makefile, you can use a target definition on the command line. To build just the program, you use make with the skel target, like this:
# make skel
If you make any changes to any element of a target object, such as a source code file, make rebuilds the target automatically. This feature is part of the convenience of using make to manage a development project. To build and install a program in one step, you can specify the target of install like this:
# make install
Larger software projects might have a number of traditional targets in the makefile, such as the following:
test—. To run specific tests on the final softwareman—. To process an include or atroffdocument with themanmacrosclean—. To delete any remaining object filesarchive—. To clean up, archive, and compress the entire source code treebugreport—. To automatically collect and then mail a copy of the build or error logs
Large applications can require hundreds of source code files. Compiling and linking these applications can be a complex and error-prone task. The make utility helps you organize the process of building the executable form of a complex application from many source files.
The make command is only one of several programming automation utilities included with Fedora. There are others, such as pmake (which causes a parallel make), imake (which is a dependency-driven makefile generator that is used for building X11 clients), automake, and one of the newer tools, autoconf, which builds shell scripts that can be used to configure program source code packages.
Building many software packages for Linux that are distributed in source form requires the use of GNU’s autoconf utility. This program builds an executable shell script named configure that, when executed, automatically examines and tailors a client’s build from source according to software resources, or dependencies (such as programming tools, libraries, and associated utilities), that are installed on the target host (your Linux system).
Many Linux commands and graphical clients for X downloaded in source code form include configure scripts. To configure the source package, build the software, and then install the new program, the root user might use the script like this (after uncompressing the source and navigating into the resulting build directory):
# ./configure ; make ; make install
The autoconf program uses a file named configure.in that contains a basic ruleset, or set of macros. The configure.in file is created with the autoscan command. Building a properly executing configure script also requires a template for the makefile, named Makefile.in. Although creating the dependency-checking configure script can be done manually, you can easily overcome any complex dependencies by using a graphical project development tool such as KDE’s KDevelop or GNOME’s Glade. (See the “Graphical Development Tools” section, later in this chapter, for more information.)
Although make can be used to manage a software project, larger software projects require document management, source code controls, security, and revision tracking as the source code goes through a series of changes during its development. CVS provides source code version control utilities for this kind of large software project management. You can find this utility in RPM packages on your Fedora DVD.
The CVS system is used to track changes to multiple versions of files, and it can be used to backtrack or branch off versions of documents inside the scope of a project. It can also be used to prevent or resolve conflicting entries or changes made to source code files by multiple developers. Source code control with CVS requires the use of at least the following six command options on the cvs command line:
checkout—. Checks out revisionsupdate—. Updates your sources with changes made by other developersadd—. Adds new files incvsrecordsimport—. Adds new sources to the repositoryremove—. Eliminates files from the repositorycommit—. Publishes changes to other repository developers
Note that some of these commands require you to use additional fields, such as the names of files.
Tracking information is usually contained in separate control files; each document within a project might contain information that is automatically updated with each change to a project. A process called keyword substitution is used to perform these automatic updates. CVS uses keywords included inside C comment strings (/* */) near the top of a document. The following are some of the available keywords:
$Author$—. The username of the person who performed the last check-in$Date$—. The date and time of the last check-in$Id$—. Same as$Header$, but without a full pathname$Name$—. A symbolic name (see thecoman page)$Revision$—. The assigned revision number (such as 1.1)$State$—. The state of the document, such asExpfor experimental,Relfor released, orStabfor stable
Getting started with CVS requires that you initialize a repository by first setting the $CVSROOT environment variable with the full pathname of the repository and then using the init command option with the cvs command, like this:
# cvs init
You can find documentation for CVS in various man pages, under the /usr/share/doc directory, and in GNU information documents.
Debugging is both a science and an art. Sometimes, the simplest tool—the code listing—is the best debugging tool. At other times, however, you need to use other debugging tools. Three of these tools are splint, gprof, and gdb.
The splint command is similar to the traditional UNIX lint command: It statically examines source code for possible problems, and it also has many additional features. Even if your C code meets the standards for C and compiles cleanly, it might still contain errors. splint performs many types of checks and can provide extensive error information. For example, this simple program might compile cleanly and even run:
$ gcc -o tux tux.c
$ ./tux
But the splint command might point out some serious problems with the source:
$ splint tux.c
Splint 3.1.1 --- 17 Feb 2004
tux.c: (in function main)
tux.c:2:19: Return value (type int) ignored: putchar(t[++j] -...
  Result returned by function call is not used. If this is intended, can cast
  result to (void) to eliminate message. (Use -retvalint to inhibit warning)
Finished checking --- 1 code warning
You can use the splint command’s -strict option, like this, to get a more verbose report:
$ splint -strict tux.c
The GNU C compiler also supports diagnostics through the use of extensive warnings (through the -Wall and -pedantic options):
$ gcc -Wall tux.c
tux.c:1: warning: return type defaults to `int'
tux.c: In function `main':
tux.c:2: warning: implicit declaration of function `putchar'
Note
If you would like to explore various C syntax-checking programs, navigate to http://www.ibiblio.org/pub/Linux/devel/lang/c. The splint program is derived from lclint, which you can find in the lclint-2.2a-src.tar.gz file at the website.
You use the gprof (profile) command to study how a program is spending its time. If a program is compiled and linked with -p as a flag, a mon.out file is created when it executes, with data on how often each function is called and how much time is spent in each function. gprof parses and displays this data. An analysis of the output generated by gprof helps you determine where performance bottlenecks occur. Using an optimizing compiler can speed up a program, but taking the time to use gprof’s analysis and revising bottleneck functions significantly improves program performance.
The gdb tool is a symbolic debugger. When a program is compiled with the -g flag, the symbol tables are retained and a symbolic debugger can be used to track program bugs. The basic technique is to invoke gdb after a core dump (a file containing a snapshot of the memory used by a program that has crashed) and get a stack trace. The stack trace indicates the source line where the core dump occurred and the functions that were called to reach that line. Often, this is enough to identify a problem. It isn’t the limit of gdb, though.
gdb also provides an environment for debugging programs interactively. Invoking gdb with a program enables you to set breakpoints, examine the values of variables, and monitor variables. If you suspect a problem near a line of code, you can set a breakpoint at that line and run gdb. When the line is reached, execution is interrupted. You can check variable values, examine the stack trace, and observe the program’s environment. You can single-step through the program to check values. You can resume execution at any point. By using breakpoints, you can discover many bugs in code.
A graphical X Window System interface to gdb is called the Data Display Debugger, or ddd.
If you elected to install the development tools package when you installed Fedora Core (or perhaps later on, using RPM, or other package tools), you should have the GNU C compiler (gcc). Many different options are available for the GNU C compiler, and many of them are similar to those of the C and C++ compilers that are available on other UNIX systems. Look at the man page or information file for gcc for a full list of options and descriptions.
When you build a C program using gcc, the compilation process takes place in several steps:
First, the C preprocessor parses the file. To do so, it sequentially reads the lines, includes header files, and performs macro replacement.
The compiler parses the modified code to determine whether the correct syntax is used. In the process, it builds a symbol table and creates an intermediate object format. Most symbols have specific memory addresses assigned, although symbols defined in other modules, such as external variables, do not.
The last compilation stage, linking, ties together different files and libraries and then links the files by resolving the symbols that had not previously been resolved.
Note
Most C programs compile with a C++ compiler if you follow strict ANSI rules. For example, you can compile the standard hello.c program (everyone’s first program) with the GNU C++ compiler. Typically, you name the file something like hello.cc, hello.C, hello.c++, or hello.cxx. The GNU C++ compiler accepts any of these names.
This section provides a simple example of how to create an executable program for Linux by using gcc. One of the shortest programs you can write in C for Linux is the quintessential “hello, world” program (popularized by Brian W. Kernighan and Dennis M. Ritchie in their 1978 book The C Programming Language).
To get started, type in the following text, using your favorite Linux text editor:
main(){
    printf("hello, world.
");
}
When you are finished, save the file as hello.c, and then compile the program by using the gcc compiler system, like this:
$ gcc -o hello hello.c
This command line creates an executable program named hello, using the file hello.c as input. You can then run the program like this:
$ ./hello
hello, world.
The C program contains only one function, named main(). The gcc command line specifies the name of the output program (using the -o option) and the input source file, hello.c. Note that to run the new hello command, you must specify it explicitly, using the period and forward-slash characters, because the program is not installed in a normal command directory (such as /usr/bin or /usr/local/bin).
Fedora Core includes a number of graphical prototyping and development environments for use during X sessions. If you want to build client software for KDE or GNOME, you might find the KDevelop, Qt Designer, and Glade programs extremely helpful. You can use each of these programs to build graphical frameworks for interactive windowing clients, and you can use each of them to automatically generate the necessary skeleton of code needed to support a custom interface for your program.
You can launch the KDevelop client (shown in Figure 33.1) from the desktop panel’s start menu’s Extras, Programming menu item or from the command line of a terminal window, like this:
$ kdevelop &
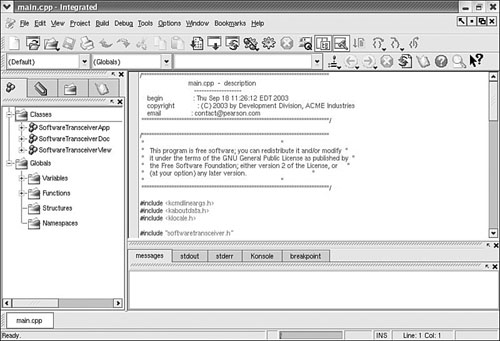
After you press Enter, the KDevelop Setup Wizard runs, and you are taken through several short wizard dialogs that set up and ensure a stable build environment. You must then run kdevelop again (either from the command line or by clicking its menu item under the desktop panel’s Programming menu). You will then see the main KDevelop window and can start your project by selecting KDevelop’s Project menu and clicking the New menu item.
You can begin building your project by stepping through the wizard dialogs. When you click the Create button, KDevelop automatically generates all the files that are normally found in a KDE client source directory (including the configure script, which checks dependencies and builds the client’s makefile). To test your client, you can either first click the Build menu’s Make menu item (or press F8) or just click the Execute menu item (or press F9), and the client is built automatically. You can use KDevelop to create KDE clients, plug-ins for the konqueror browser, KDE kicker panel applets, KDE desktop themes, Qt library–based clients, and even programs for GNOME.
A development environment that is related to KDevelop and is included with Fedora Core is Trolltech’s Qt Designer. You can use this program to build user interface “forms” for cross-platform applications. Qt Designer has a complex interface that supports drawing of windows, buttons, and other client controls. You can start Qt Designer from the command line of a terminal window like this:
$ designer &
You can also start the prototyping environment by clicking its menu item under the Programming menu’s More Programming tools menu. The Qt Designer main window (as shown in Figure 33.2) provides tools to quickly build and preview a graphical client. After first creating a directory to hold the project files, start by choosing File, New Menu to create a new project. Then you can select a C++ project and save it with a name that ends with .pro.
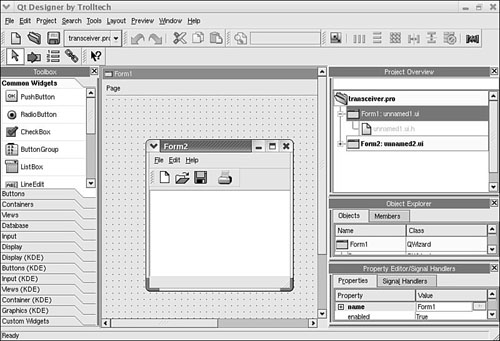
Next you can again use the File menu to add a file, but this time, you select a window, widget, or dialog, depending on the graphical interface you’d like to add to your project. After you design the program’s GUI, you can preview your design by using the Preview menu. You can also test a build of the new client if you have added enough requisite code. You begin by navigating to your project’s folder (using the cd command), and then you use the qmake and make commands, like this:
$ qmake -o Makefile myproject.pro
$ make
$ ./myproject
If you prefer to use GNOME and its development tools, the Glade GTK+ GUI builder (the glade-2 client) can save you time and effort when building a basic skeleton for a program. You launch glade-2 from the desktop panel’s Programming menu or from the command line of a terminal window, like this:
$ glade-2 &
When you launch Glade, a directory named Projects is created in your home directory, and you see a main window, along with two floating palette and properties windows (see Figure 33.3, which shows a basic GNOME client with a calendar widget added to its main window). You can use Glade’s File menu to save the blank project and then start building your client by clicking and adding user interface elements from the Palette window. For example, you can first click the Palette window’s Gnome button and then click to create your new client’s main window. A window with a menu and a toolbar appears—the basic framework for a new GNOME client!
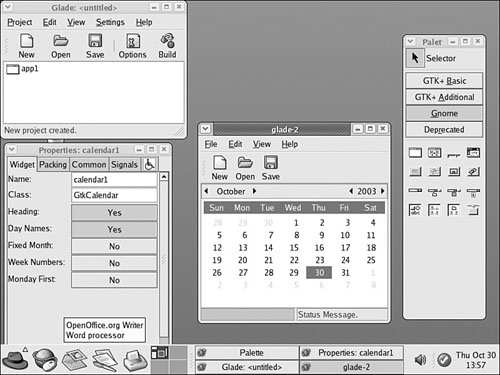
When you finish building the client, you can select Build Source Code from the Project window’s File menu, and Glade builds the necessary source code and scripts for the project. You can then build the project’s configure script by executing the autogen.sh script in the project directory, like so:
$ ./autogen.sh
After you set up the project, as with KDevelop projects, you are ready to configure, build, and install your project. To begin that process, execute the following:
# make install
You will have to add code to fill in the actions for your new KDE or GNOME client when using these rapid prototyping tools. But kdevelop, designer, and glade can help save development time and effort. Use these environments to create a working skeleton application, and then fine-tune your new client’s user interface.
UNIX and Linux were built on the C language. C is a platform-independent, compiled, procedural language based on functions and on the capability to derive new, programmer-defined data structures.
If you are interested in learning more about C and C++, you should look for the following books:
Sams Teach Yourself C in 21 Days, by Peter Aitken and Bradley Jones, Sams Publishing
Sams Teach Yourself C++ for Linux in 21 Days, by Jesse Liberty and David B. Horvath, Sams Publishing
C How to Program and C++ How to Program, both by Harvey M. Deitel and Paul J. Deitel, Deitel Associates
The C Programming Language, by Brian W. Kernighan and Dennis M. Ritchie, Prentice Hall
The Annotated C++ Reference Manual, by Margaret A. Ellis and Bjarne Stroustrup, ANSI Base Document
Programming in ANSI C, by Stephen G. Kochan, Sams Publishing
http://gcc.gnu.org/java/compile.html—More information about GCC’s Java support.
http://www.gnu.org/software/autoconf/autoconf.html—More information about the GNU Project’s autoconf utility and how to build portable software projects.
http://sourcenav.sourceforge.net—Home page for Red Hat’s snavigator client, a source code analysis utility.
http://www.trolltech.com/products/qt/tools.html—Trolltech’s page for Qt Designer and a number of programming automation tools (including translators) that you can use with Fedora.
http://glade.gnome.org—Home page for the Glade GNOME developer’s tool.
http://www.kdevelop.org—Site that hosts the KDevelop Project’s latest versions of the KDE graphical development environment, KDevelop.