
This chapter examines the practice of safeguarding data through backups, restoring that same data if necessary, and recovering data in case of a catastrophic hardware or software failure. After reading this chapter, you will have a full understanding of the reasons for sound backup practices. You can use the information in this chapter to make intelligent choices about which strategies are best for you. The chapter also shows you how to perform some types of data recovery and system restoration on your own and when to seek professional assistance.
Backups are always trade-offs. Any backup will consume time, money, and effort on an ongoing basis; backups must be monitored, validated, indexed, stored, and new media continuously purchased. Sound expensive? The cost of not having backups is the loss of your critical data. Re-creating the data from scratch will cost time and money, and if the cost of doing it all again is greater than the cost associated with backing up, you should be performing backups. At the where-the-rubber-meets-the-road level, backups are nothing more than insurance against financial loss for you or your business.
Your first step in formulating and learning to use an effective backup strategy is to choose the strategy that is right for you. First, you must understand some of the most common (and not so common) causes of data loss so that you are better able to understand the threats your system faces. Then, you need to assess your own system, how it is used and by whom, your available hardware and software resources, and your budget constraints. The following sections describe each of these issues in detail, and also offer some sample backup systems and discuss their use.
Files disappear for any number of reasons: They can be lost because the hardware fails and causes data loss; your attention might wander and you accidentally delete or overwrite a file. Some data loss occurs as a result of natural disasters and other circumstances beyond your control. A tornado, flood, or earthquake could strike, the water pipes could burst, or the building could catch on fire. Your data, as well as the hardware, would likely be destroyed in such a disaster. A disgruntled employee might destroy files or hardware in an attempt at retribution. And any equipment might fail, and it all will fail at some time—most likely when it is extremely important for it not to fail.
Data can also be lost because of malfunctions that corrupt the data as it attempts to write to the disk. Other applications, utilities, and drivers might be poorly written, buggy (the phrase most often heard is “still beta quality”), or might suffer some corruption and fail to correctly write that all-important data you just created. If that happens, the contents of your data file would be indecipherable garbage of no use to anyone.
All these accidents and disasters offer important reasons for having a good backup strategy; however, the most frequent cause of data loss is human error. Who among us has not overwritten a new file with an older version or unintentionally deleted a needed file? This applies not only to data files, but also to configuration files and binaries. While perusing the mail lists or the Usenet newsgroup postings, stories about deleting entire directories such as /home, /usr, or /lib seem all too common. Incorrectly changing a configuration file and not saving the original in case it has to be restored (which it does more often than not because the person reconfigured it incorrectly) is another common error.
Tip
To make a backup of a configuration file you are about to edit, use the cp command:
$ cp filename filename.original
And to restore it:
$ cp filename.original filename
Never edit or move the *.original file, or the original copy will be lost. If it is, you can extract the configuration files from an .rpm file to at least provide the out-of-the-box configuration; Chapter 7, “Managing Software,” explains how to do that.
Proper backups can help you recover from these problems with a minimum of hassle, but you have to put in the effort to keep backups current, verify their intactness, and practice restoring the data in different disaster scenarios.
By now you realize that some kind of plan is needed to safeguard your data, and, like most people, you are overwhelmed by the prospect. Entire books, as well as countless articles and whitepapers, have been written on the subject of backing up and restoring data. What makes the topic so complex is that each solution is truly individual.
Yet the proper approach to making the decision is very straightforward. You start the process by asking
What data must be safeguarded?
How often does the data change?
The answers to these two questions determine how important the data is, determine the volume of the data, and determine the frequency of the backups. This in turn will determine the backup medium. Only then can the software that accommodates all these considerations be selected. (You learn about choosing backup software, hardware, and media later in this chapter.)
Available resources are another important consideration when selecting a backup strategy. Backups require time, money, and personnel. Begin your planning activities by determining what limitations you face for all of these resources. Then construct your plan to fit those limitations, or be prepared to justify the need for more resources with a careful assessment of both backup needs and costs.
Tip
If you are not willing or capable of assessing your backup needs and choosing a backup solution, there exists a legion of consultants, hardware vendors, and software vendors that would love to assist you. The best way to choose one in your area is to query other UNIX and Linux system administrators (located through user groups, discussion groups, or mail lists) that are willing to share their experiences and make recommendations. If you cannot get a referral, ask the consultant for references and check them out.
Many people also fail to consider the element of time when formulating their plan. Some backup devices are faster than others, and some recovery methods are faster than others. You need to consider that when making choices.
To formulate your backup plan, you need to determine the frequency of backups. The necessary frequency of backups should be determined by how quickly the important data on your system changes. On a home system, most files never change, a few change daily, and some change weekly. No elaborate strategy needs to be created to deal with that.
A good strategy for home use is to back up (to any kind of removable media) critical data frequently and back up configuration and other files weekly.
At the enterprise level on a larger system with multiple users, a different approach is called for. Some critical data is changing constantly, and it could be expensive to re-create; this typically involves elaborate and expensive solutions. Most of us exist somewhere in between these extremes. Assess your system and its use to determine where you fall in this spectrum.
Backup schemes and hardware can be elaborate or simple, but they all require a workable plan and faithful follow-through. Even the best backup plan is useless if the process is not carried out, data is not verified, and data restoration is not practiced on a regular basis. Whatever backup scheme you choose, be sure to incorporate in it these three principles:
Have a plan—. Design a plan that is right for your needs and have equipment appropriate to the task. This involves assessing all the factors that affect the data you are backing up. We will get into more detail later in the chapter.
Follow the plan—. Faithfully complete each part of your backup strategy, and then verify the data stored in the backups. Backups with corrupt data are of no use to anyone. Even backup operations can go wrong.
Practice your skills—. Practice restoring data from your backup systems from time to time, so when disaster strikes, you are ready (and able) to benefit from the strength of your backup plan. (For more about restoring data, see the “Using Backup Software” section later in this chapter.) Keep in mind that it is entirely possible that the flaws in your backup plan will become apparent only when you try restoring!
Now that you are convinced you need backups, you need a strategy. It is difficult to be specific about an ideal strategy because each user or administrator’s strategy will be highly individualized, but here are a few general examples:
Home user—. At home, the user has the Fedora installation DVD that takes an hour or so to reinstall, so the time issue is not a major concern. The home user will want to back up any configuration files that have been altered, keep an archive of any files that have been downloaded, and keep an archive of any data files created while using any applications. Unless the home user has a special project in which constant backups are useful, a weekly backup is adequate. The home user will likely use a DVD-RW drive or other removable media for backups.
Small office—. Many small offices tend to use the same strategy as the home user, but are more likely to back up critical data daily and use manually changed tape drives. If they have a tape drive with adequate storage, they will likely have a full system backup as well because restoring from the tape is quicker than reinstalling from the CDs. They also might be using CD-RW or DVD writers for backups. Although they will use scripts to automate backups, most of it is probably done by hand.
Small enterprise—. Here is where backups begin to require higher-end equipment such as autoloading tape drives with fully automated backups. Commercial backup software usually makes an introduction at this level, but a skillful system administrator on a budget can use one of the basic applications discussed in this chapter. Backups are highly structured and supervised by a dedicated system administrator.
Large enterprise—. These are the most likely settings for the use of expensive, proprietary, highly automated backup solutions. At this level, data means money, lost data means lost money, and delays in restoring data means money lost as well. These system administrators know that backups are necessary insurance and plan accordingly.
Does all this mean that enterprise-level backups are better than those done by a home user? Not at all. The “little guy” with Fedora can do just as well as the enterprise operation at the expense of investing more time in the process. By examining the higher-end strategies, we can apply useful concepts across the board.
Note
If you are a new sysadmin, you might be inheriting an existing backup strategy. Take some time to examine it and see whether it meets the current needs of the organization. Think about what backup protection your organization really needs, and determine whether the current strategy meets that need. If it does not, change the strategy. Consider whether the current policy is being practiced by the users, and, if not, why it is not.
The following sections examine a few of the many strategies in use today. Many strategies are based on these sample schemes; one of them can serve as a foundation for the strategy you construct for your own system.
If you need to back up just a few configuration files and some small data files, copy them to a USB stick, engage the write-protect tab, and keep it someplace safe. If you need just a bit more backup storage capacity, you can copy the important files to a Zip disk (100, 250, and 750MB in size), CD-RW disk (up to 700MB in size), or DVD-RW disk (up to 8GB for data).
In addition to configuration and data files, you should archive each user’s home directory, as well as the entire /etc directory. Between the two, that backup would contain most of the important files for a small system. Then you can easily restore this data from the backup media device you have chosen, after a complete reinstall of Fedora, if necessary.
Experts believe that if you have more data than can fit on a floppy disk, you really need a formal backup strategy. Some of those strategies are discussed in the following sections. We use a tape media backup as an example.
This backup strategy involves a backup of the complete file system on a weekly, biweekly, or other periodic basis. The frequency of the backup depends on the amount of data being backed up, the frequency of changes to the data, and the cost of losing those changes.
This backup strategy is not complicated to perform, and it can be accomplished with the swappable disk drives discussed later in the chapter. If you are connected to a network, it is possible to mirror the data on another machine (preferably offsite); the rsync tool is particularly well suited to this task. Recognize that this does not address the need for archives of the recent state of files; it only presents a snapshot of the system at the time the update is done.
This scheme involves performing a full backup of the entire system once a week, along with a daily incremental backup of only those files that have changed in the previous day, and it begins to resemble what a sysadmin of a medium to large system would traditionally use.
This backup scheme can be advanced in two ways. In one way, each incremental backup can be made with reference to the original full backup. In other words, a level 0 backup is followed by a series of level 1 backups. The benefit of this backup scheme is that a restoration requires only two tapes (the full backup and the most recent incremental backup). But because it references the full backup, each incremental backup might be large (and grow ever larger) on a heavily used system.
Alternatively, each incremental backup could reference the previous incremental backup. This would be a level 0 backup followed by a level 1, followed by a level 2, and so on. Incremental backups are quicker (less data each time), but require every tape to restore a full system. Again, it is a classic trade-off decision.
Modern commercial backup applications such as Amanda and BRU assist in organizing the process of managing complex backup schedules and tracking backup media. Doing it yourself using the classic dump or employing shell scripts to run tar requires that the system administrator handle all the organization herself. For this reason, complex backup situations are typically handled with commercial software and specialized hardware that are packaged, sold, and supported by vendors.
Given adequate (and often expensive) hardware resources, you can always mirror the data somewhere else, essentially maintaining a real-time copy of your data on hand. This is often a cheap, workable solution if no large amounts of data are involved. The use of RAID arrays (in some of their incarnations—refer to Chapter 39, “Managing the File System,” for more information on RAID) provides for a recovery if a disk fails.
Note that RAID arrays and mirroring systems will just as happily write corrupt data as valid data. Moreover, if a file is deleted, a RAID array will not save it. RAID arrays are best suited for protecting the current state of a running system, not for backup needs.
Only you can decide what is best for your situation. After reading about the backup options in this book, put together some sample backup plans; run through a few likely scenarios and assess the effectiveness of your choice.
In addition to all the other information you have learned about backup strategies, here are a couple of good rules of thumb to remember when making your choice:
If the backup strategy and policy is too complicated (and this holds true for most security issues), it will eventually be disregarded and fall into disuse.
The best scheme is often a combination of strategies; use what works.
Any device that can store data can be used to back it up, but that is like saying that anything with wheels can take you on a cross-country trip. Trying to fit a gigabyte of data on a big stack of 1.4MB floppy disks is an exercise in frustration, and using a $5,000 automated tape device to save a single copy of an email is a waste of resources.
Many people use what hardware they already have for their backup operations. Many consumer-grade workstations have a floppy drive and possibly a CD-RW drive, but they typically do not have the abundant free disk space necessary for performing and storing multiple full backups.
In this section, you learn about some of the most common backup hardware available and how to evaluate its appropriateness for your backup needs. With large storage devices becoming increasingly affordable (160GB IDE drives can be had for around $100) and prices falling on DVD recorders, decisions about backup hardware for the small business and home users have become more interesting.
At one time, every computer came with a floppy drive, but those drives are becoming less common and are no longer being provided as standard equipment with many new computers. Some sysadmins remove them because they can be used as a means of penetrating system security. (Remember that physical access to a machine means that it is insecure; a floppy drive provides a way to bypass the system administrator to load and run malicious programs.) Many modern laptops do not provide floppy drives except as an option.
Floppy drives are cheap and disposable solutions for making simple, quick backups of a few files by the user, but the media are easily damaged, lost, and accidentally overwritten. They also unexpectedly fail at times. Floppies now represent the low-rent district for data storage.
You can use removable or portable drives as part of your backup strategy. Of all the removable hard drive manufacturers, Iomega seems to have acquired some staying power with its Zip (100, 250, and 750MB) drive. Although these drives have good support in Fedora, in the past they have been plagued with mechanical problems that have rendered data irretrievable. Their reliability has improved, but shy away from any older drives. These drives have been ubiquitous and are common in the publishing industry. They are now less frequently encountered and are being supplanted by CD writers.
USB hard drives and solid-state “pen” drives are the new kids on the block with prices dropping over the last year or two; a 64MB pen drive costs slightly less than $30 and capacities up to 1GB are available for around $90. USB drives have a large capacity for their size. If your machine supports them (or if you have purchased a card reader), you can also use compact flash devices, which come in sizes up to 8GB in the flash memory versions and 4GB for Hitachi Microdrives. Both USB hard drives and solid-state drives are highly portable. Support for these drives under Fedora is very good, accommodating these drives by emulating them as SCSI drives—the system usually sees them as /dev/scd1. Watch for improved support and ever-falling prices in the future. The newer USB 2.0 hard drives are significantly faster than the older USB 1.0 hard drives. A 100GB USB hard drive costs about $150. The biggest benefits of USB drives are data transfer speed and portability.
FireWire (IEEE-1394) hard drives are similar to USB drives; they just use a different interface to your computer. Many digital cameras and portable MP3 players use FireWire. Kernel support is available if you have this hardware; a 100GB FireWire drive will cost about $180, roughly twice IDE drive prices. Found mostly on the Mac, controller and drive hardware exists for the PC platform as well.
Compared to floppy drives and some removable drives, CD-RW drives and their cousins, DVD+RW/-RW drives, can store large amounts of data and are useful for a home or small business. Although very expensive in the past, CD writers and media are at commodity prices today, but automated CD changing machines, necessary for automatically backing up large amounts of data, are still quite costly. A benefit of CD and DVD storage over tape devices is that the archived uncompressed file system can be mounted and its files accessed randomly just like a hard drive (you do this when you create a data CD; refer to Chapter 10, “Multimedia Applications”), making the recovery of individual files easier.
Each CD-RW disk can hold 650MB–700MB of data (the media comes in both capacities at roughly the same cost); larger chunks of data can be split to fit on multiple disks. Some backup programs support this method of storage. After it is burned and verified, the shelf life for the media is at least a decade or longer. Prices increase with writing speed, but a serviceable CD-RW drive can be purchased for less than $100.
DVD+RW/-RW is similar to CD-RW, but it is more expensive and can store up to 8GB of uncompressed data per disk. These drives sell for less than $100. Writing to DVD drives requires special software, and, unfortunately, Linux development is somewhat behind the curve for DVD writing. Fedora does provide the latest software to write to DVD+RW drives. (DVD-RW support is still experimental.)
For network backup storage, remote arrays of hard drives provide one solution to data storage. With the declining cost of mass storage devices and the increasing need for larger storage space, network storage (NAS, or Network Attached Storage) is available and supported in Linux. These are cabinets full of hard drives and their associated controlling circuitry, as well as special software to manage all of it. These NAS systems are connected to the network and act as a huge (and expensive) mass storage device.
More modest and simple network storage can be done on a remote desktop-style machine that has adequate storage space (up to eight 250GB IDE drives is a lot of storage space, easily accomplished with off-the-shelf parts), but then that machine (and the local system administrator) has to deal with all the problems of backing up, preserving, and restoring its own data, doesn’t it? Several hardware vendors offer such products in varying sizes.
Tape drives have been used in the computer industry from the beginning. Tape drive storage has been so prevalent in the industry that the tar command (the most commonly used command for archiving) is derived from the words Tape ARchive. Modern tape drives use tape cartridges that can hold 70GB of data (or more in compressed format). Capacities and durability of tapes vary from type to type and range from a few gigabytes to hundreds of gigabytes with commensurate increases in cost for the equipment and media. Autoloading tape-drive systems can accommodate archives that exceed the capacity of the file systems.
Tip
Older tape equipment is often available in the used equipment market and might be useful for smaller operations that have outgrown more limited backup device options.
Tape equipment is well supported in Linux and, when properly maintained, is extremely reliable. The tapes themselves are inexpensive, given their storage capacity and the ability to reuse them. Be aware, however, that tapes do deteriorate over time and, being mechanical, tape drives can and will fail.
Because there are thousands of unique situations requiring as many unique backup solutions, it comes as no surprise that Linux offers many backup tools. Along with command-line tools such as tar and dd, Fedora also provides a graphical archiving tool, File Roller, that can create and extract files from archives. Finally, Fedora provides support for the Amanda backup application—a sophisticated backup application that works well over network connections and can be configured to automatically back up all the computers on your network. Amanda works with drives as well as tapes. The book Unix Backup and Recovery by W. Curtis Preston includes a whole chapter on setting up and using Amanda, and this chapter is available online at http://www.backupcentral.com/amanda.html.
Note
The software in a backup system must support the hardware, and this relationship can determine which hardware or software choices you make. Many sysadmins choose a particular backup software not because they prefer it to other options, but because it supports the hardware they own.
The price seems right for free backup tools, but consider the software’s ease of use and automation when assessing costs. If you must spend several hours implementing, debugging, documenting, and otherwise dealing with overly elaborate automation scripts, the real costs go up.
The tar tool, the bewhiskered old man of archiving utilities, is installed by default. It is an excellent tool for saving entire directories full of files. For example, here is the command used to back up the /etc directory:
# tar cvf etc.tar /etc
Here, the options use tar to create an archive, be verbose in the message output, and use the filename etc.tar as the archive name for the contents of the directory /etc.
Alternatively, if the output of tar is sent to the standard output and redirected to a file, the command appears as follows:
# tar cv /etc > etc.tar
and the result is the same.
All files in the /etc directory will be saved to a file named etc.tar. With an impressive array of options (see the man page), tar is quite flexible and powerful in combination with shell scripts. With the -z option, it can even create and restore gzip compressed archives while the -j option works with bzipped files.
If you want to create a full backup,
# tar cjvf fullbackup.tar.bz2 /
creates a bzip2-compressed tarball (the j option) of the entire system.
To perform an incremental backup, you must locate all the files that have been changed since the last backup. For simplicity, assume that you do incremental backups on a daily basis. To locate the files, use the find command:
# find / -newer name_of_last_backup_file ! -a -type f -print
When run alone, find will generate a list of files systemwide and print it to the screen. The ! -a -type eliminates everything but regular files from the list; otherwise, the entire directory would be sent to tar even if the contents were not all changed.
Pipe the output of our find command to tar as follows:
# find / -newer name_of_last_backup_file ! -type d -print |
 tar czT - backup_file_name_or_device_name
Here, the T - option gets the filenames from a buffer (where the - is the shorthand name for the buffer).
Note
The tar command can back up to a raw device (one with no file system) as well as a formatted partition. For example,
# tar cvzf /dev/hdd /boot /etc /home
backs up those directories to device /dev/hdd (not /dev/hda1, but to the unformatted device itself).
The tar command can also back up over multiple floppy disks:
# tar czvMf /dev/fd0 /home
backs up the contents of /home and spreads the file out over multiple floppies, prompting you with this message:
Prepare volume #2 for '/dev/fd0' and hit return:
The xp option in tar restores the files from a backup and preserves the file attributes as well, and tar creates any subdirectories it needs. Be careful when using this option because the backups might have been created with either relative or absolute paths. You should use the tvf option with tar to list the files in the archive before extracting them so that you know where they will be placed.
For example, to restore a tar archive compressed with bzip2,
# tar xjvf fedoratest.tar.bz2
To list the contents of a tar archive compressed with bzip2,
# tar tjvf fedoratest.tar.bz2
drwxrwxr-x paul/paul         0 2003-09-04 18:15:05 fedoratest/
-rw-rw-r-- paul/paul       163 2003-09-03 22:30:49
                           fedoratest/fedora_screenshots.txt
-rw-rw-r-- paul/paul       840 2003-09-01 19:27:59
                           fedoratest/fedora_guideline.txt
-rw-rw-r-- paul/paul      1485 2003-09-01 18:14:23 fedoratest/style-sheet.txt
-rw-rw-r-- paul/paul       931 2003-09-01 19:02:00 fedoratest/fedora_TOC.txt
Note that because the pathnames do not start with a backslash, they are relative pathnames and install in your current working directory. If they were absolute pathnames, they would install exactly where the paths state.
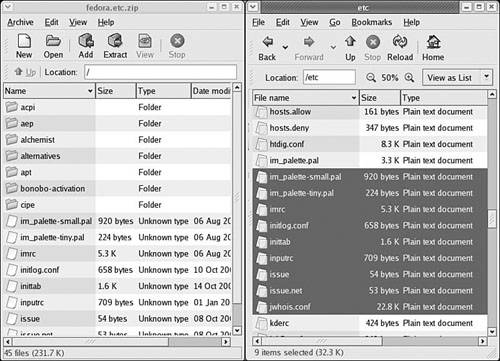
The GNOME desktop file archiving graphical application File Roller (file-roller) views, extracts, and creates archive files using tar, gzip, bzip, compress, zip, rar, lha, and several other compression formats. Note that File Roller is only a front end to the command-line utilities that actually provide these compression formats; if they are not installed, File Roller cannot use that format.
Caution
File Roller does not complain if you select a compression format that is not supported by installed software until after you attempt to create the archive. Install any needed compression utilities first.
File Roller is well integrated with the GNOME desktop environment to provide convenient drag-and-drop functionality with the Nautilus file manager. To create a new archive, select Archive, New to open the New Archive dialog box and navigate to the directory where you want the archive to be kept. Type your archive’s name in the Selection: /root text box at the bottom of the New Archive dialog box. Use the Archive type drop-down menu to select a compression method. Now, drag the files that you want to be included from Nautilus into the empty space of the File Roller window, and the animated icons will show that files are being included in the new archive. When you are done, a list of files will be shown in the previously blank File Roller window (see Figure 17.1). To save the archive, simply select Archive, Close. Opening an archive is as easy as using the Archive, Open dialog to select the appropriate archive file.
Fedora provides you with the KDE ark and kdat GUI tools for backups; they are installed only if you select the KDE desktop during installation. Archiving has traditionally been a function of the system administrator and not seen as a task for the individual user, so no elaborate GUI was believed necessary. Backing up has also been seen as a script-driven, automated task in which a GUI is not as useful.
You launch ark from the command line. It is integrated with the KDE desktop (as File Roller is with GNOME), so it might be a better choice if you use KDE. This application provides a graphical interface to viewing, creating, adding to, and extracting from archived files as shown in Figure 17.2. Several configuration options are available with ark to ensure its compatibility with MS Windows. You can drag and drop from the KDE desktop or Konqueror file browser to add or extract files, or you can use the ark menus.
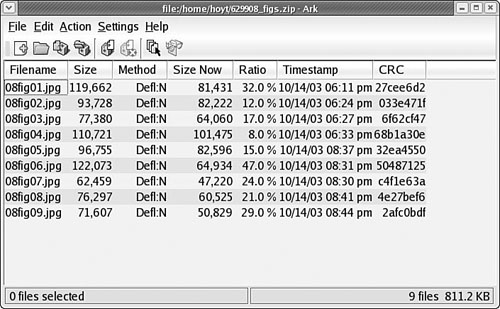
As long as the associated command-line programs are installed, ark can work with tar, gzip, bzip2, zip, and lha files (the latter four being compression methods used to save space by compaction of the archived files).
Existing archives are opened after launching the application itself. You can add files and directories to the archive or delete them from the archive, as shown in Figure 17.3. After opening the archive, you can extract all of its contents or individual files. You can also perform searches using patterns (all *.jpg files, for example) to select files.
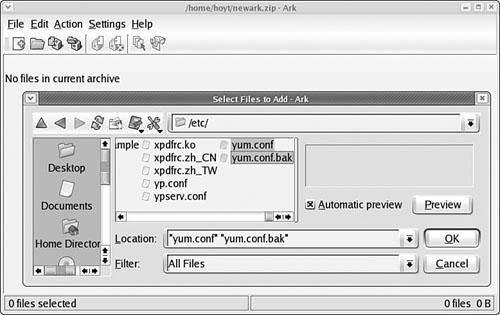
Choosing New from the File menu creates new archives. You then type the name of the archive, providing the appropriate extension (.tar, .gz, and so on), and then proceed to add files and directories as you desire.
Although the dd command is not normally thought of as an archiving tool, it can be used to mirror a partition or entire disk, regardless of the information either contains. dd is useful for archiving copies of floppy disks while retaining the capability to restore the data to a floppy disk intact. For example,
# dd if=/dev/fd0 of=floppyimage1.img
Swapping the if= and of= values reverses the process. Although best known for copying images, dd can also be used to convert data, and it is especially useful when restoring older archives or moving data between big endian and little endian systems. Although such esoteric details are beyond the scope of this chapter, remember dd if you need to convert data from obsolete formats.
Provided with Fedora, Amanda is a powerful, network backup application created by the University of Maryland at College Park. Amanda is a robust backup and restore application best suited to unattended backups with an autoloading tape drive of adequate capacity. It benefits from good user support and documentation.
Amanda’s features include compression and encryption. It is intended for use with high-capacity tape drives, floptical, CD-R, and CD-RW devices.
Amanda uses GNU tar and dump; it is intended for unattended, automated tape backups, and is not well-suited for interactive or ad hoc backups. The support for tape devices in Amanda is robust, and file restoration is relatively simple. Although Amanda does not support older Macintosh clients, it will use Samba to back up Microsoft Windows clients, as well as any UNIX client that can use GNU tools (which includes Mac OS X). Because Amanda runs on top of standard GNU tools, file restoration can be made using those tools on a recovery disk even if the Amanda server is not available. File compression can be done on either the client or server, thus lightening the computational load on less powerful machines that need backing up.
Caution
Amanda does not support dump images larger than a single tape and requires a new tape for each run. If you forget to change a tape, Amanda continues to attempt backups until you insert a new tape, but those backups will not capture the data as you intended them to. Do not use too small a tape or forget to change a tape, or you will not be happy with the results.
There is no GUI interface for Amanda. Configuration is done in the time-honored UNIX tradition of editing text configuration files located in /etc/amanda. The default installation in Fedora includes a sample cron file because it is expected that you will be using cron to run Amanda regularly. The client utilities are installed with the package am-utils; the Amanda server must be obtained from the Amanda website. As far as backup schemes are concerned, Amanda calculates an optimal scheme on-the-fly and schedules it accordingly. It can be forced to adhere to a traditional scheme, but other tools are possibly better suited for that job.
The man page for Amanda (the client is amdump) is well written and useful, explaining the configuration of Amanda as well as detailing the programs that actually make up Amanda. The configuration files found in /etc/amanda are well commented; they provide a number of examples to assist you in configuration.
The program’s home page is http://www.amanda.org/. There, you will find information on subscribing to the mail list, as well as links to Amanda-related projects and a FAQ.
The free download version of Fedora does not provide any other sophisticated backup applications, but the version targeted to businesses usually does. Commercial and other freeware backup products do exist; BRU and Veritas are good examples of effective commercial backup products. Here are some useful free software backup tools that are not installed with Fedora:
flexbackup—. This backup tool is a large file of Perl scripts that makesdumpandrestoreeasier to use.flexbackup’s command syntax can be accessed by using the command with the-helpargument. It also can useafio,cpio, andtarto create and restore archives locally or over a network usingrshorsshif security is a concern. Its home page is http://www.flexbackup.org/.afio—. This tool createscpio-formatted archives, but handles input data corruption better thancpio(which does not handle data input corruption very well at all). It supports multivolume archives during interactive operation and can make compressed archives. If you feel the need to usecpio, you might want to check outafioat http://freshmeat.net/projects/afio/.cdbackup—. Designed for the home or small office user,cdbackupworks with any backup and restores software that can read fromstdin, write tostdout, and can handle linear devices such as tape drives. It makes it easier to use CD-Rs as the storage medium. Similar applications are available elsewhere as well; the home page for this application is at http://www.muempf.de/index.html.
Many other alternative backup tools exist, but covering all of them is beyond the scope of this book. Two good places to look for free backup software are Freshmeat (http://www.freshmeat.net/) and Google (http://www.google.com/linux).
Often, when you have only a few files that you need to protect from loss or corruption, it might make better sense to simply copy the individual files to another storage medium rather than to create an archive of them. You can use the tar, cp, rsync, or even the cpio commands to do this, as well as a handy file management tool known as mc. Using tar is the traditional choice because older versions of cp did not handle symbolic links and permissions well at times, causing those attributes (characteristics of the file) to be lost; tar handled those file attributes in a better manner. cp has been improved to fix those problems, but tar is still more widely used. rsync has recently been added to Fedora and is an excellent choice for mirroring sets of files, especially when done over a network.
To illustrate how to use file copying as a backup technique, the examples here show how to copy (not archive) a directory tree. This tree includes symbolic links and files that have special file permissions we need to keep intact.
One choice for copying files into another location is to use the tar command where you would create a tar file that would be piped to tar to be uncompressed in the new location. To accomplish this, first change to the source directory. Then, the entire command resembles
# tar cvf - files | (cd target_directory; tar xpf -)
where files are the filenames you want to include; use * to include the entire current directory.
Here is how the command shown works: You have already changed to the source directory and executed tar with the cvf - arguments that tell tar to
c—. Create an archive.v—. Verbose; lists the files processed so we can see that it is working.f—. The filename of the archive will be what follows. (In this case, it is-.)-—. A buffer; a place to hold our data temporarily.
The following tar commands can be useful for creating file copies for backup purposes:
l—. Stay in the local file system (so that you do not include remote volumes).atime-preserve—. Do not change access times on files, even though you are accessing them now, to preserve the old access information for archival purposes.
The contents of the tar file (held for us temporarily in the buffer, which is named -) are then piped to the second expression, which extracts the files to the target directory. In shell programming (refer to Chapter 14, “Managing Users”), enclosing an expression in parentheses causes it to operate in a subshell and be executed first.
First we change to the target directory, and then
x—. Extract files from atararchive.p—. Preserve permissions.f—. The filename will be-, the temporary buffer that holds thetar’ed files.
The file copy techniques using the tar command in the previous section can also be used to quickly and securely copy a directory structure across a LAN or the Internet (using the ssh command). One way to make use of these techniques is to use the following command line to first compress the contents of a designated directory, and then decompress the compressed and encrypted archive stream into a designated directory on a remote host:
$ tar cvzf - data_folder | ssh remote_host`( cd ~/mybackup_dir; tar xvzf - )'
The tar command is used to create, list, and compress the files in the directory named data_folder. The output is piped through the ssh (secure shell) command and sent to the remote computer named remote_host. On the remote computer, the stream is then extracted and saved in the directory named /mybackup_dir. You will be prompted for a password in order to send the stream.
To copy files, we could use the cp command. The general format of the command when used for simple copying is
$ cp -a source_directory target_directory
The -a argument is the same as giving -dpR, which would be
-d—. Dereferences symbolic links (never follows symbolic links) and copies the files that they point to instead of copying the links.-p—. Preserves all file attributes if possible. (File ownership might interfere.)-R—. Copies directories recursively.
The cp command can also be used to quickly replicate directories and retain permissions by using the -avR command-line options. Using these options preserves file and directory permissions, gives verbose output, and recursively copies and re-creates subdirectories. A log of the backup can also be created during the backup by redirecting the standard output like this:
# cp -avR directory_to_backup destination_vol_or_dir 1>/root/backup_log.txt
or
# cp -avR fedora /test2 1>/root/backup_log.txt
This example makes an exact copy of the directory named /fedora on the volume named /test2, and saves a backup report named backup_log.txt under /root.
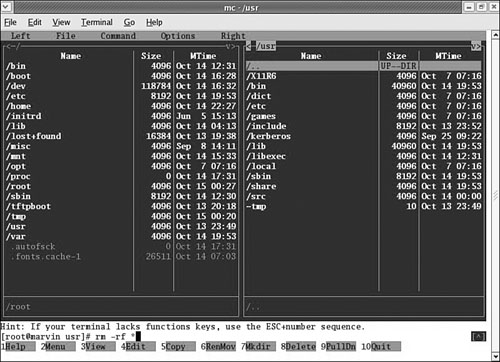
The Midnight Commander is a command-line file manager that is useful for copying, moving, and archiving files and directories. The Midnight Commander has a look and feel similar to the Norton Commander of DOS fame. By executing mc at a shell prompt, a dual-pane view of the files is displayed. It contains drop-down menu choices and function keys to manipulate files. It also uses its own virtual file system, enabling it to mount FTP directories and display the contents of tar files, gzipped tar files (.tar.gz or .tgz), bzip files, DEB files, and RPM files, as well as extract individual files from them. As if that were not enough, mc contains a File Undelete virtual file system for ext2/3 partitions. By using cd to “change directories” to an FTP server’s URL, you can transfer files using the FTP protocol. The default font chosen for Fedora makes the display of mc ugly when used in a tty console (as opposed to an xterm), but does not affect its performance.
Figure 17.4 shows a shot of the default dual-panel display. Pressing the F9 key drops down the menu, and pressing F1 displays the Help file. A “feature” in the default GNOME terminal intercepts the F10 key used to exit mc, so use F9 instead to access the menu item to quit, or simply click on the menu bar at the bottom with your mouse. The configuration files are well documented, and it would appear easy to extend the functionality of mc for your system if you understand shell scripting and regular expressions. It is an excellent choice for file management on servers not running X.
The traditional way to copy files from one computer to another is to use uucp, the UNIX-to-UNIX copy program, or to use one of the rtools, rcp. The rtools are not secure over a public network and are subject to several exploits. It is best not to use them at all because they have been supplanted by more secure tools based on the secure shell, ssh.
Note
The file transfer protocol known as FTP can be used to copy files from one computer to another, but this requires that an FTP server be running, and the server is subject to security problems of its own.
See Chapter 24, “Remote File Serving with FTP,” for more details on FTP.
The scp command uses ssh for file copying. Useful arguments for this command include
The syntax of an scp copy command is
scp [arguments] [source] [target]
For example, if we want to copy the file /home/paul/fedora.txt to ~/docs on our account on a remote host
$ scp -p /home/paul/fedora.txt [email protected]:/home/paul/docs
After it prompts us for a password, we see
fedora.txt 100% ************************* 0 00:00
This indicates that the transfer was completed. If we had subdirectories to transfer, we would have used the -r (recursive) argument.
Actually, it can be much easier than the example because scp assumes that all paths are relative to the home directory of the user unless the full path is given.
Taking this into consideration, our example becomes
$ scp -p fedora.txt [email protected]:docs
And it can be made even easier. Creating a file named ~/.ssh/config with the following contents:
Host = titan
HostName = 192.168.168.5
User = paul
ForwardAgent = yes
ForwardX11 = yes
Compression = yes
allows us to simply use
$ scp -p fedora.txt titan:docs
Note
If you are comfortable with FTP, you might want to consider a cousin of scp: sftp. It provides the common FTP command set. If no sftp server is running on the remote host, simply use scp to copy the sftpserv binary to your remote home directory. (Often, ~/bin is in your path.) The FTP client gftp supports sftp and gives you a GUI client as well.
You can find more information on both scp and sftp in Chapter 19, “Remote Access with SSH and Telnet.”
rsync is a file transfer tool now included with Fedora. According to the rsync man page, it is a “faster, flexible replacement for rcp, the traditional remote copy application.” We have already mentioned that rcp is not a secure method of transferring files.
A significant benefit of using rsync is that it speeds up file transfers by transferring only the differences between the two sites across a network link. rsync can copy links, devices, owners, groups, and permissions, and it can be told to exclude certain files. rsync can use ssh (via the command line or setting the RSYNC_RSH variable) and does not require root privileges. rsync has support for anonymous or authenticated rsync servers for use in mirroring.
The man page is extremely well-written and provides four excellent examples of how rsync can be used to transfer files matching a pattern, can recursively transfer files, and can be used locally (without a server).
The rsync command has some 62 options (not including short and long variants of the same option). A few particularly useful options are
-z—. Usesgzipcompression.-P—. Keeps partial files and reports on the progress of the transfer.--bwlimit=KBPS—. Sets a maximum bandwidthrsyncmight use.--exclude-from=FILE—. All excluded files listed in a separate file; pattern matching is enabled.-x—. Does not cross file system boundaries.-n—. Dry run for testing.-l—. Copies symlinks, not the files themselves.-L—. Copies the file, not the symlink.-r—. Copies recursively.-v—. Verbose output.
The rsync utility can be run as a daemon to establish an rsync server, listening on TCP port 873 by default. The configuration of the server is handled by the contents of the /etc/rsyncd.conf file; the man page for rsyncd.conf provides the details. The daemon can be launched standalone or via xinetd to suit your needs.
The rsync website provides an examples page showing examples of
Backing up to a central server with a seven-day increment
Backing up to a spare disk
Mirroring a CVS tree
Automated backup at home over a modem
A time- and bandwidth-saving trick is to use rsync to redownload only that part of an ISO file that is incorrect, rather than downloading the entire 650 to 700MB of the file. First, you must locate an rsync server that is offering the .iso images you seek. Look at the Fedora mirrors at http://www.redhat.com/download/mirror.html and select one that offers "D", the identifier for .iso images.
An rsync server will provide modules, or directory trees, as symbolic names. To determine whether a server provides an rsync module, use the query:
rsync some.site.com::
If an rsync server is running on that site, you will see a list of available rsync modules. If we try
$ rsync ftp-linux.cc.gatech.edu::

GEORGIA TECH SOFTWARE LIBRARY

Unauthorized use is prohibited. Your access is being logged.

If you run a publicly accessible mirror, and are interested in
mirroring from us, please contact [email protected].

---------------------------------------------------------------------------

altlinux        mirror of ftp.altlinux.ru
arklinux        mirror of arklinux.org
asplinux        mirror of ftp.asp-linux.com
debian          mirror of ftp.debian.org
debian-cd       mirror of ftp.debian.org
mandrake        mirror of ftp.mandrake.com
redhat          mirror of ftp.redhat.com
<SNIP>
To use this rsync service, we would explore the redhat module to discover the file path to the .iso images using rsync -r and the module name to explore it recursively.
To use rsync to repair our defective .iso images, we point rsync at the “good” image and at our “bad” image like so:
# rsync -a -vvv --progress ftp-linux.cc.gatech.edu::
redhat/linux/9/en/iso/i386/shrike-i386-disc1.iso
 ~/downloads/shrike-i386-disc1.iso
rsync compares the two files and downloads only the needed replacement parts for our local file, which is much faster than downloading the entire image again.
Up to this point, we have discussed backing up data and restoring that data. In some situations, however, you need to restore data that has not been backed up because you just accidentally deleted it. File recovery (and system recovery, which you learn about in a later section) requires a high level of expertise to successfully complete. There are data recovery businesses that are good at data and system recovery, and they prosper because the task is so difficult. The information presented here, along with practice on your part, can assist you in attempting to do it yourself or enable you to recognize when a professional service is warranted.
In attempting to recover data from a damaged disk with file system errors that cannot be fixed with fsck, you can run the mke2fs command with the -S option like this (for example, if you are having trouble with the ext2/3 partition on /dev/hda2):
# mke2fs -S /dev/hda2
The -S argument writes new superblock information, but does not write new inodes; this might or might not make the missing data salvageable, depending on the damage. You must run e2fsck on the unmounted partition after using the mke2fs command in this manner.
Because a directory is a file as well, the same techniques for file recovery can be used to recover entire directories. The Ext2fs Undeletion of Directory Structures mini-HOWTO (see the “Reference” section at the end of this chapter) is written as a companion to the Ext2fs Undeletion mini-HOWTO—both of which should be on your required reading list if you want to successfully undelete any files. The manual technique described in the HOWTOs is too long and complex to be covered in this book.
The Midnight Commander can make use of a virtual file system and includes a special undelete file system that can be used on ext2/3 partitions. The mc utility is just an interface to the ext2fs library, and the virtual file system handles for you the nitty-gritty details of the file system that the previous paragraph alluded to. As with any simplified solution to complex issues, mc must make some assumptions for you that might result in less data being recovered than if you use the manual method. For that reason, using mc for recovering deleted files is not a standard method.
To use the recovery file system, you must cd in one of the panels to the special filename formed by combining the prefix /#undel: with the partition name where your deleted file resides. For example, to attempt to recover a deleted file on /dev/hda2, do this:
# cd /#undel:hda2
Be patient because it will take quite a while for the deleted files to be displayed. You will see a list of inodes that you can examine with the text editor (using the F4 key); then use the F12 key to perform a Save As operation, renaming the file to something appropriate for your use. Repeat this process until you have renamed and saved all the files. Press the Shift+F10 key to exit when done. Note that you might be able to recover only pieces of files and might not be able to recover any at all.
Note
If you need to know what is on a drive or disk that cannot be easily mounted (it could be a non-Linux format, or could contain unformatted, raw data), use
# dd if=/dev/hda1 count=1 bs=512 | file -
which produces output similar to the following:
1+0 records in
1+0 records out
standard input:          x86 boot sector,
system MSWIN4.1, FAT (16 bit)
To discover what an unknown floppy disk is, use this:
# dd if=/dev/fd0 count=1 bs=512 | file -
which produces output similar to the following:
1+0 records in
1+0 records out
standard input:          x86 boot sector, system )
_3oEIHC, FAT (12 bit)
There will come a time when you need to engage in system rescue efforts. This need arises when the system will not even start Linux so that you can recover any files. This problem is most frequently associated with the boot loader program or partition table, but it could be that critical system files have been inadvertently deleted or corrupted. If you have been making backups properly, these kinds of system failures are easily, although not quickly, recoverable through a full restore. Still, valuable current data might not have been backed up since the last scheduled backup, and the backup archives are found to be corrupt, incomplete, or missing. A full restore also takes time you might not have. If the problem causing the system failure is simply a damaged boot loader, a damaged partition table, a missing library, or misconfiguration, a quick fix can get the system up and running and the data can then be easily retrieved.
In this section, we will first examine a way to back up and restore the boot loader itself or, having failed to do that, restore it by hand. Then we will look at a few alternatives to booting the damaged system so that we can inspect it, fix it, or retrieve data from it.
Fedora provides a rescue disc hidden in the installation DVD. To use it, insert the disc and reboot the computer, booting from the DVD just as you did when you installed Fedora originally. At the intro screen, press the F1 key to see all the available choices, but simply enter linux rescue at the LILO boot prompt to enter rescue mode like so:
boot: linux rescue
You will learn more about the rescue mode later in this section, but feel free to explore it at any time. A graphical interface is not available, so you will need to bone up on your command-line skills. If necessary, you can perform all the operations discussed in this section from rescue mode.
The Master Boot Record (MBR) is the first 512 bytes of a hard disk. It contains the boot loader code in the first 446 bytes and the partition table in the next 64 bytes; the last two bytes identify that sector as the MBR. The MBR can become corrupted, so it makes sense to back it up.
This example uses the dd command as root to back up the entire MBR. If the boot loader code changes from the time you make this image and restore the old code, the system will not boot when you restore it all; it is easy enough to keep a boot floppy disk handy and then rerun LILO if that is what you are using.
To copy the entire MBR to a file, use this:
# dd if=/dev/hda of=/tmp/hdambr bs=512 count=1
To restore the entire MBR, use this:
# dd if=/tmp/hdambr of=/dev/hda bs=512 count=1
To restore only the partition table, skipping the boot loader code, use this:
# dd if=/tmp/hdambr of=/dev/hda bs=1 skip=446 count=66
Of course, it would be prudent to move the copy of the MBR to a floppy disk or other appropriate storage device. (The file is only 512 bytes in size.) You will need to be able to run dd on the system to restore it (which means that you will be using the Fedora rescue disc, as described later, or any equivalent to it).
A different way of approaching the problem is to have a printed copy of the partition table that can then be used to restore the partition table by hand using the Fedora rescue disc and the fdisk program.
We can create a listing of the printout of the partition table with fdisk using the -l option (for list), as follows:
# fdisk /dev/hda -l > /tmp/hdaconfig.txt
or send the listing of the partition table to the printer:
# fdisk /dev/hda -l | kprinter
We could also copy the file /tmp/hdaconfig.txt to the same backup floppy disk as the MBR for safekeeping.
Now that we have a hard copy of the partition table (as well as having saved the file itself somewhere), it is possible to restore the MBR by hand at some future date.
Use the Fedora Rescue Disc for this process. After booting into rescue mode, you have the opportunity to use a menu to mount your system read/write, not to mount your system, or to mount any found Linux partitions as read-only. If you plan to make any changes, you will need to have any desired partitions mounted with write permission.
After you are logged on (you are root by default), start fdisk on the first drive:
# fdisk /dev/had
Use the p command to display the partition information and compare it to the hard copy you have. If the entries are identical, you have a problem somewhere else; it is not the partition table. If there is a problem, use the d command to delete all the listed partitions.
Now use the n command to create new partitions that match the partition table from your hard copy. Make certain that the partition types (ext2, FAT, swap and so on) are the same. If you have a FAT partition at /dev/hda1, make certain that you set the bootable flag for it; otherwise, Windows or DOS will not boot.
If you find that you have made an error somewhere along the way, just use the q command to quit fdisk without saving any changes and start over. Without specifically telling fdisk to write to the partition table, no changes are actually made to it.
When the partition table information shown on your screen matches your printed version, write the changes to the disk with the w command; you will be automatically exited from fdisk. Restart fdisk to verify your handiwork, and then remove the rescue disc and reboot.
It helps to practice manually restoring the partition table on an old drive before you have to do it in an emergency situation.
For advanced Linux users, you can use the rescue disc to boot the system (rather than boot the rescue operating system on the DVD) if the boot loader code on your computer is damaged or incorrect. To use the Rescue DVD to boot your system from /dev/hda1, for example, first boot the disc and press the F1 key. At the LILO prompt, enter something similar to this example. Note that you are simply telling the boot loader what your root partition is.
boot: linux rescue root=/dev/hda1
If you failed to make a boot floppy disk or cannot locate the one you did make, any Linux boot floppy disk (a slightly older version or one borrowed from a friend) can be pressed into service as long as it has a reasonably similar kernel version. (The major and minor numbers match—for example, 2.6.5 would likely work with any 2.6 system, but not with a 2.4 system.) You would boot your system by manually specifying the root and boot partitions as described previously. Although you are almost guaranteed to get some error messages, you might at least be able to get a base system running enough to replace files and recover the system.
Tip
In both preceding cases, it is assumed that you do not need any special file system or device drivers to access the root partition. If you do, add the initrd= argument to the LILO line pointing to the appropriate initrd file on your system. If you do not know the exact name of the initrd file, you are out of luck with LILO, so learn to use a GRUB boot floppy disk as well.
The GRand Unified Boot (GRUB) loader can attempt to boot a system from a floppy disk without a viable custom-made boot floppy disk. The image for the floppy disk can be downloaded from ftp://alpha.gnu.org/gnu/grub/grub-0.95-i386-pc.ext2fs and copied to a floppy disk using dd. (rawrite.exe would be used on a Microsoft system.) Or, if you have a boot floppy disk from an existing system using GRUB, that one will work as well.
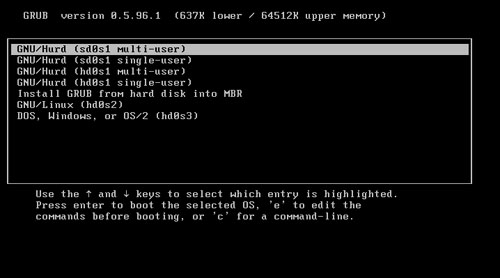
GRUB has its own command shell, file system drivers, and search function (much like command completion in the bash shell). It is possible to boot using the GRUB floppy disk, examine the drive partitions, and search for the kernel and initrd image as well, using them to boot the system. Worthy of a chapter all its own, the GRUB documentation is extensive: In addition to info grub (the info system is similar to the man system for documentation), the GRUB documents contain a tutorial worth reading. The flexibility and power of GRUB are what influenced Red Hat to make it the default boot loader for Fedora. The GRUB loader is shown in Figure 17.5.
As in the previous example, use the linux rescue command at the LILO boot prompt (:) to launch the DVD in rescue mode. Rescue mode runs a version of Fedora from the DVD that is independent of your system. It permits you to mount your root partition for maintenance. This alternative is useful when your root partition is no longer bootable because something has gone wrong. Fedora is constantly improving the features of the Recovery Facility.
On beginning the rescue mode, you get your choice of language and keyboard layouts. You are given an opportunity to configure networking in rescue mode and are presented with a nice ncurses-based form to fill in the information. The application attempts to find your existing partitions and offers you a choice of mounting them read-write, read-only (always a wise choice the first time), or skip any mounting and drop to a command prompt. With multiple partitions, you must then indicate which is the root partition. That partition is then mounted at /mnt/sysimage. When you are finally presented with a command prompt, it is then possible to make your system the root file system with
# chroot /mnt/sysimage
To get back to the rescue file system, type exit at the prompt. To reboot, type exit at the rescue system’s prompt.
The rescue function does offer support for software RAID arrays (RAID 0, 1, and 5), as well as IDE or SCSI partitions formatted as ext2/3. After asking for input if it is unsure how to proceed, you eventually arrive at a command shell as root; there is no login or password. Depending on your configuration, you might or might not see prompts for additional information. If you get lost or confused, you can always reboot. (It helps to practice the use of the rescue mode.)
In rescue mode, a number of command-line tools are available for you, but no GUI tools are provided. For networking, you have the ifconfig, route, rcp, rlogin, rsh, and ftp commands. For archiving (and restoring archives), gzip, gunzip, dd, zcat, and md5sum commands are there. As for editors, vi is emulated by BusyBox and pico, jmacs, and joe are provided by the joe editor. There are other useful system commands. A closer look at these commands reveals that they are all links to a program called BusyBox (home page at http://www.busybox.net/).
BusyBox provides a reasonably complete POSIX environment for any small or embedded system. The utilities in BusyBox generally have fewer options than their full-featured GNU cousins; however, the included options “provide the expected functionality and behave very much like their GNU counterparts.” This means that you should test the rescue mode first to see whether it can restore your data and check which options are available to you because the BusyBox version will behave slightly different from the full GNU version. (Some options are missing; some options do not work quite the same—you need to know whether this will affect you before you are in an emergency situation.)
There are a few useful tricks to know when using rescue mode. If your system is functional, you can use the chroot command to change the root file system from the CD to your system in this manner:
# chroot /mnt/sysimage
You will find yourself at a new command prompt with all your old files in—hopefully—the right place. Your familiar tools—if intact—should be available to you. To exit the chrooted environment, use the exit command to return to the rescue system prompt. If you use the exit command again, the system will reboot.
The rescue environment provides a nice set of networking commands and network-enabled tools such as scp, sftp, and some of the rtools. It also provides rpm, which can fetch packages over a network connection. Installing them is tricky because you want them installed in the file system mounted at /mnt/sysimage, not at /. To accomplish that, use the --root argument to set an alternative path to root:
# rpm -ivh --root /mnt/sysimage ftp://location/package.rpm
http://www.tldp.org/LDP/solrhe/Securing-Optimizing-Linux-RH-Edition-v1.3/whywhen.html—A thorough discussion with examples of using dump and restore for backups.
http://en.tldp.org/LDP/solrhe/Securing-Optimizing-Linux-RH-Edition-v1.3/chap29sec306.html—Making automatic backups with tar using cron.
http://kmself.home.netcom.com/Linux/FAQs/backups.html—The Linux Backups mini-FAQ contains some useful, although brief, comments on backup media, compression, encryption, and security.
http://www.tldp.org/—The Linux Documentation Project offers several useful HOWTO documents that discuss backups and disk recovery.
http://www.ibiblio.org/pub/Linux/docs/HOWTO/other-formats/html_single/Ext2fs-Undeletion.html—If you need to undelete a file from an ext2/3 file system, the Linux Ext2fs Undeletion mini HOWTO is the document for you. You will be more successful if you practice.
http://www.ibiblio.org/pub/Linux/docs/HOWTO/other-formats/html_single/Ext2fs-Undeletion-Dir-Struct.html—The Ext2fs Undeletion of Directory Structures is a companion HOWTO to the Linux Ext2fs Undeletion mini HOWTO, helping you cope with an errant rm -rf *.
http://www.ibiblio.org/pub/Linux/docs/HOWTO/other-formats/html_single/Bootdisk-HOWTO.html#AEN1483—Here is a list of LILO boot error codes to help you debug a cranky system that will not boot.
http://www.ibiblio.org/pub/Linux/docs/HOWTO/other-formats/html_single/Ftape-HOWTO.html—This is a HOWTO for the floppy tape device driver.
http://www.linux-usb.org/USB-guide/x498.html—The USB Guide for mass storage devices. If you have a USB device and need to know if it is supported, check here.
http://www.backupcentral.com/amanda.html—This is the Amanda chapter of Unix Backup and Recovery (written by John R. Jackson and published by O’Reilly and Associates). The chapter is available online and covers every aspect of using Amanda. The site features a handy search tool for the chapter.
http://twiki.org/cgi-bin/view/Wikilearn/RsyncingALargeFileBeginner—Rsyncing a large file to repair a local ISO image that does not pass the md5sum check.
http://www.lycoris.org/sections.php?op=viewarticle&artid=8—Lycoris ISO rsync mini-HOWTO. A step-by-step tutorial on using rsync to sync files.
http://www.mikerubel.org/computers/rsync_snapshots/—Automated snapshot-style backups using rsync.
http://www.mondorescue.org/—Mondo Rescue is a bare-metal backup/rescue tool independent of Fedora, using CD, DVD, tape, or NFS; it can produce bootable CDs to restore the system.
http://www.ccp14.ac.uk/ccp14admin/linux-server/mondorescue/dvd_mondo.html—A HOWTO for using MondoRescue to back up on a DVD.
http://www.linuxorbit.com/modules.php?op=modload&name=Sections&file=index&req=viewarticle&artid=222&page=1—A HOWTO using split and mkisofs to manually back up large archives to CD.