
File Transfer Protocol (FTP) was once considered the primary method used to transfer files over a network from computer to computer. FTP is still heavily used today, although many graphical FTP clients now supplement the original text-based interface command. As computers have evolved, so has FTP, and Fedora includes many ways with which to use a graphical interface to transfer files over FTP.
This chapter contains an overview of the available FTP software included with Fedora, along with some details concerning initial set up, configuration, and use of FTP-specific clients. Fedora also includes an FTP server software package named vsftpd, the Very Secure FTP Daemon, and a number of associated programs you can use to serve and transfer files with the FTP protocol.
The FTP protocol allows users to connect to a server, read directories and filenames, and download and upload data. If the correct access rights are set, users can also create new folders and set access permissions on them.
However, using FTP poses a security risk: Usernames and passwords are transmitted unencrypted across a LAN or the Internet. To stop users from taking the risk of giving their authentication details to anyone listening on the wire, many sites enable only anonymous FTP login and file retrieval. Many Linux users have turned to more secure alternatives, such as sshd and sftp or scp, included with the OpenSSH suite. The following sections discuss the different types of newer and traditional interfaces to FTP and their usage. Because they are part of the larger OpenSSH collection, the sftp and scp commands are covered in Chapter 19, “Remote Access with SSH and Telnet.”
Using the text-based FTP interface helps you understand what each action in a graphical FTP session does. This understanding can be handy when, for example, the graphic client does not automatically detect the file type being transferred. In this situation, a binary file is transferred as an ASCII file and is therefore useless. Conversely, an ASCII file transferred as a binary prints the ^M control character at the end of each line. This error typically occurs when transferring files from older Microsoft Windows operating systems to Linux because the Windows FTP client defaulted to ASCII, not binary transfers.
Some of the following common commands may be used in a typical FTP session:
ascii—. Sets an ASCII file transfer type for the FTP session. You use this command before file transfers when sending or receiving text files.bin—. Sets a binary file-type transfer for the FTP session. Use it before file transfers to send or receive binary files such as graphics images or compressed archives.close—. Closes a connection to a remote server during an FTP session. Use this command instead ofquitorbyeto return to theftpcommand prompt.get—. Initiates a transfer of a single file from the FTP server to the user’s local machine. Use this command to retrieve a single file (such asget cartoon.jpg).hash—. Sets use of a hash mark (#) during file transfer. Use this command to get a visual indication of the progress of a transfer.mget—. Initiates a transfer of multiple files from the FTP server to the user’s local machine. Use this command to download (receive) multiple files with a single command (such asmget *.jpg).mput—. Initiates a transfer of multiple files from the user’s local machine to the FTP server. Use this command to upload (send) multiple files with a single command (such asmput *.jpg).open—. Opens a connection to a remote server using an IP address or hostname. Use this command when working at theftpcommand prompt (such asopen ftp.redhat.com).prompt—. Is an interactive command that asks the user for input on whether to get a specific file when themputormgetcommand is issued. If the user initiates anmget *, with prompting on, the FTP client prompts the user to transfer each file that the*wildcard matches. This can be particularly useful when several files in a directory need to be transferred, with one or two files that are unwanted. By default, prompting is turned on.put—. Initiates the transfer of a single file from the user’s local machine to the FTP server. Use this command to upload (send) a single file (such asput inventory.doc).quit—. Use this command to close the FTP connection and quit theftpcommand.
These are just some of the commands available during an FTP session. By typing help, the user can see a full list of valid commands. Typing help command-name displays a brief description of what that command does. Listing 24.1 shows the help output.
Example 24.1. The Commands Listed by help in an FTP Session
Commands may be abbreviated. Commands are:
!               cr             mdir             proxy             send
$               delete         mget             sendport          site
account         debug          mkdir            put               size
append          dir            mls              pwd               status
ascii           disconnect     mode             quit              struct
bell            form           modtime          quote             system
binary          get            mput             recv              sunique
bye             glob           newer            reget             tenex
case            hash           nmap             rstatus           trace
ccc             help           nlist            rhelp             type
cd              idle           ntrans           rename            user
cdup            image          open             reset             umask
chmod           lcd            passive          restart           verbose
clear           ls             private          rmdir             ?
close           macdef         prompt           runique
cprotect        mdelete        protect          safe
Connecting to a remote FTP server can require a username and password, but many servers also provide anonymous access. A properly configured remote FTP server responds quickly to FTP requests, and displays shared directories and files. This section shows a sample FTP session with a typical server found at many Internet sites (in this case, running the wu-ftpd server).
You connect to a remote FTP server by using the ftp command along with either the IP address or hostname of the remote computer, like so:
$ ftp pheniox
Connected to pheniox.
220 pheniox FTP server (Version wu-2.6.1-18) ready.
Name (pheniox:tdc): anonymous
331 Guest login ok, send your complete e-mail address as password.
Password:
230 Guest login ok, access restrictions apply.
Remote system type is UNIX.
Using binary mode to transfer files.
ftp>
In this example, ftp is used to connect and then log in using anonymous access. This is done by entering the word anonymous at the Name prompt. After you press Enter, a password prompt is displayed. When using anonymous access, it is considered good form to enter your email address as a courtesy. There is no validation of the address entered, but many FTP servers are configured to accept only a valid email address form (that is, [email protected]) if any text is typed at the prompt.
Tip
Many FTP servers accept a simple press of the Enter key at the password prompt if accessed anonymously.
Now that a connection has been established and authenticated to the server, you can set up your FTP session to work the way you want it to. As mentioned in the previous section, the ftp command has many different built-in commands, which you can view by typing a question mark at the ftp> prompt. These commands can affect the session display, set the type of file transfer, or obtain information about the remote server.
ftp> hash
Hash mark printing on (1024 bytes/hash mark).
ftp> prompt
Interactive mode off.
ftp> bin
200 Type set to I.
In this example, you have told ftp to print a hash (#) character for every 1024 bytes that are transferred, turn off prompting, and set the transfer type to binary (which should be on by default). The hash character display provides a visual indicator of the progress of your downloads and uploads. Turning off prompting allows you to send and retrieve multiple files without the need to confirm each transfer. Setting the transfer type to binary ensures that binary files are transferred in the proper format instead of text, which means that executable files and pictures transfer correctly.
Next, you ask the server to show a listing of what directories and files are available on the server:
ftp> ls
200 PORT command successful.
150 Opening ASCII mode data connection for directory listing.
total 32
d--x--x--x   2 root     root         4096 Aug 31 07:15 bin
d--x--x--x   2 root     root         4096 Aug 31 07:15 etc
d--x--x--x   2 root     root         4096 Aug 31 04:44 lib
d--x-x---x   2 root     50           4096 Sep  3 07:34 pub
226 Transfer complete.
If directory permissions in the FTP repository are set correctly, the pub directory should be the only directory that shows any files under it. To verify this, change directories to etc and list the contents:
ftp> cd etc
250 CWD command successful.
ftp> ls
200 PORT command successful.
150 Opening ASCII mode data connection for directory listing.
total 0
226 Transfer complete.
By setting the permissions to execute only on the directories bin, lib, and etc, a system administrator can restrict users from seeing any files in those directories. Good security dictates that remote users be denied information about a system because any information could aid in hacking attempts.
Now that you see the server is relatively secure, change directories to pub and list its contents:
ftp> cd pub
250-Please read the file README
250-  it was last modified on Sun Sep 2 19:25:47 2001 - 1 day ago
250 CWD command successful.
ftp> ls
200 PORT command successful.
150 Opening ASCII mode data connection for directory listing.
total 552
-rw-r--r--   1 root     50            100 Sep  2 19:25 README
-rw-r--r--   1 root     50              8 Sep  3 07:33 configuration
-rw-r--r--   1 root     50              8 Sep  3 07:33 temp.txt
-rw-r--r--   1 root     50          15798 Sep  3 10:29 tftp-0.17-14.i386.rpm
-rw-r--r--   1 root     50          26011 Sep  3 10:30 tftp-
server-0.17-14.i386.rpm
-rw-r--r--   1 root     50         219332 Sep  3 10:29 wu-ftpd-
2.6.1-22.i386.rpm226 Transfer complete.
To transfer all the RPM files to your local machine, issue the mget *.rpm command:
ftp> mget *.rpm
local: tftp-0.17-14.i386.rpm remote: tftp-0.17-14.i386.rpm
200 PORT command successful.
150 Opening BINARY mode data connection for tftp-0.17-14.i386.rpm
(15798 bytes).###############
226 Transfer complete.
15798 bytes received in 0.974 secs (16 Kbytes/sec)
local: tftp-server-0.17-14.i386.rpm remote: tftp-server-0.17-
14.i386.rpm
200 PORT command successful.
150 Opening BINARY mode data connection for tftp-server-0.17-
14.i386.rpm (26011 bytes).
#########################
226 Transfer complete.
26011 bytes received in 2.5 secs (10 Kbytes/sec)
local: wu-ftpd-2.6.1-22.i386.rpm remote: wu-ftpd-2.6.1-
22.i386.rpm
200 PORT command successful.
150 Opening BINARY mode data connection for wu-ftpd-2.6.1-
22.i386.rpm (219332 bytes).
#################################################################
#################################################################
#################################################################
###################
226 Transfer complete.
219332 bytes received in 50.3 secs (4.3 Kbytes/sec)
As described before, the mget command transferred all files with the .rpm extension to our local machine. Furthermore, it did not prompt us to confirm each file because we turned off prompting. The ftp client printed a # for each 1024 bytes transferred to our machine. This is helpful when transferring over a slow connection because you get a visual reminder that your connection is still active.
Tip
After every action, the FTP server returns a status code and brief message showing the result of the command you issued. You can find a listing of all status codes and their corresponding messages in Request for Comments 959; you can access a copy of this listing at http://www.ietf.org/rfc/rfc959.txt.
Now you are finished with this session; you can issue the command quit or bye to end the session. The FTP server informs you of how many bytes your session transfers, how many files, and the total transferred data (in bytes) between your local machine and the server.
ftp> bye
221-You have transferred 503818 bytes in 5 files.
221-Total traffic for this session was 506422 bytes in 7 transfers.
221 Thank you for using the FTP service on pheniox.
This is a simple example, but average FTP sessions are similarly trivial. Several other commands are available during an FTP session, but they are rarely used. FTP has the capability to take scripted input and define macros that allow for a much more complicated session.
The lftp command can be used for file transfers using FTP, HTTP, and various secure protocols such as HTTPS and HFTP if a remote proxy is enabled. Two great features of this command are the ability to restart a stalled download in the middle of a file transfer, as well as to start and run multiple downloads in a single session (with job control).
For example, here is a simple session showing an HTTP retrieval from a remote computer running the Apache web server:
$ lftphttp://192.168.2.37
cd ok, cwd=/
lftp 192.168.2.37:/> ls
-rw-r--r--  --  manual/mod/core.html
-rw-r--r--  --  manual/index.html
-rw-r--r--  --  icons/apache_pb.gif
-rw-r--r--  --  poweredby.png
lftp 192.168.2.37:/> get poweredby.png
1154 bytes transferred
lftp 192.168.2.37:/> bye
The lftp command can also be used as a traditional FTP client, but with some interesting features:
$ lftp 192.168.2.67 -u phudson
Password:
lftp [email protected]:~> cd /d2/isos/redhat/limbo
cd ok, cwd=/d2/isos/redhat/limbo
lftp [email protected]:/d2/isos/redhat/limbo> mget disc1 &
[0] mget *disc1* &
lftp [email protected]:/d2/isos/redhat/limbo> jobs
[0] mget *disc1*
         'limbo-i386-disc1.iso' at 56436448 (8%) 1.08M/s eta:9m [Receiving data]
lftp [email protected]:/d2/isos/redhat/limbo> bye
[1843] Moving to background to complete transfers...
$ ps aux | fgrep lftp
phudson     1843  7.6  1.0  5456 2404 ?        S     19:09  0:02 lftp 192.168.2.67
A username (and password) can be passed on the command line using the -u option. You can use this feature to reduce the amount of interactive typing required when retrieving remote files, as an aid when using lftp in shell scripts, and when retrieving files with lftp as a background process.
By using an ampersand (&), the retrieval is conducted in the background, as shown in the preceding example. The jobs command is used to show current transfers. If a user logs out of the session (using the bye command), the file transfer continues as a background process if it has not completed. (This is verified by using the ps command.)
The lftp client has many additional features that can make the job of transferring files easier than using other FTP clients.
The wget command is used for file transfers using FTP, HTTP, and various secure protocols such as HTTPS and HFTP if a remote proxy is enabled. However, wget supports only noninteractive transfers, unlike other FTP clients. This is actually a feature because wget can be used to download files as a background process and to recursively replicate remote file directories. The command also supports download completion of partially downloaded files, which can save a lot of time during periods of intermittent connectivity or broken connections.
For example, here is a simple invocation showing FTP retrieval from a remote computer using wget and an FTP URL:
$ wget ftp://phudson:mypasswd@stinky/mp3/*
--13:13:28--  ftp://phudson:*password*@stinky/mp3/*
           => `.listing'
Resolving stinky... done.
Connecting to stinky[192.168.2.33]:21... connected.
Logging in as phudson ... Logged in!
==> SYST ... done.    ==> PWD ... done.
==> TYPE I ... done.  ==> CWD /home/paul/mp3 ... done.
==> PORT ... done.    ==> LIST ... done.

    [ <=>                                 ] 648          632.81K/s
13:13:28 (632.81 KB/s) - `.listing' saved [648]

Removed `.listing'.
--13:13:28--  ftp://phudson:*password*@stinky/mp3/C31821-01A.mp3
           => `C31821-01A.mp3'

==> CWD not required.
==> PORT ... done.    ==> RETR C31821-01A.mp3 ... done.
Length: 5,172,089

60% [=====================>             ] 3,123,680 264.80K/s ETA 00:07
In this example, the user retrieves all files in a directory named mp3 (under /home/paul) on the remote host named stinky. The wget command first retrieves a directory listing, and then proceeds to download the specified files (all marked with * in this example). Note that you can specify a username and password (mypasswd in the example) on the command. This generally is not a good idea. A better, but still not really secure, approach is to save the password in a file named .wgetrc in your home directory. See the wget man page for more information, or check the only documentation at http://www.gnu.org/software/wget/manual/wget-1.8.1/html_mono/wget.html.
Tip
Another popular use for wget is downloading complete copies of websites for offline reading, although it is not very friendly toward website owners who have to pay for all the bandwidth!
To download an entire site, you need to specify the --mirror, --convert-links, and -p parameters, followed by the URL of the site to download. The first parameter tells wget to download all the pages and pictures from the site, following links as it can. The second tells it to rewrite the HTML so that it works when browsed locally. The last parameter, -p, tells wget to download all the files referenced in the HTML, such as sounds, CSS files, and other related documents. You might also want to specify the -w parameter, which allows you to specify a number of seconds between individual wget requests; this stops your download from overloading the web server.
So, the complete command to download a website (for example, www.example.com) would be wget --mirror --convert-links -p -w 2 http://www.example.com/.
Many graphical FTP clients are available for Linux. Fedora includes the graphical gFTP client and network-aware browsers included with GNOME and KDE. These browsers feature built-in drag-and-drop capability, thus ensuring FTP functionality. Other graphical interface clients that can be used for FTP include the Mozilla web browser, KDE’s Konqueror, GNOME’s Epiphany, and the Nautilus file manager.
The GNOME gFTP client provides all the typical features of FTP, including the capability to save profiles of common connections. Figure 24.1 shows a typical gFTP session in action. On the left panel is the local host, and on the right panel is the remote server. A connection is initiated by typing the address of the host into the host field, a specific port if not the standard FTP port (21), a valid username for the server, and a password. After the information is entered, clicking the icon that looks like a monitor starts the connection to the server. The bottom panel displays session information, such as changing directories, as shown in Figure 24.1.

gFTP sets the file type as binary by default, which can be changed by clicking ASCII in the FTP drop-down menu. To upload a file to the server, the user clicks a filename in the left panel and clicks the right arrow icon. The file is then transferred to the server, and the right panel is updated to reflect this new file being added to the server. Similarly, to download a file from the server, the user selects the correct file type from the drop-down menu, selects the file to be downloaded, and clicks the left arrow icon. The left panel is then updated to show the result of the transfer, with logging information shown in the bottom panel.
After all files are uploaded or downloaded, you must close the session. Do this by clicking the red button on the top right of the application window to issue the quit command. gFTP displays the session summary information in the log panel at the bottom of the application. You can also close the session simply by exiting gFTP.
Both KDE and GNOME file browsers have integrated FTP functionality built in. Use an ftp:// URL followed by a server name or IP address to start an anonymous FTP session. The drag-and-drop feature of KDE and the GNOME window manager allows users to select remote files and drag them to the desktop.
KDE’s Konqueror web browser is capable of handling a number of networking and file transfer protocols, including FTP. You can configure various settings for this browser, such as the appearance of the browser’s toolbar, but one of Konqueror’s best features is its flexibility for file transfers.
Start the browser by clicking its icon on the KDE’s kicker desktop panel or by typing the following at the command line:
$ konqueror &
After launching the client, you can use the ftp:// URL form to access remote servers, as shown in Figure 24.2.
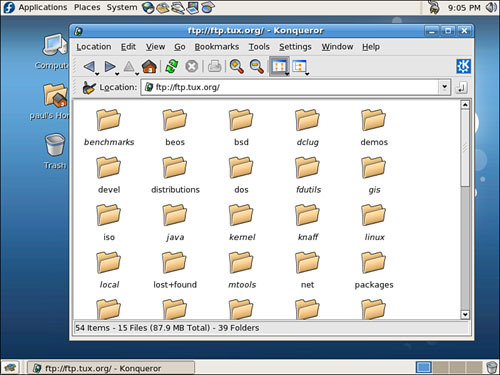
If your window manager does not support drag and drop, you can use Konqueror’s Copy Files feature to retrieve a file. First, you type in an FTP URL (such as ftp://ftp.tux.org). Next, navigate to a desired directory and click to select a desired file. You then click the Edit menu’s Copy Files menu item (or press F7). A Save dialog appears, and you can select your home directory to save the file. After you press Enter, a file download progress dialog is displayed while the file is being retrieved.
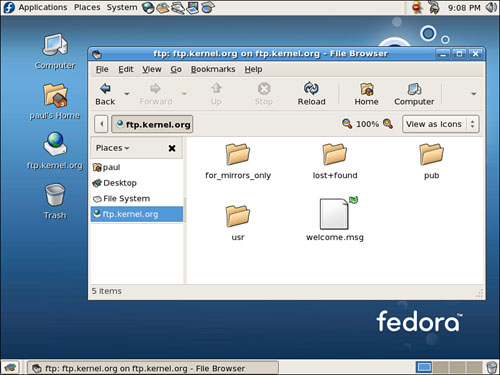
You can also use the Nautilus browser to retrieve files from a remote server. Figure 24.3 shows an anonymous login to a remote FTP server using Nautilus. Browse to a remote FTP server by going to the File menu, and then selecting Connect to Server (Public FTP is the default server type). Simply click to select a file, select Copy from the Edit menu (or press Ctrl+C), click to go to your home directory (using the icon in the Nautilus toolbar), and then click Paste (or press Ctrl+V) to retrieve and save the file.
These types of intuitive features can shield users from needing to know the details of how FTP works or memorizing various commands.
FTP uses a client/server model. As a client, FTP accesses a server, and as a server, FTP provides access to files or storage. Just about every computer platform available has software written to enable a computer to act as an FTP server, but Fedora provides the average user the ability to do this without paying hefty licensing fees and without regard for client usage limitations.
There are two types of FTP servers and access: standard and anonymous. A standard FTP server requires an account name and password from anyone trying to access the server. An anonymous server allows anyone to connect to the server to retrieve files. Anonymous servers provide the most flexibility, but they can also present a security risk. Fortunately, as you will read in this chapter, Fedora is set up to use proper file and directory permissions and commonsense default configuration, such as disallowing root to perform an FTP login.
Note
Many Linux users now use OpenSSH and its suite of clients, such as the sftp command, for a more secure solution when transferring files. The OpenSSH suite provides the sshd daemon and enables encrypted remote logins (see Chapter 19 for more information).
When you are preparing to set up your FTP server, you must first make the decision to install either the authenticated or anonymous service. Authenticated service requires the entry of a valid username and password for access. As previously mentioned, anonymous service allows the use of the username anonymous and an email address as a password for access.
Authenticated FTP servers provide some measure of secure data transfer for remote users, but require maintenance of user accounts as username and passwords are used. Anonymous FTP servers are used when user authentication is not needed or necessary, and can be helpful in providing an easily accessible platform for customer support or public distribution of documents, software, or other data.
If you use an anonymous FTP server in your home or business Linux system, it is vital that you properly install and configure it to retain a relatively secure environment. Sites that host anonymous FTP servers generally place them outside the firewall on a dedicated machine. The dedicated machine contains only the FTP server and should not contain data that cannot be restored quickly. This dedicated-machine setup prevents malicious users who compromise the server from obtaining critical or sensitive data. For an additional, but by no means more secure setup, the FTP portion of the file system can be mounted read-only from a separate hard drive partition or volume, or mounted from read-only media, such as CD-ROM, DVD, or other optical storage.
The Very Secure vsftpd server, like wu-ftpd (also discussed in this chapter), is licensed under the GNU GPL. The server can be used for personal or business purposes. Other FTP servers are available for Fedora, but only vsftpd comes bundled with this book’s DVD. The wu-ftpd and vsftpd servers will be covered in the remainder of this chapter.
One alternative server is NcFTPd, available from http://www.ncftp.com. This server operates independently of xinetd (typically used to enable and start the wu-ftp server) and provides its own optimized daemon. Additionally, NcFTPd has the capability to cache directory listings of the FTP server in memory, thereby increasing the speed at which users can obtain a list of available files and directories. Although NcFTPd has many advantages over wu-ftpd, NcFTPd is not GPL licensed software, and its licensing fees vary according to the maximum number of simultaneous server connections ($199 for 51 or more concurrent users and $129 for up to 50 concurrent users, but free to education institutions with a compliant domain name). Because of this licensing, NcFTPd is not packaged with Fedora—you will not find it on this book’s DVD.
Note
Do not confuse the ncftp client with ncftpd. The ncftp-3.1.7-4 package included with Fedora is the client software, a replacement for ftp-0.17-22, and includes the ncftpget and ncftpput commands for transferring files via the command line or by using a remote file uniform resource locator address. ncftpd is the FTP server, which can be downloaded from www.ncftpd.com.
Another FTP server package for Linux is ProFTPD, licensed under the GNU GPL. This server works well with most Linux distributions and has been used by a number of Linux sites, including ftp.kernel.org and ftp.sourceforge.net. ProFTPD is actively maintained and updated for bug fixes and security enhancements. Its developers recommend that you use the latest release (1.2.10 at the time of this writing) to avoid exposure to exploits and vulnerabilities. Browse to http://www.proftpd.org to download a copy.
Yet another FTP server package is Bsdftpd-ssl, which is based on the BSD ftpd (and distributed under the BSD license). Bsdftpd-ssl offers simultaneous standard and secure access using security extensions; secure access requires a special client. For more details, browse to http://bsdftpd-ssl.sc.ru/.
Finally, another alternative is to use Apache and the HTTP protocol for serving files. Using a web server to provide data downloads can reduce the need to monitor and maintain a separate software service (or directories) on your server. This approach to serving files also reduces system resource requirements and gives remote users a bit more flexibility when downloading (such as enabling them to download multiple files at once). See Chapter 21, “Apache Web Server Management,” for more information about using Apache.
As part of the Workstation installation, the client software for FTP is already installed. You can verify that FTP-related software is installed on your system by using the RPM (Red Hat Package Manager), grep, and sort commands in this query:
$ rpm -qa | grep ftp | sort
The sample results might differ, depending on what software packages are installed. In your Fedora file system, the /usr/bin/pftp file is symbolically linked to /usr/bin/ftp as well as the vsftpd server under the /usr/sbin directory. The base anonymous FTP directory structure is located under the /var/ftp directory. Other installed packages include additional text-based and graphical FTP clients.
If vsftpd is not installed, you can find it under Servers, FTP Server in the Add/Remove Software dialog.
Note
If you host an FTP server connected to the Internet, make it a habit to always check the Fedora site, http://fedora.redhat.com, for up-to-date system errata and security and bug fixes for your server software.
Because the anonftp and wu-ftpd RPM packages are not included with Fedora, you must download and install them if you want to use the wu-ftpd server. Retrieve the most recent packages for Linux from http://www.wu-ftpd.org/ to build from the latest source code or obtain RPM packages from a reputable mirror.
Refer to Chapter 7, “Managing Software,” for information on how to use RPM packages, and see Chapter 33, “C/C++ Programming Tools for Fedora,” for how to build software packages from source code archives.
After installing Fedora, an FTP user is created. This user is not a normal user per se, but a name for anonymous FTP users. The FTP user entry in /etc/passwd looks like
ftp:x:14:50:FTP User:/var/ftp:/sbin/nologin
Note
The FTP user, as discussed here, applies to anonymous FTP configurations and server setup.
Also, note that other Linux distributions might use a different default directory, such as /usr/local/ftp, for FTP files and anonymous users.
This entry follows the standard /etc/passwd entry: username, password, user ID, group ID, comment field, home directory, and shell. To learn more about /etc/password, see the section “The Password File” in Chapter 14, “Managing Users.”
Each item in this entry is separated by colons. In the preceding example, you can see that the Fedora system hosting the server uses shadowed password because an x is present in the traditional password field. The shadow password system is important because it adds an additional level of security to Fedora; the shadow password system is normally installed during the Fedora installation.
The FTP server software uses this user account to assign permissions to users connecting to the server. By using a default shell of /sbin/nologin (as opposed to /bin/bash or some other standard interactive shell) for anonymous FTP users, those users will be unable to log in as regular users. /sbin/nologin is not a shell, but a program usually assigned to an account that has been locked. As root inspection of the /etc/shadow file shows (see Listing 24.2), it is not possible to log in to this account, denoted by the use of * as the password.
Example 24.2. Shadow Password File ftp User Entry
#
cat /etc/shadow
bin:*:11899:0:99999:7:::
daemon:*:11899:0:99999:7:::
adm:*:11899:0:99999:7:::
lp:*:11899:0:99999:7:::
...
ftp:*:12276:0:99999:7:::
...
The shadow file (only a portion of which is shown in Listing 24.2) contains additional information not found in the standard /etc/passwd file, such as account expiration, password expiration, whether the account is locked, and the encrypted password. The * in the password field indicates that the account is not a standard login account; thus, it does not have a password.
Although shadow passwords are in use on the system, passwords are not transmitted in a secure manner when using FTP. Because FTP was written before the necessity of encryption and security, it does not provide the mechanics necessary to send encrypted passwords. Account information is sent in plain text on FTP servers; anyone with enough technical knowledge and a network sniffer can find the password for the account you connect to on the server. Many sites use an anonymous-only FTP server specifically to prevent normal account passwords from being transmitted over the Internet.
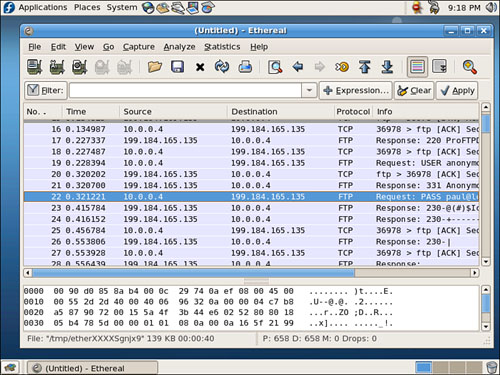
Figure 24.4 shows a portion of an ethereal capture of an FTP session where you can see it has caught a user’s password being sent in clear text. The ethereal client is a graphical browser used to display network traffic in real-time, and it can be used to watch packet data, such as an FTP login on a LAN.
xinetd (pronounced “zy-net-d”) is the extended Internet services daemon, and handles incoming connections for network services. xinetd is the preferred replacement for a similar tool (used with other Linux distributions and older Red Hat releases) called inetd. However, in addition to several other improvements over inetd, xinetd allows you to apply individual access policies to different network connection requests, such as FTP.
This daemon controls a number of services on your system according to settings in configuration files under the /etc/xinetd.d directory. This section shows you how to edit the appropriate files to enable the use of the wu-ftpd FTP server.
When installing wu-ftp using RPM, the RPM package might contain a xinetd configuration file, /etc/xinetd.d/wu-ftpd, as seen in Listing 24.3. You need to edit the file because its default settings disable incoming FTP requests.
Note
Do not be confused by the first line of the wu-ftpd file’s text. Even though the line reads default: on, FTP service is off unless you specifically configure its use. The line is a comment because it begins with a pound sign (#) and is ignored by xinetd. Whether FTP service is on is determined by the text line disable = yes.
Example 24.3. xinetd Configuration File for wu-ftpd
#
default: on
# description: The wu-ftpd FTP server serves FTP connections. It uses
#       normal, unencrypted usernames and passwords for authentication.
service ftp
{
disable = yes
        socket_type             = stream
        wait                    = no
        user                    = root
        server                  = /usr/sbin/in.ftpd
        server_args             = -l -a
        log_on_success          += DURATION
        nice                    = 10
}
Using an editor, change the disable = yes line to disable = no. Save the file and exit the editor. You then must restart xinetd because configuration files are parsed only at startup. To restart xinetd as root, issue the command /etc/rc.d/init.d/xinetd restart. This makes a call to the same shell script that is called at any runlevel to start or stop the xinetd daemon (and thus start up or shut down the system). xinetd should report its status as
# /etc/rc.d/init.d/xinetd restart
Stopping xinetd:                                [ OK ]
Starting xinetd:                                [ OK ]
After it is restarted, the FTP server is accessible to all incoming requests.
Previous versions of Red Hat’s Linux distributions required you to edit a file named vsftp under the /etc/xinetd.d directory in order to enable and start the Very Secure FTP server, vsftpd. With Fedora, you can now simply use the system-config-services client or service command to start vsftpd. For example, start the server using the service command like this:
# service vsftpd start
Starting vsftpd for vsftpd:                     [ OK ]
Use the system-config-services client or service command to start, stop, or restart the vsftpd server. Do not run two FTP servers on your system at the same time!
Tip
You can also use the shell script named vsftpd under the /etc/rc.d/init.d directory to start, stop, restart, and query the vsftpd server. You must have root permission to use the vsftpd script to control the server, but any user can query the server (to see whether it is running and to see its process ID number) using the status keyword like this:
$ /etc/rc.d/init.d/vsftpd status
The vsftpd server, although not as popular as wu-ftpd, is used by Red Hat, Inc. for its FTP server operations. (The vsftpd server home page is located at http://vsftpd.beasts.org/.) The server offers features such as simplicity, security, and speed. It has been used by a number of sites, such as ftp.debian.org, ftp.gnu.org, rpmfind.net, and ftp.gimp.org. Note that despite its name, the Very Secure FTP server does not enable use of encrypted usernames or passwords.
Its main configuration file is vsftpd.conf, which resides under the /etc/vsftpd directory. The server has a number of features and default policies, but these can be overridden by changing the installed configuration file.
By default, anonymous logins are enabled, but users are not allowed to upload files, create new directories, or delete or rename files. The configuration file installed by Fedora allows local users (that is, users with a login and shell account) to log in and access their home directory. This configuration presents potential security risks because usernames and passwords are passed without encryption over a network. The best policy is to deny your users access to the server from their user accounts. The standard vsftpd configuration disables this feature.
Toggling anonymous access features for your FTP server is done by editing the vsftpd.conf file and changing related entries to YES or NO in the file. Settings to control how the server works for anonymous logins include
anonymous_enable—. Enabled by default. Use a setting ofNO, and then restart the server to turn off anonymous access.anon_mkdir_write_enable—. Allows or disallows creating of new directories.anon_other_write_enable—. Allows or disallows deleting or renaming of files and directories.anon_upload_enable—. Controls whether anonymous users can upload files (also depends on the globalwrite_enablesetting). This is a potential security and liability hazard and should rarely be used; if enabled, consistently monitor any designated upload directory.anon_world_readable_only—. Allows anonymous users to download only files with world-readable (444) permission.
After making any changes to your server configuration file, make sure to restart the server; doing so forces vsftpd to reread its settings.
You can edit vsftpd.conf to enable, disable, and configure many features and settings of the vsftpd server, such as user access, filtering of bogus passwords, and access logging. Some features might require the creation and configuration of other files, such as
/etc/vsftpd.user_list—. Used by theuserlist_enableand/or theuserlist_denyoptions; the file contains a list of usernames to be denied access to the server./etc/vsftpd.chroot_list—. Used by thechroot_list_enableand/orchroot_local_useroptions, this file contains a list of users who are either allowed or denied access to a home directory. An alternative file can be specified using thechroot_list_fileoption./etc/vsftpd.banned_emails—. A list of anonymous password entries used to deny access if thedeny_email_enablesetting is enabled. An alternative file can be specified using thebanned_emailoption./var/log/vsftpd.log—. Data transfer information is captured to this file if logging is enabled using thexferlog_enablesetting.
The contents of a file named .message (if it exists in the current directory) are displayed when a user enters the directory. This feature is enabled in the installed configuration file, but disabled by the daemon. FTP users are also not allowed to perform recursive directory listings, which can help reduce bandwidth use.
The PASV data connection method is enabled to let external users know the IP address of the FTP server. This is a common problem when using FTP from behind a firewall/gateway using IP masquerading or when incoming data connections are disabled. For example, here is a connection to an FTP server (running ProFTPD), an attempt to view a directory listing, and the resulting need to use ftp’s internal passive command:
$ ftp ftp.tux.org
Connected to gwyn.tux.org.
220 ProFTPD 1.2.5rc1 Server (ProFTPD on ftp.tux.org) [gwyn.tux.org]
500 AUTH not understood.
KERBEROS_V4 rejected as an authentication type
Name (ftp.tux.org:gbush): gbush
331 Password required for gbush.
Password:
230 User gbush logged in.
Remote system type is UNIX.
Using binary mode to transfer files.
ftp> cd public_html
250 CWD command successful.
ftp> ls
500 Illegal PORT command.
ftp: bind: Address already in use
ftp>
ftp> pass
Passive mode on.
ftp> ls
227 Entering Passive Mode (204,86,112,12,187,89).
150 Opening ASCII mode data connection for file list
-rw-r--r--   1 gbush    gbush        8470 Jan 10  2000 LinuxUnleashed.gif
-rw-r--r--   1 gbush    gbush        4407 Oct  4  2001 RHU72ed.gif
-rw-r--r--   1 gbush    gbush        6732 May 18  2000 SuSEUnleashed.jpg
-rw-r--r--   1 gbush    gbush        6175 Jan 10  2000 TYSUSE.gif
-rw-r--r--   1 gbush    gbush        3135 Jan 10  2000 TZones.gif
...
Note
Browse to http://slacksite.com/other/ftp.html for a detailed discussion regarding active and passive FTP modes and the effect of firewall blocking of service ports on FTP server and client connections.
Other default settings are that specific user login controls are not set, but you can configure the controls to deny access to one or more users.
The data transfer rate for anonymous client access is unlimited, but a maximum rate (in bytes per second) can be set using the anon_max_rate setting in vsftpd.conf. This can be useful for throttling bandwidth use during periods of heavy access. Another default is that remote clients are logged out after five minutes of idle activity or a stalled data transfer. You can set idle and transfer timeouts (stalled connections) separately.
Other settings that might be important for managing your system’s resources (networking bandwidth or memory) when offering FTP access include
dirlist_enable—. Toggles directory listings on or off.dirmessage_enable—. Toggles display of a message when user enters a directory. A related setting isls_recurse_enable, which can be used to disallow recursive directory listings.download_enable—. Toggles downloading on or off.max_clients—. Sets a limit on the maximum number of connections.max_per_ip—. Sets a limit on the number of connections from the same IP address.
wu-ftp uses a number of configuration files to control how it operates, including the following:
ftpaccess—. Contains the majority of server configuration settingsftpconversions—. Contains definitions of file conversions during transfersftphosts—. Holds settings to control user access from specific hosts
These files may be created in the /etc directory during RPM installation, or may be created by a system administrator. The following sections describe each of these files and how to use the commands they contain to configure the wu-ftp server so that it is accessible to all incoming requests.
Caution
When configuring an anonymous FTP server, it is extremely important to ensure that all security precautions are taken to prevent malicious users from gaining privileged level access to the server. Although this chapter shows you how to configure your FTP server for secure use, all machines connected to the Internet are potential targets for malicious attacks. Vulnerable systems can be a source of potential liability, especially if anyone accesses and uses them to store illegal copies of proprietary software—even temporarily. There is little value in configuring a secure FTP server if the rest of the system is still vulnerable to attack. Use Red Hat’s lokkit or system-config-securitylevel client to implement a firewall on your system.
Tip
Before editing the FTP server files, make a backup file first. Also, it is always a good idea to comment out (using a pound sign at the beginning of a line) what is changed instead of deleting or overwriting entries. Follow these comments with a brief description why the change was made. This leaves a nice audit trail of what was done, by whom, when, and why. If you have any problems with the configuration, these comments and details can help you troubleshoot and return to valid entries if necessary. You can use the rpm command or other Linux tools (such as mc) to extract a fresh copy of a configuration file from the software’s RPM archive. Be aware, however, that the extracted version replaces the current version and overwrites your configuration changes.
Note
Back up the FTP server configuration files to another machine, in case any of the working copies should become corrupt. There might be a need to replicate server configurations across multiple hosts or revert back to an original copy of the defaults at some point in time. By making regular backups before changing a file, you guarantee that the changes can be undone and a working server restored with minimal downtime.
The ftpaccess file contains most of the server configuration details. Each line contains a definition or parameter that is passed to the server to specify how the server is to operate. The directives can be broken down into the following categories, including
Access Control—. Settings that determine who can access the FTP server and how it is accessed
Information—. Settings that determine what information is provided by the server or displayed to a user
Logging—. Settings that determine whether logging is enabled and what information is logged
Permission Control—. Settings that control the behavior of users when accessing the server; in other words, what actions users are allowed to perform, such as create a directory, upload a file, delete a file or directory, and so on
You can edit the ftpaccess file at the command line to make configuration changes in any of these categories. The following sections describe some configuration changes and how to edit these files to accomplish them.
Controlling which users can access the FTP server and how they can do so are critical parts of system security. Use the following entries in the ftpaccess file to specify to which group the user accessing the server is assigned.
This command imposes increased security on the anonymous user:
autogroup <groupname> <class> [<class>]
If the anonymous user is a member of a group, he is allowed access to only files and directories owned by him or his group. The group must be a valid group from /etc/groups or /var/ftp/etc/groups.
This command defines a class of users by the address to which the user is connected:
class <class> <typelist> <addrglob> [<addrglob>]
There might be multiple members for a class of users, and multiple classes might apply to individual members. When multiple classes apply to one user, the first class that applies is used.
The typelist field is a comma-separated list of the keywords anonymous, guest, and real. anonymous applies to the anonymous user, and guest applies to the guest access account, as specified in the guestgroup directive. real defines those users who have a valid entry in the /etc/passwd file.
The addrglob field is a regular expression that specifies addresses to which the class is to be applied. The (*) entry specifies all hosts.
Sometimes it is necessary to block entire hosts from accessing the server. This can be useful to protect the system from individual hosts or entire blocks of IP addresses, or to force the use of other servers. Use this command to do so:
deny <addrglob> <message_file>
deny always denies access to hosts that match a given address.
addrglob is a regular expression field that contains a list of addresses, either numeric or a DNS name. This field can also be a file reference that contains a listing of addresses. If the address is a file reference, it must be an absolute file reference; that is, starting with a /. To ensure that IP addresses can be mapped to a valid domain name, use the !nameserver parameter.
A sample deny line resembles the following:
deny *.exodous.net /home/ftp/.message_exodous_deny
This entry denies access to the FTP server from all users who are coming from the exodous.net domain, and displays the message contained in the .message_exoduous_deny file in the /home/ftp directory.
The guestgroup line assigns a given group name or group names to behave exactly like the anonymous user. Here is the command:
guestgroup <groupname> [<groupname>]
This command confines the users to a specific directory structure in the same way anonymous users are confined to /var/ftp. This command also limits these users to access files for which their assigned group has permissions.
The groupname parameter can be the name of a group or that group’s corresponding group ID (GID). If you use a GID as the groupname parameter, put a percentage symbol (%) in front of it. You can use this command to assign permissions to a range of group IDs, as in this example:
guestgroup %500-550
This entry restricts all users with the group IDs 500–550 to being treated as a guest group, rather than individual users. For guestgroup to work, you must set up the users’ home directories with the correct permissions, exactly like the anonymous FTP user.
The guestuser line works exactly like the guestgroup command you just read about, except it specifies a user ID (UID) instead of a group ID. Here’s the command:
guestuser <username> [<username>]
This command limits the guest user to files for which the user has privileges. Generally, a user has more privileges than a group, so this type of assignment can be less restrictive than the guestgroup line.
limit restricts the number of users in a class during given times. Here is the command, which contains fields for specifying a class, a number of users, a time range, and the name of a text file that contains an appropriate message:
limit <class> <n> <times> <message_file>
If the specified number of users from the listed class is exceeded during the given time period, the user sees the contents of the file given in the message_file parameter.
The times parameter is somewhat terse. Its format is a comma-delimited string in the form of days, hours. Valid day strings are Su, Mo, Tu, We, Th, Fr, Sa, and Any. The hours string is formatted in a 24-hour format. An example is as follows:
limit anonymous 10 MoTuWeThFr,Sa0000-2300 /home/ftp/.message_limit_anon_class
This line limits the anonymous class to 10 concurrent connections on Monday through Friday, and on Saturday from midnight to 11:00 p.m. For example, if the number of concurrent connections is exceeded at 11:00 p.m. on Saturday, the users will see the contents of the file /home/ftp/.message_limit_anon_class.
Syntax for finer control over limiting user connections can be found in the ftpaccess man page.
This line allows control over how many times a user can enter an invalid password before the FTP server terminates the session:
loginfails <number>
The default for loginfails is set to 5. This command prevents users without valid passwords from experimenting until they get it right.
Providing users with information about the server and its use is a good practice for any administrator of a public FTP server. Adequate user information can help prevent user problems and eliminate tech support calls. You also can use this information to inform users of restrictions governing the use of your FTP server. User information gives you an excellent way to document how your FTP server should be used.
You can use the commands detailed in the following sections to display messages to users as they log in to the server and as they perform specific actions. The following commands enable messages to be displayed to users when logging in to the server and when an action is performed.
This command is a reference to a file that is displayed before the user receives a login prompt from the FTP server:
banner <path>
This file generally contains information to identify the server. The path is an absolute pathname relative to the system root (/), not the base of the anonymous FTP user’s home. The entry might look like this:
banner /etc/rh8ftp.banner
This example uses the file named rh8ftp.banner under the /etc directory. The file can contain one or more lines of text, such as
Welcome to Widget, Inc.'s Red Hat Linux FTP server.
This server is only for use of authorized users.
Third-party developers should use a mirror site.
When an FTP user attempts to log in, the banner is displayed like so:
$ ftp shuttle2
Connected to shuttle2.home.org.
220-Welcome to Widget, Inc.'s Red Hat Linux FTP server.
220-This server is only for use of authorized users.
220-Third-party developers should use a mirror site.
220-
220-
220 shuttle2 FTP server (Version wu-2.6.2-8) ready.
504 AUTH GSSAPI not supported.
504 AUTH KERBEROS_V4 not supported.
KERBEROS_V4 rejected as an authentication type
Name (shuttle2:phudson):
Note
Note that the banner does not replace the greeting text that, by default, displays the hostname and server information, such as
220 shuttle2 FTP server (Version wu-2.6.2-8) ready.
To hide version information, use the greeting command in ftpaccess with a keyword, such as terse, like so:
greeting terse
FTP users will then see a short message like this as part of the login text:
220 FTP server ready.
Also, not all FTP clients can handle multiline responses from the FTP server. The banner <path> command is how the banner line passes the file contents to the client. If a client cannot interrupt multiline responses, the FTP server is useless to them. You should also edit the default banner to remove identity and version information.
This line specifies a text file to be displayed to the user during login and when the user issues the cd command:
message <path> {<when> {<class> ...}}
The optional when clause can be LOGIN or CWD=(dir), where dir is the name of a directory that is current. The optional class parameter enables messages to be shown to only a given class or classes of users.
Using messages is a good way to give information about where things are on your site as well as information that is system dependent, such as alternative sites, general policies regarding available data, server availability times, and so on.
You can use magic cookies to breathe life into your displayed messages. Magic cookies are symbolic constants that are replaced by system information. Table 24.1 lists the message command’s valid magic cookies and their representations.
Table 24.1. Magic Cookies and Their Descriptions
Cookie | Description |
|---|---|
| Local time (form |
| Free space in partition of CWD (kilobytes) [Not supported on all systems] |
| Current working directory |
| Maintainer’s email address as defined in |
| Remote hostname |
| Local hostname |
| Username as determined via RFC931 authentication |
| Username given at login time |
| Maximum allowed number of users in this class |
| Current number of users in this class |
| Absolute limit on disk blocks allocated |
| Preferred limit on disk blocks |
| Current block count |
| Maximum number of allocated inodes (+1) |
| Preferred inode limit |
| Current number of allocated inodes |
| Time limit for excessive disk use |
| Time limit for excessive files |
Ratios | |
| Uploaded bytes |
| Downloaded bytes |
| Upload/download ratio (1:n) |
| Credit bytes |
| Time limit (minutes) |
| Elapsed time since login (minutes) |
| Time left |
| Upload limit |
| Download limit |
To understand how this command works, imagine that you want to display a welcome message to everyone who logs in to the FTP server. An entry of
message /home/ftp/welcome.msg login
message /welcome.msg          login
shows the contents of the welcome.msg file to all real users who log in to the server. The second entry shows the same message to the anonymous user.
The welcome.msg file is not created with the installation of the RPM, but you can create it using a text editor. Type the following:
Welcome to the anonymous ftp service on %L!

There are %N out of %M users logged in.

Current system time is %T

Please send email to %E if there are
any problems with this service.

Your current working directory is %C
Save this file as /var/ftp/welcome.msg. Verify that it works by connecting to the FTP server:
220 FTP server ready.
504 AUTH GSSAPI not supported.
504 AUTH KERBEROS_V4 not supported.
KERBEROS_V4 rejected as an authentication type
Name (shuttle:phudson): anonymous
331 Guest login ok, send your complete e-mail address as password.
Password:
230-Welcome to the anonymous ftp service on shuttle.home.org!
230-
230-There are 1 out of unlimited users logged in.
230-
230-Current system time is Mon Nov 3 10:57:06 2003
230-
230-Please send email to root@localhost if there are
230-any problems with this service.
230-Your current working directory is /
This line sets the email address for the FTP administrator:
email <name>
This string is printed whenever the %E magic cookie is specified. This magic cookie is used in the message line or in the shutdown file. You should display this string to users in the login banner message so that they know how to contact you (the administrator) in case of problems with the FTP server.
The readme line tells the server if a notification should be displayed to the user when a specific file was last modified. Here’s the command:
readme <path> {<when {<class>}}
The path parameter is any valid path for the user. The optional when parameter is exactly as seen in the message line. class can be one or more classes as defined in the class file. The path is absolute for real users. For the anonymous user, the path is relative to the anonymous home directory, which is /var/ftp by default.
Part of system administration involves reviewing log files for what the server is doing, who accessed it, what files were transferred, and other pieces of important information. You can use a number of commands within /etc/ftpacess to control your FTP server’s logging actions.
This line allows the administrator to redirect where logging information from the FTP server is recorded:
log <syslog>{+<xferlog>}
By default, the information for commands is stored in /var/log/messages, although the man pages packaged in some RPMs state that this information is written to /var/log/xferlog. Check your server’s settings for information regarding the location of your file transfer logs.
This line enables logging for all commands issued by the user:
log commands [<typelist>]
typelist is a comma-separated list of anonymous, guest, and real. If no typelist is given, commands are logged for all users. Some wu-ftpd RPMs set the logging of all file transfers to /var/log/xferlog (see the next section). However, you can add the log command to ftpaccess with the commands keyword to capture user actions. Logging is then turned on and user actions are captured in /var/log/messages. Here is a sample log file:
Oct  6 12:21:42 shuttle2 ftpd[5229]: USER anonymous
Oct  6 12:21:51 shuttle2 ftpd[5229]: PASS [email protected]
Oct  6 12:21:51 shuttle2 ftpd[5229]: ANONYMOUS FTP LOGIN FROM 192.168.2.31 [192.168.2.31], [email protected]
Oct  6 12:21:51 shuttle2 ftpd[5229]: SYST
Oct  6 12:21:54 shuttle2 ftpd[5229]: CWD pub
Oct  6 12:21:57 shuttle2 ftpd[5229]: PASV
Oct  6 12:21:57 shuttle2 ftpd[5229]: LIST
Oct  6 12:21:59 shuttle2 ftpd[5229]: QUIT
Oct  6 12:21:59 shuttle2 ftpd[5229]: FTP session closed
The sample log shows the username and password entries for an anonymous login. The CWD entry shows that a cd command is used to navigate to the pub directory. Note that the commands shown do not necessarily reflect the syntax the user typed, but instead list corresponding system calls the FTP server received. For example, the LIST entry is actually the ls command.
Two other logging commands are useful in the /etc/ftpaccess configuration file. This line enables the logging of security violations:
log security [<typelist>]
Violations are logged for anonymous, guest, and real users, as specified in the typelist—the same as other log commands. If you do not specify a typelist, security violations for all users will be logged.
This line writes a log of all files transferred to and from the server:
log transfers [<typelist> [<directions>]]
typelist is the same as in log commands and log security lines. directions is a comma-separated list of the keywords inbound for uploaded files and outbound for downloaded files. If no directions list is given, both uploaded and downloaded files will be logged. Inbound and outbound logging is turned on by default.
Controlling user activity is an important component of securing your system’s server. The ftpaccess file includes a number of commands that enable you to determine what users can and cannot execute during an FTP session. You can use these permission controls to allow users to change file permissions, delete and overwrite files, rename files, and create new files with default permissions. You learn how to use all these ftpaccess file command lines in the following sections.
Note
By default, all the ftpaccess file command lines prohibit anonymous users from executing actions and enable authorized users to do so.
The chmod line determines whether a user has the ability to change a file’s permissions. Here is the command line:
chmod <yes|no> <typelist>
This command acts the same as the standard chmod command.
The yes|no parameter designates whether the command can be executed. typelist is a comma-delimited string of the keywords anonymous, guest, and real. If you do not specify a typelist string, the command will be applied to all users. An exhaustive description of its purpose and parameters can be found in the man page.
The delete line determines whether the user can delete files with the rm command. Here’s the command line:
delete<yes|no> <typelist>
The yes|no parameter is used to turn this permission on or off, and typelist is the same as the chmod command.
This command line of the ftpaccess file allows or denies users the ability to overwrite an existing file. Here’s the command line:
overwrite <yes|no> <typelist>
The FTP client determines whether users can overwrite files on their own local machines; this line specifically controls overwrite permissions for uploads to the server. The yes|no parameter toggles the permission on or off, and typelist is the same as in the chmod line.
You can enable or prevent a user from renaming files using this command line:
rename <yes|no> <typelist>
The yes|no parameter toggles the permission on or off, and typelist is the same comma-delimited string as in chmod.
This line determines whether the user is able to use the compress command on files:
compress <yes|no> [<classglob>]
The yes|no parameter toggles the permission on or off, and classglob is a regular expression string that specifies one or more defined classes of users. The conversions that result from the use of this command are specified in the ftpconversions file, which contains directions on what compression or extraction command is to be used on a file with a specific extension, such as .Z for the compress command, .gz for the gunzip command, and so on. See the section “Configure FTP Server File-Conversion Actions” later in this chapter.
This line determines whether the user is able to use the tar (tape archive) command on files:
tar <yes|no> [<classglob> ...]
The yes|no parameter toggles the permission on or off, and classglob is a regular expression string that specifies one or more defined classes of users. Again, the conversions that result from the use of this command are specified in the ftpconversions file.
This line is a bit different from the other commands in the permission control section. The umask command determines with what permissions a user can create new files; here it is.
umask <yes|no> <typelist>
The yes|no parameter toggles based on whether a user is allowed to create a file with his default permissions when uploading a file. Like the overwrite command you read about earlier in this section, this command line is specific to uploaded files because the client machine determines how new files are created from a download.
This alias command allows the administrator to provide another name for a directory other than its standard name:
alias <string> <dir>
The alias line applies to only the cd command. This line is particularly useful if a popular directory is buried deep within the anonymous FTP user’s directory tree. The following is a sample entry:
alias linux-386 /pub/redhat/7.3/en/i386/
This line would allow the user to type cd linux-386 and be automatically taken to the /pub/redhat/7.3/en/i386 directory.
The cdpath <dir> line specifies the order in which the cd command looks for a given user-entered string. The search is performed in the order in which the cdpath lines are entered in the ftpacess file.
For example, if the following cdpath entries are in the ftpaccess file,
cdpath /pub/redhat/
cdpath /pub/linux/
and the user types cd i386, the server searches for an entry in any defined aliases first in the /pub/redhat directory and then in the /pub/linux directory. If a large number of aliases are defined, it is recommended that symbolic links to the directories be created instead of aliases. Doing so reduces the amount of work on the FTP server and decreases the wait time for the user.
The shutdown command tells the server where to look for the shutdown message generated by the ftpshut command or by the user. The shutdown command is used with a pathname to a shutdown file, such as
shudown /etc/rh8ftpshutdown
If this file exists, the server checks the file to see when the server should shut down. The syntax of this file is as follows:
<year> <month> <day> <hour> <minute> <deny_offset> <disc_offset> <text>
year can be any year after 1970 (called the epoch), month is from 0–11, hour is 0–23, and minute is 0–59. deny_offset is the number of minutes before shutdown in which the server disallows new connections. disc_offset is the number of minutes before connected users are disconnected, and text is the message displayed to the users at login. In addition to the valid magic cookies defined in the messages section, those listed in Table 24.2 are also available.
The FTP server can convert files during transfer to compress and uncompress files automatically. Suppose that the user is transferring a file to his Microsoft Windows machine that was TARed and GZIPed on a Linux machine. If the user does not have an archive utility installed to uncompress these files, he cannot access or use the files.
As the FTP server administrator, you can configure the FTP server to automatically unarchive these files before download if the site supports users who do not have unarchive capabilities. Additionally, you can configure an upload area for the users, and then configure the FTP server to automatically compress any files transferred to the server.
The structure of the format of the ftpconversions file is
1:2:3:4:5:6:7:8
where 1 is the strip prefix, 2 is the strip postfix, 3 is the add-on prefix, 4 is the add-on postfix, 5 is the external command, 6 is the types, 7 is the options, and 8 is the description.
The strip prefix is one or more characters at the beginning of a filename that should be automatically removed by the server when the file is requested. By specifying a given prefix to strip in a conversions rule, such as devel, the user can request the file devel_procman.tar.gz by the command get procman.tar.gz, and the FTP server performs any other rules that apply to that file and retrieve it from the server. Although this feature is documented, as of version 2.6.2, it has yet to be implemented.
The strip postfix works much the same as the strip prefix, except that one or more characters are taken from the end of the filename. This feature is typically used to strip the .gz extension from a file that has been TARed and GZIPed when the server performs automatic decompression before sending the file to the client.
The add-on prefix conversion instructs the server to insert one or more characters to a filename before it is transferred to the server or client. For example, assume that a user requests the file procman.tar.gz. The server has a conversion rule to add a prefix of gnome to all .tar.gz files; therefore the server would append this string to the file before sending it to the client. The user would receive a file called gnome_procman.tar.gz. Keywords such as uppercase and lowercase can be used in this function to change the case of the filename for those operating systems in which case makes a difference. As with the strip prefix conversion, this feature is not yet implemented in version 2.6.2.
An add-on postfix instructs the server to append one or more characters to the end of a filename during the transfer or reception of a file. A server can contain TARed packages of applications that are uncompressed. If an add-on postfix conversion is configured on the server, the server could compress the file, append a .gz extension after the file was compressed, and then send that file to the client. The server could also perform the same action for uncompressed files sent to the server. This would have the effect of conserving disk space on the server.
The external command entries in the ftpconversions file contain the bulk of the FTP server conversion rules. The external command entry tells the server what should be done with a file after it is transferred to the server. The specified conversion utility can be any command on the server, although generally it is a compression utility. As the file is sent, the server passes the file through the external command. If the file is being uploaded to the server, the command needs to send the result to standard in, whereas a download sends the result to standard out. For example, here is an entry specifying the tar command:
: : :.tar:/bin/tar -c -f - %s:T_REG|T_DIR:O_TAR:TAR
The following sections describe the fields in a conversion entry.
You must use the types field of the ftpconversions file to tell the server what types of files the conversion rules apply to. Separate the file type entries with the (|) character, and give each type a value of T_REG, T_ASCII, and T_DIR.
T_REG signifies a regular file, T_ASCII an ASCII file, and T_DIR a directory. A typical entry is T_REG | T_ASCII, which signifies a regular ASCII file.
The options field informs the server what action is being done to the file. Similar to the types field, options are separated by the (|) character. Here are the valid ranges you can assign to items in the options field:
O_COMPRESSto compress the fileO_UNCOMPRESSto uncompress the fileO_TARto tar the file
An example of this field is O_COMPRESS | O_TAR, where files are both compressed and TARed.
The description field allows an administrator to quickly understand what the rule is doing. This field does not have any syntax restriction, although it is usually a one-word entry—such as TAR, TAR+COMPRESS, or UNCOMPRESS—which is enough to get the concept across.
Crafting complex conversion entries is a task perhaps best left to the Linux/UNIX expert, but the sample ftpconversions file included with wu-ftpd provides more than enough examples for the average Red Hat administrator. Building your own simple conversion entry is not really too difficult, so let’s examine and decode an example:
:.Z: : :/bin/compress -d -c %s:T_REG|T_ASCII:O_UNCOMPRESS:UNCOMPRESS
In this example, the strip prefix (field 1) is null because it is not yet implemented, so this rule does not apply to prefixes. The second field of this rule contains the .Z postfix; therefore it deals with files that have been compressed with the compress utility. The rule does not address the add-on prefix or postfix, so fields 3 and 4 are null. Field 5, the external command field, tells the server to run the compress utility to decompress all files that have the .Z extension, as the -d parameter signifies. The -c options tells compress to write its output to standard out, which is the server in this case. The %s is the name of the file that the rule was applied against. Field 6 specifies that this file is a regular file in ASCII format. Field 7, the options field, tells the server that this command uncompresses the file. Finally, the last field is a comment that gives the administrator a quick decode of what the conversion rule is doing; that is, uncompressing the file.
The purpose of the ftphosts file is to allow or deny specific users or addresses from connecting to the FTP server. The format of the file is the word allow or deny, optionally followed by a username, followed by an IP or a DNS address.
allow username address
deny username address
Listing 24.4 shows a sample configuration of this file.
Example 24.4. ftphosts Configuration File for Allowing or Denying Users
# Example host access file
#
# Everything after a '#' is treated as comment,
# empty lines are ignored
allow tdc 128.0.0.1
allow tdc 192.168.101.*
allow tdc insanepenguin.net
allow tdc *.exodous.net
deny anonymous 201.*
deny anonymous *.pilot.net
The * is a wildcard that matches any combination of that address. For example, allow tdc *.exodous.net allows the user tdc to log in to the FTP server from any address that contains the domain name exodous.net. Similarly, the anonymous user is not allowed to access the FTP if he is coming from a 201 public class C IP address.
Changes made to your system’s FTP server configuration files become active only after you restart xinetd because configuration files are parsed only at startup. To restart xinetd as root, issue the command /etc/rc.d/init.d/xinetd restart. This makes a call to the same shell script that is called at system startup and shutdown for any runlevel to start or stop the xinet daemon. xinetd should report its status as
# /etc/rc.d/init.d/xinetd restart
Stopping xinetd:                                      [ OK ]
Starting xinetd:                                      [ OK ]
When the FTP server restarts, it is accessible to all incoming requests.
wu-ftp provides a few commands to aid in server administration. Those commands are
ftpwho—. Displays information about current FTP server usersftpcount—. Displays information about current server users by classftpshut—. Provides automated server shutdown and user notificationftprestart—. Provides automated server restart and shutdown message removal
Each of these commands must be executed with superuser privileges because they reference the ftpaccess configuration file to obtain information about the FTP server.
The ftpwho command provides information about the users currently connected to the FTP server. Here’s the command line:
/usr/bin/ftpwho
Table 24.3 shows the format of the output ftpwho displays.
Table 24.3. ftpwho Fields
Name | Description |
|---|---|
Process ID | The process ID of the FTP server process. |
TTY | The terminal ID of the process. This is always a question mark ( |
Status | The status of the FTP process. The values are
|
Time | The elapsed processor time the process has used in minutes and seconds. |
Details | Tells what host the process is connecting from, the user who connected, and the currently executing command that is executing. |
Listing 24.5 shows typical output from this command. It lists the process ID for the ftp daemon handling requests, the class that the particular user belongs to, the total time connected, what username the user is connected as, and the status of his session.
In addition to the information given about each connected user, ftpwho also displays the total number of users connected out of any maximum that has been set in the ftpaccess file. This information can be used to monitor the use of your FTP server.
You can pass one parameter to ftpwho. (You can find the parameter by using the ftpwho--help command.) The single parameter you can pass to ftpwho is -v. This parameter prints out version and licensing information for wu-ftp, as shown here:
# ftpwho
Service class all:
10447 ?        SN     0:00 ftpd: localhost: anonymous/[email protected]: IDLE
1 users (no maximum)
The output of ftpwho, using the -V option, which shows version information, is shown in Listing 24.5.
Example 24.5. ftpwho -V Command Output
Copyright © 1999,2000,2001 WU-FTPD Development Group.
All rights reserved.

Portions Copyright © 1980, 1985, 1988, 1989, 1990, 1991, 1993, 1994
  The Regents of the University of California.
Portions Copyright © 1993, 1994 Washington University in Saint Louis.
Portions Copyright © 1996, 1998 Berkeley Software Design, Inc.
Portions Copyright © 1989 Massachusetts Institute of Technology.
Portions Copyright © 1998 Sendmail, Inc.
Portions Copyright © 1983, 1995, 1996, 1997 Eric P. Allman.
Portions Copyright © 1997 by Stan Barber.
Portions Copyright © 1997 by Kent Landfield.
Portions Copyright © 1991, 1992, 1993, 1994, 1995, 1996, 1997
Free Software Foundation, Inc.
Use and distribution of this software and its source code are governed
by the terms and conditions of the WU-FTPD Software License ("LICENSE").

If you did not receive a copy of the license, it may be obtained online
at http://www.wu-ftpd.org/license.html.
Version wu-2.6.2-8
/usr/bin/ftpcount counts the number of connected users to the FTP server and the maximum number of users allowed. This same information is found at the end of the output for the ftpwho command. This command only takes one parameter, -V, which displays the same output as the previous ftpwho example.
# ftpcount
Service class all           -  4 users (no maximum)
As with any public server administration, it is always good practice to let users of the FTP server know about upcoming outages, when the server will be updated, and other relevant site information. The ftpshut command allows the administrator to let the FTP server do much of this automatically.
The ftpshut command allows the administrator to take down the FTP server at a specific time based on some parameters passed to it. The format of the command is as follows and is documented in the ftpshut man page:
ftpshut [ -V ] [ -l min] [ -d min] time [ warning-message ... ]
The -V parameter displays the version information of the command. The time parameter is the time when the ftpshut command will stop the FTP servers. This parameter takes either a + number for the number of minutes from the current time, or a specific hour and minute in 24-hour clock format with the syntax of HH:MM.
The -l parameter allows the FTP server administrator to specify how long, in minutes, before shutdown the server disallows new connections. The default is 10 minutes. If the time given to shut down the servers is less than 10 minutes, new connections are disallowed immediately.
The -d parameter is similar to the -l parameter, but controls when the FTP server terminates the current connections. By default, this occurs five minutes before the server shuts down. If the shutdown time is less than five minutes, the server terminates the current connections immediately.
When you execute this command, the FTP server creates a file containing the shutdown information in the location specified under the shutdown section in the ftpaccess file.
The default configuration for this file is /etc/shutmsg. If you execute the ftpshut command with warning messages, the messages are displayed when the user logs in to the server.
Name (pheniox:tdc): anonymous
331 Guest login ok, send your complete e-mail address as password.
Password:
230-system doing down at Mon Sep 3 06:23:00 2001
230-0 users of unlimited on pheniox.
230 Guest login ok, access restrictions apply.
Remote system type is UNIX.
Using binary mode to transfer files.
Here is a sample ftpshut command:
ftpshut -l 5 -d 5 +10 "system going down at %s %N users of %M on %R"
This command tells the FTP server to disconnect new connections in 5 minutes, drop all current connections in 5 minutes, shut down the server in 10 minutes, and display a warning message to the users at login. The message can be a mixture of text and the magic cookies defined in Table 24.4. It is important to keep in mind that the message can be a maximum of 75 characters in length. Additionally, it is not important to know how many characters the magic cookies take because the system knows this information and truncates the message at 75 characters.
Table 24.4. Magic Cookies for the ftpshut Command
Cookie | Description |
|---|---|
| Time the system will be shut down |
| Time new connections will be denied |
| Time current connections will be dropped |
| Current working directory |
| Server administrator’s email address as specified in the |
| Available free space in the current working directories partition, in kilobytes |
| Local host time |
| Maximum number of allowed connections in this user class |
| Current number of connections for this user class |
| Remote hostname |
| Local time, in the form of |
| Username given at login |
When ftpshut is issued to the system, it creates a file that stores the necessary information. The ftprestart command removes this file for all servers, either canceling the impending shutdown or removing the shutdown file and restarting the FTP server. The ftprestart has only one optional argument, -V, to show version information.
The xferlog file gives a log of what transactions have occurred with the FTP server. Depending on the settings in the /etc/ftpaccess file, the contents of this file can contain the files sent or received, by who, with a date stamp. Table 24.5 lists the fields of this file. The same information can also be found in the corresponding man page included in the wu-ftp RPM.
Table 24.5. /var/log/xferlog Fields
Field | Description |
|---|---|
| Current local time in the form of DDD MMM dd hh:mm:ss YYYY, where DDD is the day of the week, MMM is the month, dd is the day of the month, hh is the hour, mm is the minutes, ss is the seconds, and YYYY is the year. |
| Total time in seconds for the transfer. |
| Remote hostname. |
| Size of the transferred file in bytes. |
| Name of the file. |
| A single character indicating the transfer type. The types are
|
| One or more character flags indicating any special action taken by the server. The values are
|
| Indicates whether the file was sent from or received by the server. |
| The way in which the user logged in to the server. The values are
|
| If logged in as a real user, the username. If the access mode was |
| The name of the service used, usually FTP. |
| Type of authentication used. The values are
|
| This is the user ID returned to the server based on the authentication method used to access the server. An |
| A single-character field indicating the status of the transfer. The values are
|
An example of this file is seen in Listing 24.6.
Example 24.6. Sample /var/log/xferlog File with Inbound and Outbound Logging
Mon Sep 3 07:13:05 2001 1 localhost.localdomain 100
  /var/ftp/pub/README b o a [email protected] ftp 0 * c
Mon Sep 3 02:35:35 2001 1 helios 8 /var/ftp/pub/configuration a
_ o a [email protected] ftp 0 * c
Mon Sep 3 02:35:35 2001 1 helios 8 /var/ftp/pub/temp.txt a o a
[email protected] ftp 0 * c
Mon Sep 3 02:35:35 2001 1 helios 8 /var/ftp/pub/tftp-server-
0.17-14.i386.rpm a o a [email protected] ftp 0 * c
Mon Sep 3 02:35:35 2001 1 helios 8 /var/ftp/pub/wu-ftpd-2.6.1-
22.i386.rpm a o a [email protected] ftp 0 * c
http://www.wu-ftpd.org/—wu-ftp official website.
http://www.cert.org/—Computer emergency response team.
http://www.openssh.com/—OpenSSH home page and source for the latest version of OpenSSH and its component clients, such as sftp.
http://www.cert.org/tech_tips/anonymous_ftp_config.html—CERT anonymous FTP configuration guidelines.
http://vsftpd.beasts.org/—Home page for the vsftd
ftp://vsftpd.beasts.org/users/cevans/—Download site for the latest releases of the vsftpd server.