
Now, let's bring up the Arduino IDE. Before you start coding, you'll need to get the library associated with your display and install it in the IDE.
Note
For this display, the library is found at http://www.seeedstudio.com/wiki/Grove_-_Serial_LCD. If you go to this website and select the library, it will take you to another web page that will allow you to download a .zip file with the library.
Here are the steps:
- Download the library. The
.zipfile should then exist in your Downloads directory. Now, you'll need to place these files in the libraries directory of your Arduino installation. The following screenshot shows the directory structure of the most common installation of the Arduino IDE: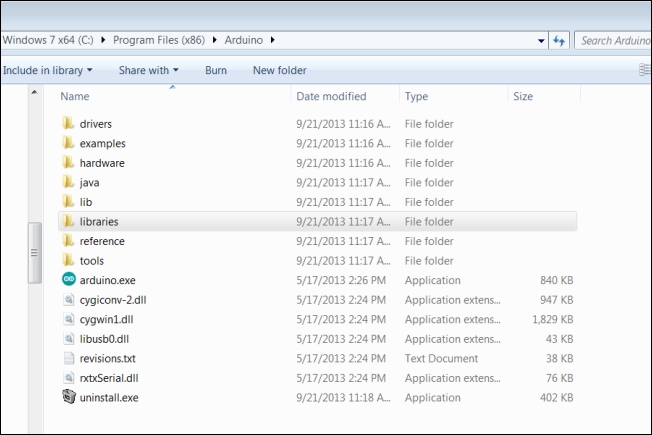
- Note the location of this directory. Now, go to your Downloads directory and unzip the
.zipfile that holds your library. When it asks for the directory to unzip to, select this directory. When complete, this library should be added as a subdirectory in your libraries directory, as shown in the following screenshot: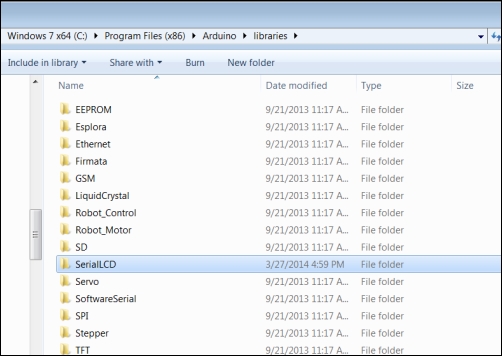
- Note that the files are in the libraries directory under SerialLCD. If you'd like to do this automatically, open the Arduino IDE. Select Sketch, click on Import Library…, and then click on Add Library…, as shown in the following screenshot:
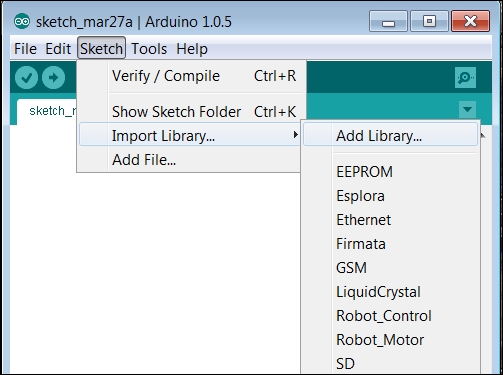
- This will open up a file dialog box. Go to the directory where you downloaded the file and select the
.zipfile. Once the library is installed, go back to the main IDE screen and you should be able to select one of the examples from the SerialLCD library, for example, the HelloWorld example, as seen in the following screenshot: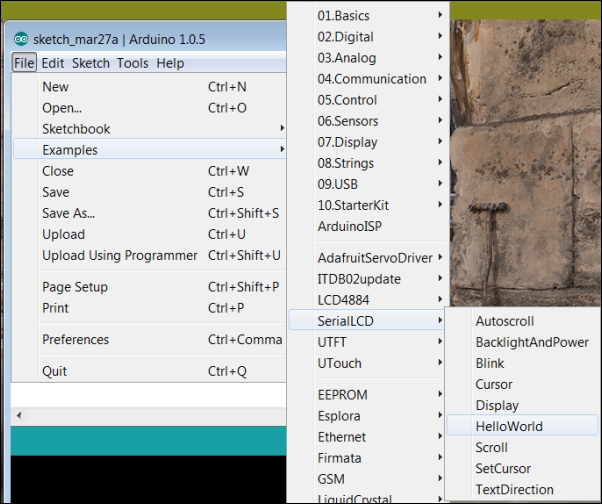
- This should open the sketch of the HelloWorld example. It should look like the following screenshot:
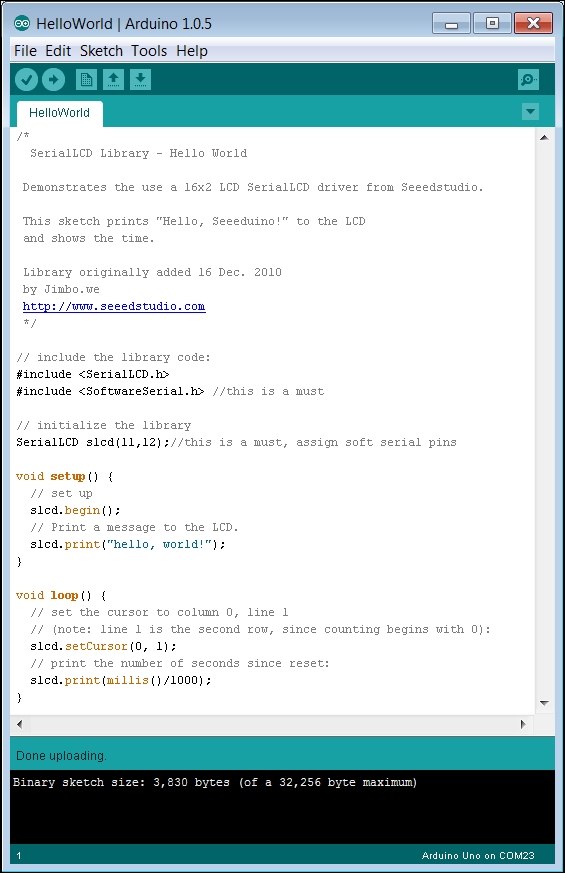
Note that the
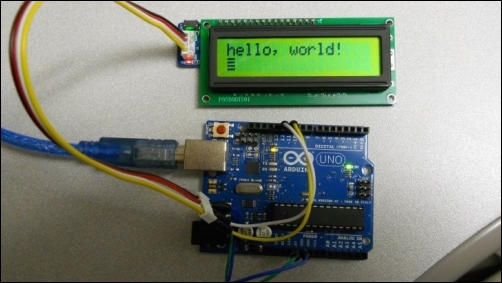
slcd.print("hello, world!");statement is the way to send a string text to the serially connected LCD. Theslcd.setCursor(0, 1);command sets the cursor to the start of the second line of the display. Theslcd.print(millis()/1000);statement is an example of how to print a number to the display, in this case, the number of seconds. - Now upload the sketch and you should see the hello, world! statement on the display, as shown in the following image:
Now, you can add all sorts of text by simply editing the slcd.print("hello, world!"); line in the setup() function or adding this same function to the loop() function. Make sure that if you place a message in the loop, use the delay(2000) function after it to give the user some time to read the display before you change it.