
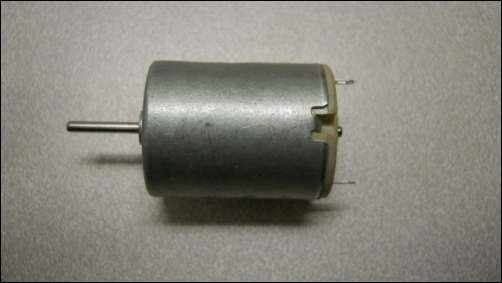
The first step in connecting a DC motor to Arduino is to actually obtain a DC motor. The motors that you will be dealing with here are simple, small DC motors. The motors must not require much current because Arduinos cannot supply more than 40 mA of current directly. For this example, you can use a small 6 V DC motor available at most electronics or hobby stores. The following figure shows one such motor:
In order to connect this motor to your Arduino, you'll need some additional parts. You'll need two male-to-male solderless jumper cables and two alligator clip jumper cables. You'll also need a transistor, a TIP120 to be specific. In this case, the transistor will act like an electronic switch; when you send a control signal to it, the power will flow from the battery. You'll also need a diode, the 1N4004 diode. The diode is a device that protects from reverse power flow. You'll need a 1000 ohm resistor; this will translate the control signal out of Arduino to the proper current for the transistor.
You'll also add a 1 microfarad ceramic capacitor; this capacitor filters out some of the switching noise that can appear on the wires that control the motor. These last four parts should be available at almost any electronics store or online. These parts should be very inexpensive. To control this motor, you'll connect one motor connector to digital pin 11 and the other connector to GND on Arduino. You could use one of the voltage sources on Arduino, but some DC motors can draw lots of current, more than what our Arduino can supply. A safer way is to connect the DC motor supply to a battery holder with four AA batteries.
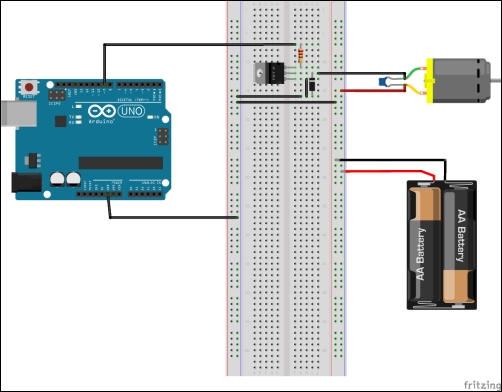
Connect Arduino, transistor, diode, resistor, and power supply as shown in the following figure:
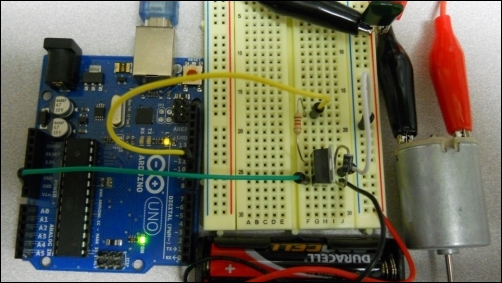
When plugged into the breadboard, the preceding circuit will look like the following figure:
Now, you can start the Arduino IDE and enter a program to send a control signal to the DC motor.
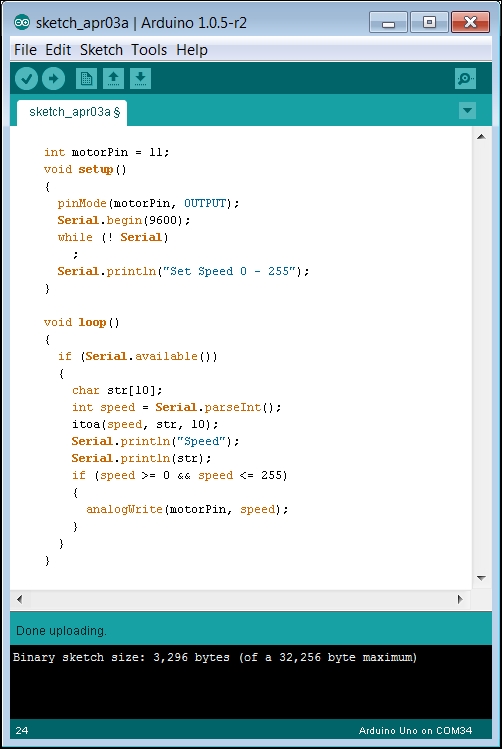
Now, you'll need to type the following code into the Arduino IDE:
Now, upload the code to your Arduino. Your motor should start running. Once you have uploaded the code, you'll want to open up the Serial Monitor tab so that you can command your motor to run at different speeds. To do this, perform the following steps:
- First, navigate to Tools | Serial Monitor. When you open this, you should see a pop-up window that displays the text from your program as shown in the following screenshot:
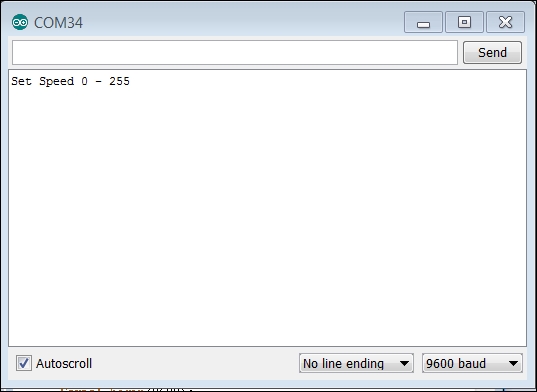
- Enter a value, for example,
255, and then click on Send. Your motor should speed up. Now, enter another number, for example,0, and then click on Send. Your motor should stop. Numbers between these two should adjust the speed of your DC motor. Unfortunately, the motor can only go in one direction. The value 255 sends an output to the motor controller that should drive it to its maximum speed, whereas the value 0 sends an output that corresponds with a speed of 0.
The next example will provide a solution if you'd like bidirectional control for your DC motor.