
One of the most popular and well-documented ways of connecting to Arduino via an RF connection is to use an XBee device. This device uses a technology called ZigBee, and it is made for long-range wireless communications. These types of devices can work up to a range of 1 mile.
The ZigBee standard is built upon the IEEE 802.15.4 standard, a standard that was created to allow a set of devices to communicate with each other to enable low data rate coordination of multiple devices.
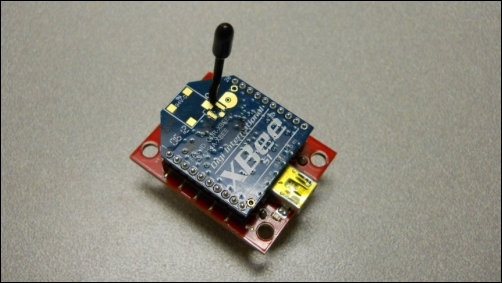
The other standard that you might hear as you try to purchase or use devices like these is XBee. This is a specific company's implementation, Digi, of several different wireless standards with standard hardware modules that can connect in many different ways to different embedded systems. They make several devices that support ZigBee standard. The following image shows the type of device that supports ZigBee attached to a small XBee-specific shield that provides a USB port:
The advantage of using this device is that it is configured to make it very easy to create and manage a simple link between two XBee series 1 devices. To make this work, you'll need the following four items:
- Make sure you have two XBee devices that support ZigBee series #1.
- You'll also need to purchase a small XBee-specific shield that provides a USB port connection to one of the two devices. This will provide communication from a host computer.
- You'll also need to buy a shield that plugs into your Arduino so that you can interface with the XBee devices. The following is an image of the shield plugged into Arduino with the XBee device plugged in:

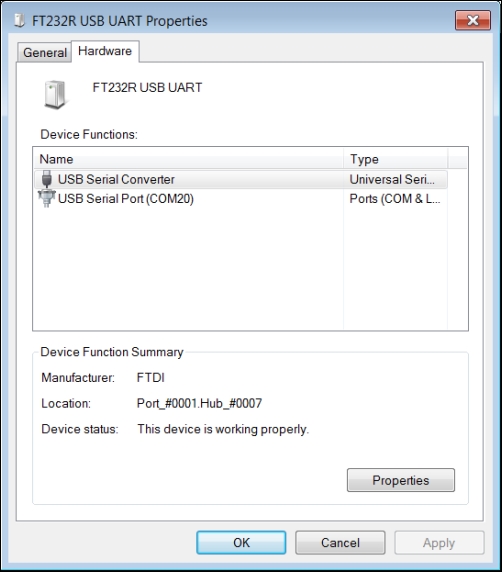
Now, let's start to configure your two devices to talk. You'll need to configure both devices by plugging them into your host computer. Plug one of the devices into the small XBee-specific USB shield and then connect the shield to your personal computer. Your computer should find the latest drivers for the device. You should see your device when you select the Devices and Printers selection from the Start menu, as shown in the following screenshot:

The device is now available to communicate via the IEEE 802.15.4 wireless interface. We could set up a full ZigBee-compliant network, but we're just going to communicate from one device to another directly. So, we'll just use the device as a serial port connection. Double-click on the device and then select the Hardware tab; you should see the following screenshot:
Note that the device is connected to the COM20 serial port. We'll use this to communicate with the device and configure it. You can use any terminal emulator program; I like to use PuTTY. If you don't have PuTTY, you can download it from www.chiark.greenend.org.uk/~sgtatham/putty/download.html. This will provide an executable file that you can run to talk with and configure the devices.
Perform the following steps to configure the device:
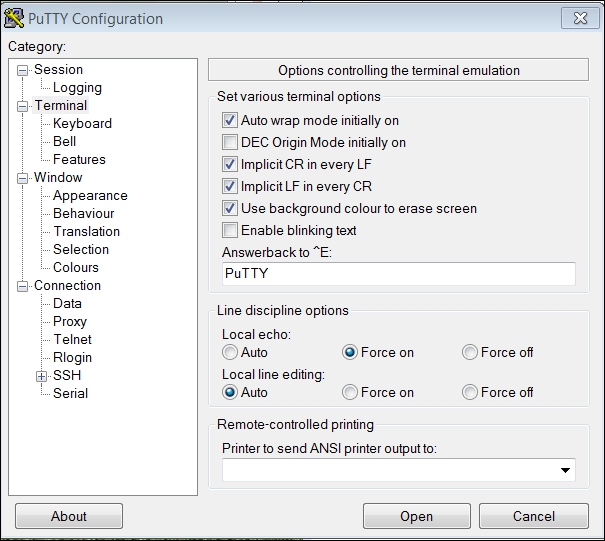
- Open up PuTTY and select the Serial selection and, in this case, the COM20 port. The following screenshot shows you how to fill in the PuTTY window:

- Configure the terminal window and set the following parameters:
- Speed (baud) as 9600
- Data bits as
8 - Stop bit as
1 - Parity as None

- Make sure that you also select Force on in the Local echo option and check the Implicit CR in every LF and Implicit LF in every CR checkboxes (available under the Terminal tab in the Category selection), as shown in the following screenshot:
- Connect to the device by selecting Open.
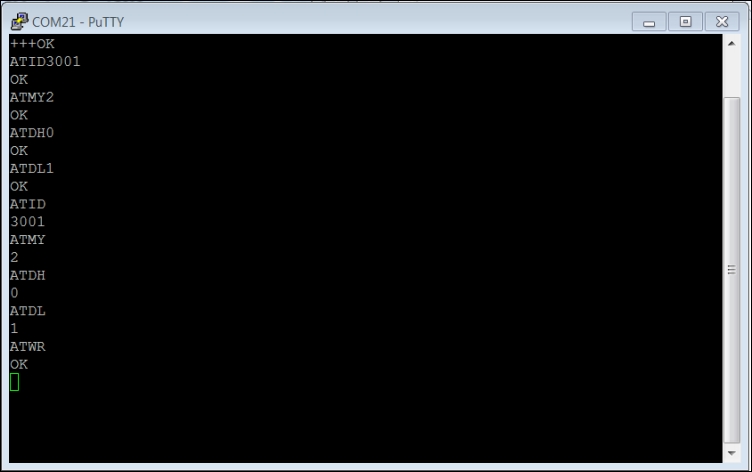
- Enter the following commands to the device through the terminal window:
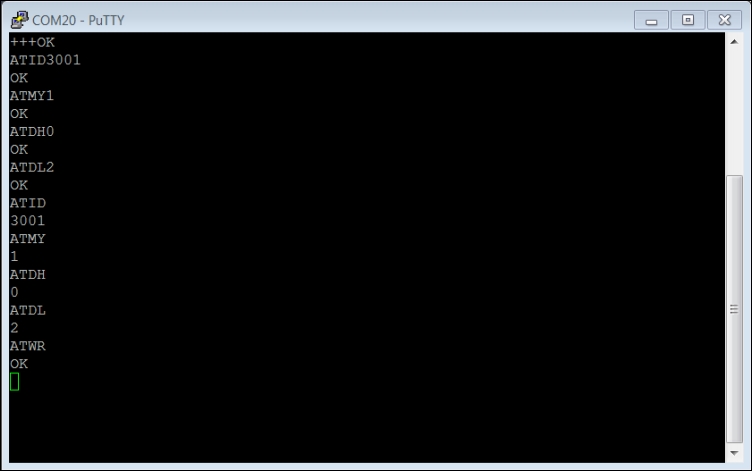
The OK response comes back from the device as you enter each command. The first device is now configured. Remove it from the small XBee-specific shield and plug it into the Arduino XBee shield.
Now, plug the second device into the small XBee shield and then plug it into the PC. Note that it might choose a different COM port; go to the Devices and Printers selection, double-click on the device, and select the Hardware tab to find the COM port. Follow the same steps to configure the second device, except that there are two changes. The ATMY value will be 2, and the ATDL value will be 1. The following screenshot shows the terminal window for these commands:
The two devices are now ready to communicate.