
User Filters are among Sets on Tableau Desktop and are based on a Dimension. Depending on who is the current logged-in user on Tableau Server, you can what data the user sees:
- To add a User Filter, click on Server in the top menu, go to Create a User Filter, and choose the Field to secure. The following screenshot illustrates the creation of a User Filter on Region...:
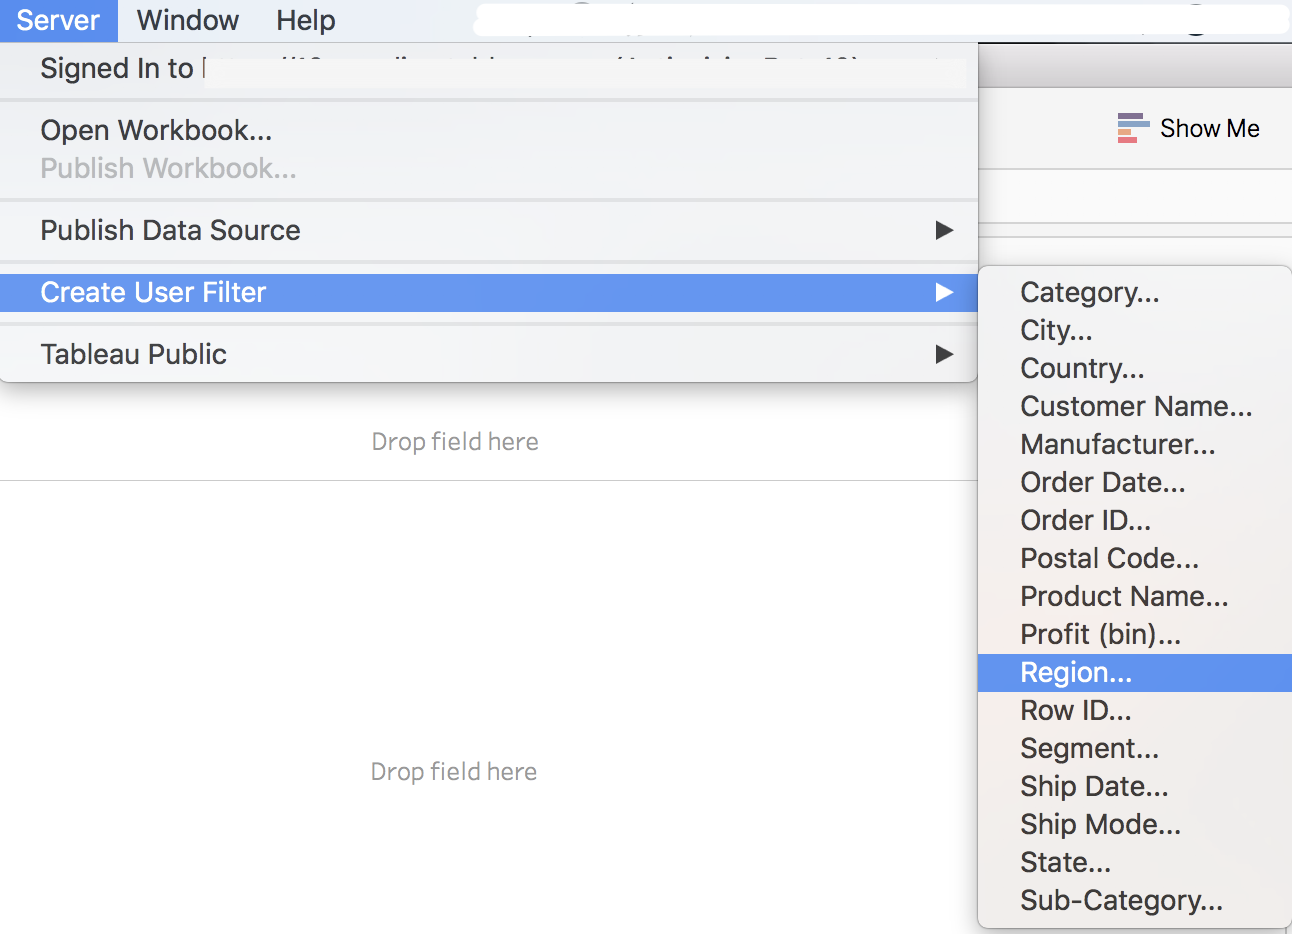
- Tableau opens a new window where you can select, on the left, a User or a Group and select the values of the field that the User or Group can see.
- Once you've created the User Filter, you'll see a new set in your Data Source.
- To use a User Filter, add the corresponding set to the Filter shelf or, better, as a Data Source filter (with Use all option).
The reason it's better to add a User Filter on the Data Source filters rather than the Filter shelf is to increase the security. If you put a User Filter in the Filter shelf, and if a User can download or edit the Workbook, they can remove the User Filter from the Filters shelf, and they'll have access to all the data. Also, if someone starts a new analysis based on this Data Source, they'll also have access to all the data. Always put the User Filter on the Data Source Filters to make sure that no one can access data they're not supposed to see.
Now, to illustrate the usage of a User Filter, let's see an example with the Sample-Superstore Data Source. For this example, I created five Groups on Tableau Server: Central, South, West, East, and Top Management.
It's not a problem if you can't create the same groups as me to replicate this example. Just use existing Groups or Users on your Tableau Server, you can't break anything.
Let's start:
- Create a new User Filter on Region and name it Region Filter.
- In the User Filter configuration window, for each Group, select the members of the field that they are allowed to see. For example, for the West group, select the West value. For the Top Management group, select all members, and for All Users, select none.
Here's an example of the configuration for the West group:

- Build a simple visualization: double click on State, then add Sales on Color.
- Put the Region Filter Set in the Filter shelf to test it. If you're not inside one of the Groups where we define access, you should not see anything.
- At the very bottom of the Tableau window, you can see the current logged-in User in Tableau Server, as framed in the following screenshot:

- Beside the name of the logged-in User, you can click on the arrow to select another User or Group.
- With this option, choose the West group and the User Filter will automatically filter the Region to keep only the West value, as you can see here:

- You can test the same with Top Management—all the regions will be displayed:

- When you're confident that the User Filter works fine, you can remove it from the Filters shelf.
- Right-click on the Data Source and select Edit Data Source Filters.
- Click on the Add button, and select the Region Filter.
- Select the Use all option, and click on OK. The User Filter is applied on all the data source, thereby enhancing the security of your data.
This is the first way of securing your data. As you may have guessed, if you have hundreds of Users to give access to and hundreds of different values in a Field, the User Filter will be extremely long to create and impossible to maintain. In those cases, we create a Row-level filter.