
With Balsamiq now installed and opened on your computer's desktop, you are essentially looking at the entirety of the application. Let's break it down into its essential pieces. There are two main areas of focus:
- Application menu
- Application view
The Application menu, like any menu found in most applications, is found at the top of your computer screen, as shown in the following screenshot:
While most of the items found within these menus are common to all applications, like Save, Open, New, Cut, Copy, Paste, and so on, there are a few that are specific to Balsamiq and that may be helpful to you when working with the tool.
The ones I am referring to can be found under the File menu, as shown in the following screenshot:

This menu item acts as it sounds by making a duplicate of whatever Balsamiq page is currently active on your screen.
This command will save any changes made to multiple pages currently open on your screen. As you will most definitely be working with multiple pages, I am sure you will find this tool to be very useful.
Selecting this command from the File menu saves the entire active page as a .png file. You can also use this command to save parts of a page by performing the following steps:
- Press the Shift key on your computer keyboard as you select individual elements on the canvas.
- Select Export to PNG Image from the File menu.
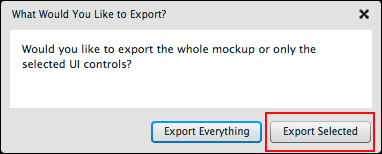
If you choose to save only a portion of the screen, you will see a dialog box with the option to save only what you selected (Export Selected). Or, if you so choose, you can save the entire page with one click (Export Everything), as shown in the following screenshot:
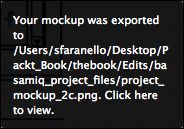
Upon exporting your work, a dialog box will appear telling you where exactly the .png file was saved, as shown in the following screenshot:
Balsamiq mockup files use the file extension .bmml, which stands for Balsamiq Mockups Markup Language.
Unlike the previous command which saved only the active page as a single .png file, this command will save every open page as a separate .png file.
Choosing this command converts all of your open .bmml files into a single, multi-page PDF document that you can print, email, use for building paper prototypes, share with peers, or present to a larger group.
This menu item copies the contents of an entire canvas, or some selected elements of the canvas, onto the clipboard. Once that is done, the content can then be pasted onto a new Balsamiq canvas or into any application that accepts imPhotoshop, MS Word, PowerPoint, and so on.
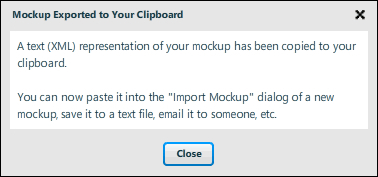
Speaking of raw XML code, Export Mockup XML
will export an entire .bmml file into raw XML code. From there, the XML code can be imported into another Balsamiq page or saved as pure XML code to share with other developers. When selecting this command, you will see the following pop-up message confirming the action:
To import XML code back into a .bmml file, open a new canvas (Command + N or Ctrl + N) and paste your copied XML code into the text field that appears, as shown in the following screenshot:
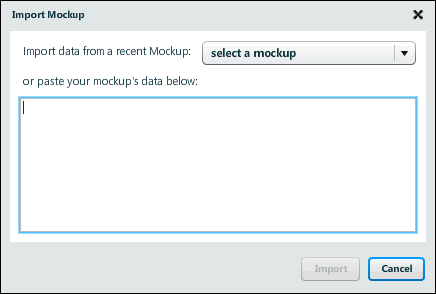
If you want to import an entire page as XML, click the menu item called select a mockup and select a page from the drop-down menu. Once a selection is made, the Import button will become active.
Now let's take a closer look at Balsamiq's main application window. This is where you will be spending most of your time.
The application window in the following screenshot, shown here in full, can be broken down into four distinct areas:
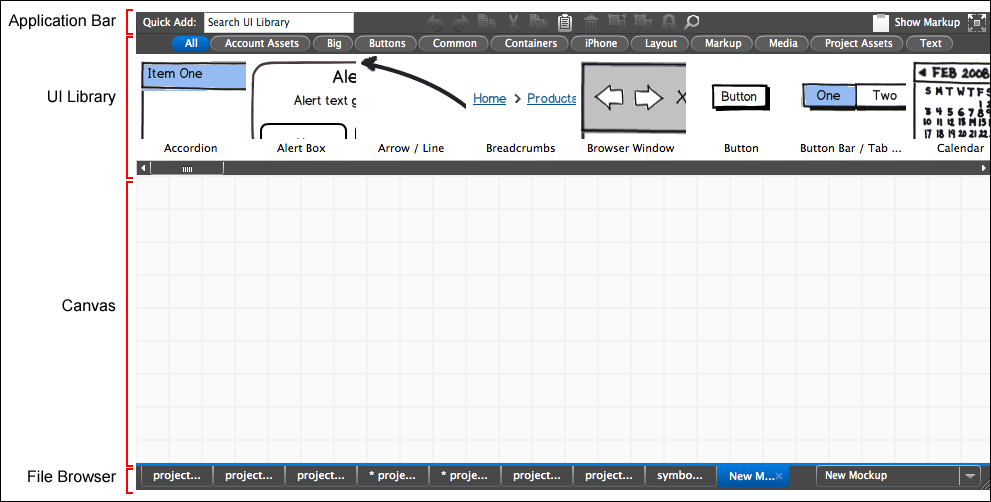
The Application Bar sits atop the main application window and contains some of the most commonly used Balsamiq tools.
Starting in the upper-left of the application bar, you will find the Quick Add tool, as shown in the following screenshot:
This tool allows you to find items in the UI Library quickly by typing a letter or word into the text field, utilizing a Google-like autocomplete functionality, as shown in the following screenshot:
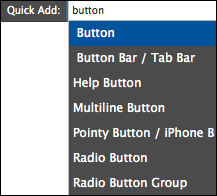
Select the most appropriate result in the results list and press Enter on your keyboard. The chosen widget will appear on the canvas. Give it a try.
The Tool Bar offers many of the same tools found in the Edit menu at the top of the screen. However, rather than having to go up to the Edit menu for items like Undo, Redo, Duplicate, Cut, Copy, Paste, and so on, the Tool Bar gives them to you in a more convenient, one-click location, as shown in the following screenshot:
To learn the name of an icon within the Property Inspector, simply hover your mouse pointer over an icon and wait until you see its name in the tooltip provided.
Balsamiq allows you to add notes to your wireframe to note things like user instructions, special notes to the developers, explanations of complicated areas, numbering of items, and so on. These notes are referred to in Balsamiq as markup. By clicking on the Show Markup button, you can toggle markup on and off, as shown in the following screenshot:
Creating markup in Balsamiq is easy. Just click the button labeled Markup in the UI Library to filter just those widgets, as shown in the following screenshot:

We will be taking a closer look at markup in Chapter 6, Presenting Your Work.
Full Screen (Presentation Mode) is a one-click toggle button that resizes Balsamiq to full screen. You will use this functionality when you start presenting your work to clients, or if you want to demonstrate some interactivity using a clickable prototype.
We will learn more about Balsamiq's prototyping capabilities, in Chapter 6, Presenting your Work.
To return to the smaller screen, simply click the Esc key on your computer keyboard.
The UI Library is the part of the Balsamiq application that you will be using often as you build your wireframes. Each graphical element within the library is referred to as a widget. Simply click-and-drag, or double-click on a widget, and it will appear on your canvas, as shown in the following screenshot:

As you can see in the previous screenshot, there are quite a few widgets to choose from. Rather than defining each one here, they are introduced throughout the remainder of this book.
Note
To view a complete description for every widget in the UI Library, visit https://support.mybalsamiq.com/projects/uilibrary/story.
To use the UI Library, click a button just above the UI Library to isolate a specific category of widgets, or simply click on the All button, scroll to the desired element, and drag it onto the canvas. You can also double-click on a widget to place it on the canvas.
The canvas acts as a blank sheet of paper upon which you build your ideas and turn them into working wireframes. Just place some widgets from the UI Library onto your canvas and start building. For more on working with the canvas, explore Chapter 2, Building a Project.
At the very bottom of the application window is the File Browser. Each open canvas page is shown as a tab containing the name of that file. Since you can only work on one page at a time in Balsamiq, the currently active page is highlighted in blue, as shown in the following screenshot:
There are a few things to note about the file browser:
- Viewing pages: Click on the tab of the page you want to work on.
- Rearranging pages: While clicking on a page tab, drag it left or right and to its new position in the File Browser.
- Closing a page: Click on the x icon located to the right of each tab, as shown in the following screenshot:

- Adding a page: Hover over a tab in the File Browser and a plus sign will appear, as shown in the following screenshot. Clicking on the plus sign will create a blank canvas page titled New Mockup.

- Saving a page: When a change is made to the canvas, the page tab will display an asterisk to the left of the page title, as shown in the following screenshot:

To remove the asterisk, you must first save the page by selecting File | Save, or by pressing Command + S or Ctrl + S, on your keyboard.
- Renaming a page: Right-click on the page tab to reveal a menu of options. Select Rename Mockup..., as shown in the following screenshot:
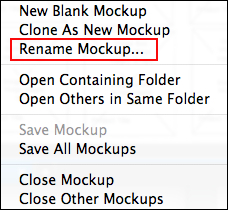
Type a new filename into the text field that appears.
Click on the arrow to see all of your page titles in full. Select one from the menu to bring it into view, as shown in the following screenshot:

If you haven't already done so, drag a few elements from the UI Library onto the canvas. Once placed, click on any one of them to expose the Property Inspector, as shown in the following screenshot:
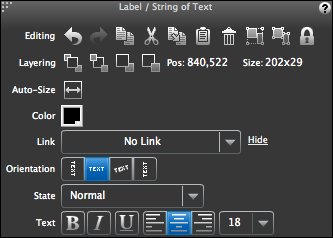
The Property Inspector is an important tool for controlling much of what happens on the canvas and is a tool you will be using very often in Balsamiq and throughout this book. As you can see in the previous screenshot, there are a number of functions that exist within the Property Inspector. Some might even look familiar to you as they work the same as in other applications.
We will explore many tools within the Property Inspector throughout this book. For now, take some time to explore your new Balsamiq backyard. And don't worry about breaking anything. It is impossible to break Balsamiq.