
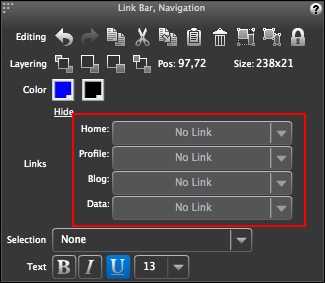
Now we are ready to link the navigation to their respective pages. With the navigation selected, you will see a section in the Property Inspector called Links. You will notice that the links you just updated are represented there as well, as shown in the following screenshot:
To link the pages, perform the following steps:
When finished, your navigation should look like the following screenshot:
Notice the red arrows that appear next to each link. This is Balsamiq's way of indicating that these areas are now linked.
You may be wondering why the links don't actually work when you click on them. That's because you first have to be in the presentation mode. Presentation mode is what Balsamiq uses to present your work to the outside world.
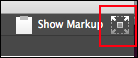
To activate it, click the icon, known as the Full Screen Presentation button, in the upper-right corner of your Balsamiq application window, as shown in the following screenshot:
You can also press Command + F/Ctrl + F on your keyboard to activate it. Once in the presentation mode, click the navigation links again. They are now clickable and should link to the pages you specified.
Presentation mode offers two ways to present links to your audience: Invisible links and visible links.
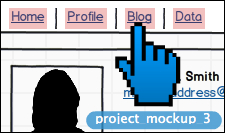
- Invisible links: In this mode, all link hotspots are transparent, meaning the page will look normal, with no indication that there are any links present. You simply hover your mouse over an area that you know is linked and the cursor will change to a pointing hand, as shown in the following screenshot:

- Visible links: In this mode, all links are visible via shaded blocks around the text. There is also an unmistakable giant blue arrow pointing them out, as shown in the following screenshot:

Once you hover over a link, the arrow becomes a giant blue hand pointer. Underneath it, you will also see the page that it is linked to, as shown in the following screenshot:
Keep in mind you can also toggle between the two presentation modes.
Perform the following steps:
- Hover the mouse pointer over the bottom-right corner of the canvas until you see a set of three icons.
- Click the first icon, Show Linking Hints and Cursor, to toggle between visible and invisible attributes.
You can also perform this action by using the L key on your keyboard.

Let's briefly review the remaining two icons in this set as well.

From left to right, they are as follows:
- Show Markup: This clipboard icon toggles markup between on and off. Pressing the K key will perform the same action. We will cover markup later in this chapter.
- Edit this mockup: This pencil icon closes the presentation mode and returns to the wireframe for additional editing. Pressing the E key or pressing Esc will perform the same action.