
Now, we will create our PechaKucha in Prezi about our last summer's holiday.
First, we'll collect at least twenty images of our vacation to Croatia. We've taken quite a few pictures with our mobile phone, so we search for twenty to thirty pictures and copy them to our computer. We picked a few more so that we can decide inside Prezi which pictures fit best.
Open a new prezi, choose the blank template, and delete all the objects on the canvas. Make sure your canvas is completely empty.
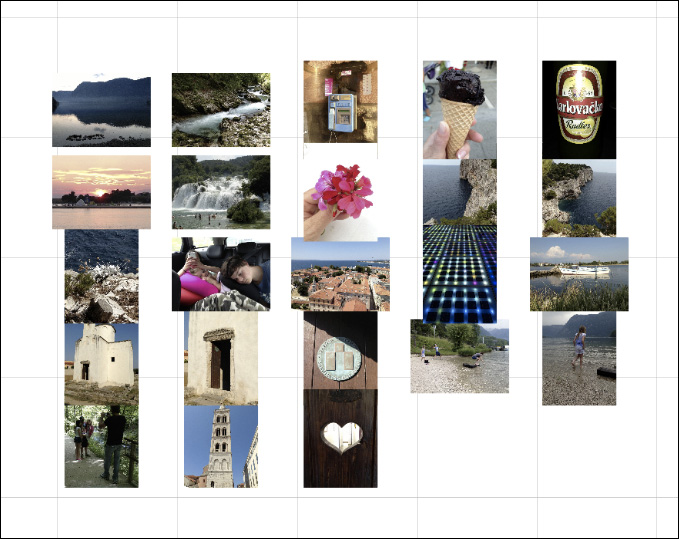
Navigate to Insert | Image and choose all the pictures you have already selected. Prezi puts the images automatically in a grid. Choose multiple pictures while holding down the Shift key when you click on them, as shown in the following screenshot:

As you can see in the previous screenshot, not all pictures have the right position. Some pictures are upside down and some should be portrait. This could especially happen we you use pictures from your mobile phone.
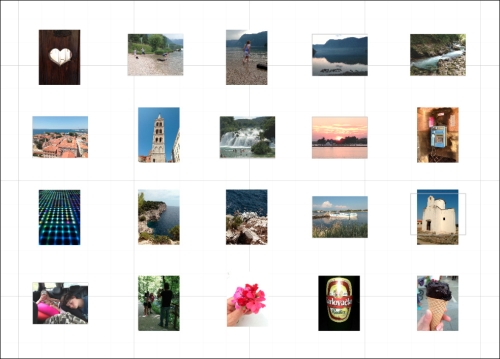
Use the transformation tool to rotate the pictures that should be rotated. Hold down the Shift key while rotating to rotate around exactly 90 or 180 degrees. You can see the result in the next screenshot:
Now, let's arrange the pictures in the right order. The first and the last image are very important, the rest is just filling in. We chose the cut-out heart as the first picture because we want to start our holiday story with a family-thing and a heart that symbolizes love. In between, we want to show all kind of nice pictures to tell our story, and we also want to show some fun pictures. Make sure you choose exactly twenty pictures. Delete the pictures you don't need.
We want our PechaKucha to end with the subject we started our presentation with, which is family. So, we have chosen the picture with our kids asleep in the back of the car as the last picture. We thought that it's a nice picture to end our PechaKucha.
In Prezi, we put the pictures in the right order, five in a row. But note this! After the first row, we don't start at the beginning of the second row; we start from the end of the second row and work our way back to the beginning. The third row starts at the beginning and in the fourth row we start from the end again. We do this to avoid large steps in our path and to get a much more fluent flow in our presentation.
The problem we had with our pictures is that if we add these pictures to the path, not all the pictures get a good position. This is probably due to one of the settings, because they were taken with a mobile phone. Maybe you won't have this problem with your pictures and you can add them straight to the path, but we had to use invisible frames. Invisible frames are also great when you are determining the a part of the picture you want to show, especially when your picture is in portrait mode.
Draw an invisible frame with ratio 4:3 (by holding down the Shift key) and as large as one of the landscape pictures. Copy (Ctrl/Cmd + C) and paste (Ctrl/Cmd + V) the picture a few times and place them over the other pictures. You can also use the Ctrl/Cmd + D keys to duplicate the invisible frame.
Now, add all the invisible frames to the path. If you don't want to use invisible frames, you can add all the pictures to the path in the right order, as shown in the following screenshot:
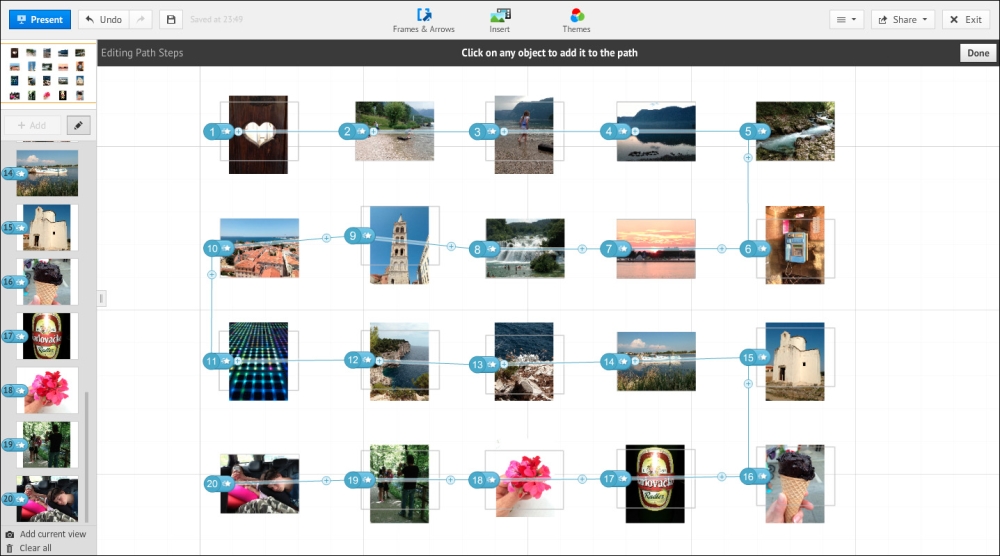
As you can see, the flow of the presentation is from left to right in the first row, from right to left in the second row, from left to right again in the third row, and finally from right to left in the fourth row. We are finished with our prezi.
Click on Present to test your PechaKucha. First, walk through it by clicking the arrows in the bottom of the screen or using the arrow keys on your keyboard. When you think the order is okay, test the PechaKucha by holding down the Autoplay option and choosing 20 sec.