
In the last step, you wrote down your story. Now, you are going to transform this story to something visual—a storyboard.
A lot of people are afraid to draw. They say they can't draw. Well, most kids can draw, so most people should be able to draw as well. You don't have to be an artist and we won't hang your storyboard in an art gallery. The storyboard you are creating is just for you. Just for you to create better presentations. Of course, we'll give you the best tips and you'll see that you can create a storyboard as well. So let's move on!
This task consists of two parts. First we are going to divide the story into views, and then we are going to draw our storyboard.
The first step in creating our storyboard is to divide the written story into views. Every time the screen changes, there is a different view. You can compare a view to a slide. Actually, we don't like the word slide, because that might put you in a PowerPoint mode and that's not what we want right now.
Print your written story and start dividing your story into views. Every time you think something else should be on screen, draw a line next to the sentences to combine them and put a number next to the line.
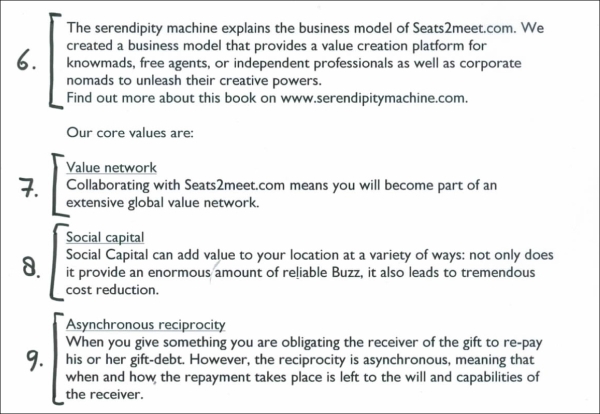
Take a look at the next image to understand this better:
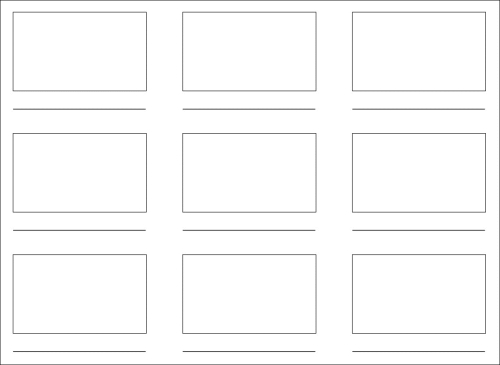
Take page number six, put the largest side of the paper at the bottom (landscape), and draw nine rectangles on it. Look at the next image to see how this will look like. You can also download our storyboard example from www.prezihotshot.com as a PDF file so that you can print it.
Give every view a number. Also, give the page a number because you might need multiple pages for your storyboard. Then, start drawing your storyboard.
Here are some tips that might help you:
- Make your drawings as simple as possible.
- It's ok to use words in your storyboard.
- Don't try to draw every detail. It's ok to draw a logo as a circle or square.
- Use symbols to visualize whether you are zooming in (magnifier with plus sign), zooming out (magnifier with minus sign), making a vertical transition (arrow up or down), making a horizontal transition (arrow right or left), or using fade-in animation (plus sign). Put these symbols between the views.
- If you need to explain something, write it under the rectangle in just a few words.
- Have some fun while creating your drawings.
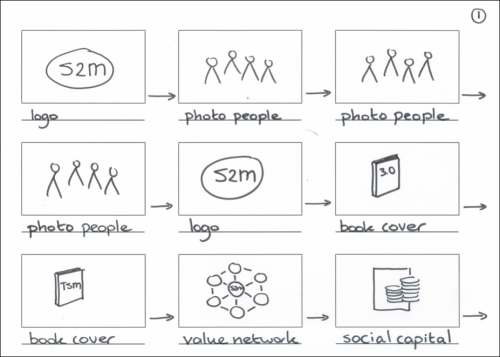
Take a look at our storyboard. This is the first page of our storyboard:
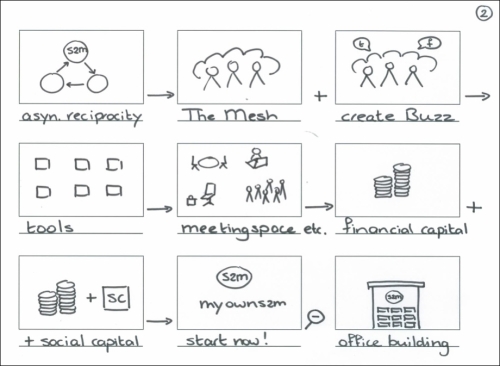
Here is our second page of the storyboard:
We have already come really far in our process. In this step, we created the storyboard for our presentation. It's a visual representation of the story we are going to tell on the stage. It's important that you don't visualize every sentence. Remember the things you show in your presentation should be of added value.