When your prezumé is finished, you are not finished. Your prezumé will not reach your perfect job automatically. You'll have to share it first.
Before you can share your prezi, you have to make it public. Maybe it's already public, but you better check this. If you have a free Public account your prezi will automatically be public and reusable by default. If you have a paid account or an educational Enjoy account, your prezis will be private by default.
If you do not want to make your prezi public, but you still want to share it, you'll also have plenty of options. Just keep reading.
You check whether your prezi is public. Go to prezi.com, click on the Your prezis tab, find your prezume and click on it. At the bottom-right corner, just under your prezi, you'll find the privacy status (Public & reusable, Public, Hidden, or Private). Click on the status if you want to change it. If you're still in the Prezi editor, first save and close your prezi by clicking on the Exit button.
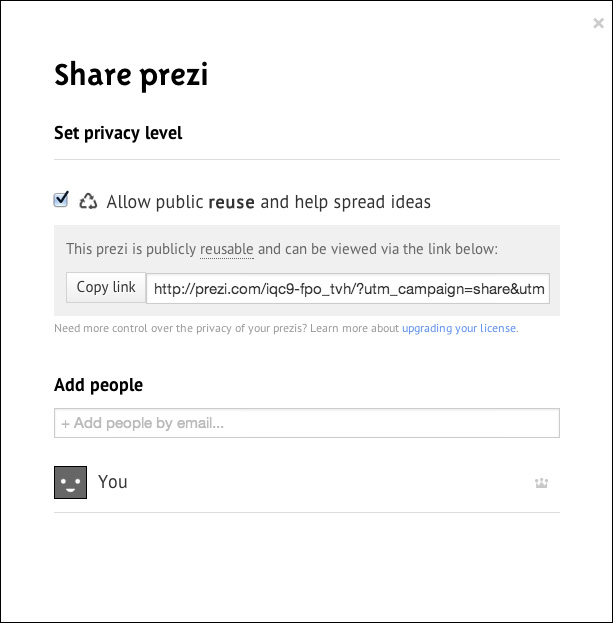
With a free Public account, you'll have two options:
- Public & reusable
- Public
This is easy because your prezi is automatically public. The default value is Public & reusable. Reusable means that everyone can make a copy of your prezi to their account and reuse your content. If you don't want that, uncheck the checkbox Allow public reuse and help spread ideas, as shown in the following screenshot:
If you have a paid account or an educational account (Enjoy or Pro), you'll have four options:
- Public & reusable
- Public
- Hidden
- Private
The default value is Hidden, as shown in the following screenshot:
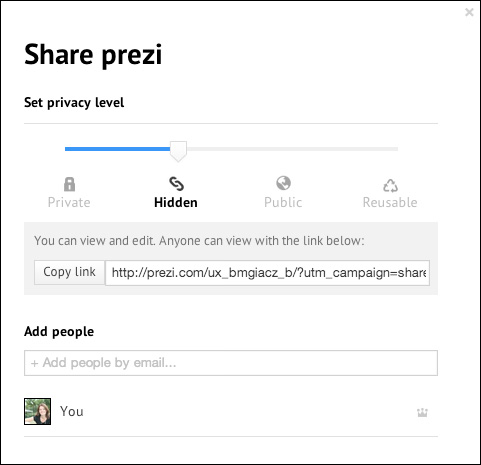
Use the option Private if you don't want anyone to view your prezi unless you invite them. If you keep the option Hidden, your prezi will be viewable by link but not searchable on prezi.com/explore.
Move the slider to Public to make your prezi public or to Reusable to make it public and reusable.
If you want to keep your prezumé private, you can still share your prezi to specific people. However, if you want to share it with a large audience, you should set your prezi to public so that other people can share your prezumé too.
Go to prezi.com, click on the Your prezis tab, and find and click your prezumé. Click on the Share button under your prezi. You might notice this is the same window where you set your privacy level. So, if you want, you can set both at the same time.
You can share your prezumé in several ways:
- Sharing with the world
- Sharing with a specific person
- Embedding your prezumé on your website
- Adding your prezi to your Facebook timeline
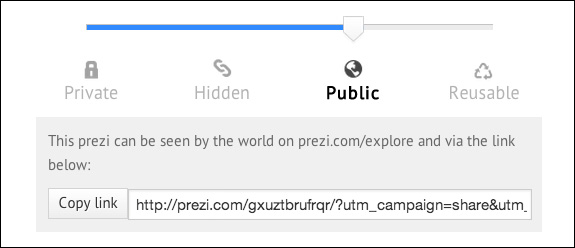
The following steps will show you how to share your prezi with the world:
- You can choose from three privacy levels: Public & reusable, Public, and Hidden.
- Click on the Copy link button and paste it into these channels as shown in the following screenshot:
If you want to have more control over your sharing, you can also share your prezumé with a specific person. You can do that at every level. So, you can keep your prezi private and still share it.
Perform the following steps to share your prezi with a specific person:
- In the Add people box, fill in the e-mail address of the person that you want to share your prezi with.
- Choose Viewer and click on the button Add. An e-mail is sent with a link of the prezi. You can add more than one person who can view your prezi and you can also remove them later, as shown in the following screenshot:
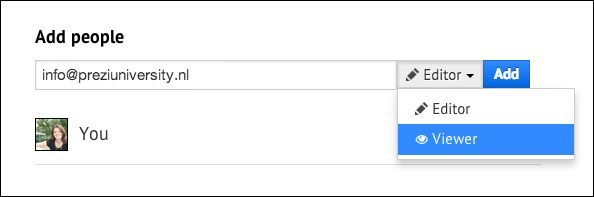
If you want the person be able to edit your prezi, you could click on Editor, but when you're looking for a job, that won't be the case.
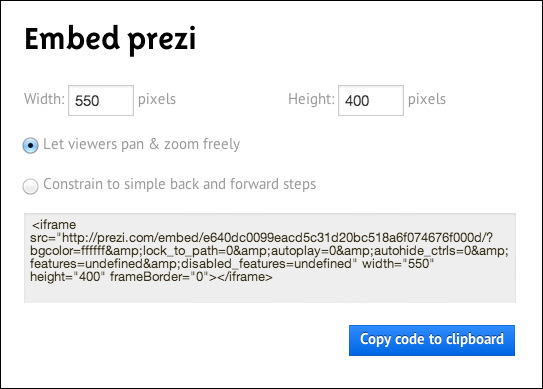
To reach a large audience, you can embed your prezumé in your website. Perform the following steps:
- Go to Your prezis and click on your prezumé. Click on the Embed button under your prezi.
- If you want, you can change the size of the prezi and you can restrict the visitors to simple back and forward steps. Usually, the default values will do.
- Click on Copy code to clipboard and paste it into the HTML of your website, as shown in the following screenshot. If you have no idea how HTML works, just ask your web designer.
If you are using WordPress, you can paste the code into HTML by clicking on the HTML tab first instead of WYSIWYG.
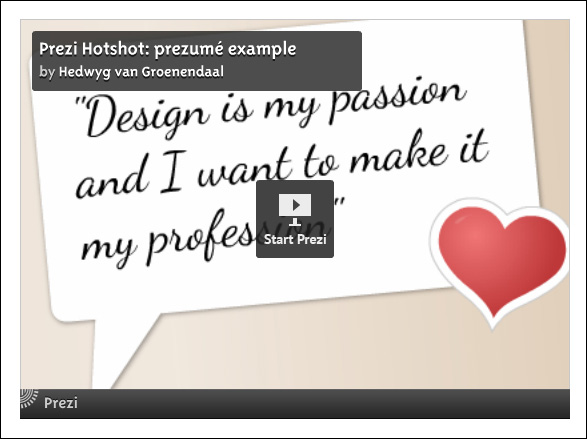
An embedded prezi looks like the following screenshot:
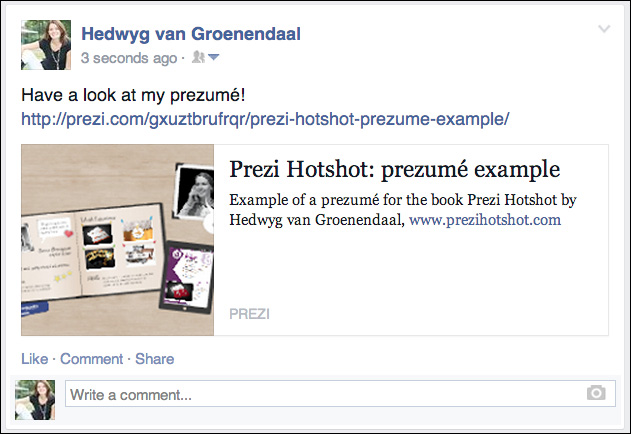
Facebook is very popular, so it might be a good idea to share your prezi via this channel. It's very easy. Perform the following steps:
- Go to Your prezis and click on your prezumé.
- Select the URL of the prezi from the address bar of your browser and copy it with the Ctrl/Command + C keys.
- Open your Facebook account, type a message in the new status box, and paste the URL of your prezi with the Ctrl/Command + V keys. Facebook will find the picture of your prezi itself and automatically add it after a few seconds.
- After you post your message, both the URL and the image will be a hyperlink to your prezi, as shown in the following screenshot: