
Finally, we're ready to create the animations in Flash. It's the best part of all, so let's have some fun!
The following are the animations we'll be creating in this task:
- Moving the machine
- Popping out the smoke clouds
- Rotating the gauge pointers
It might seem difficult to create animations in Flash. I'll show you it's not that difficult at all!
We can move the machine by performing the following steps:
- Open Adobe Flash Professional and create a new empty file by navigating to Create New | ActionScript 3.0.
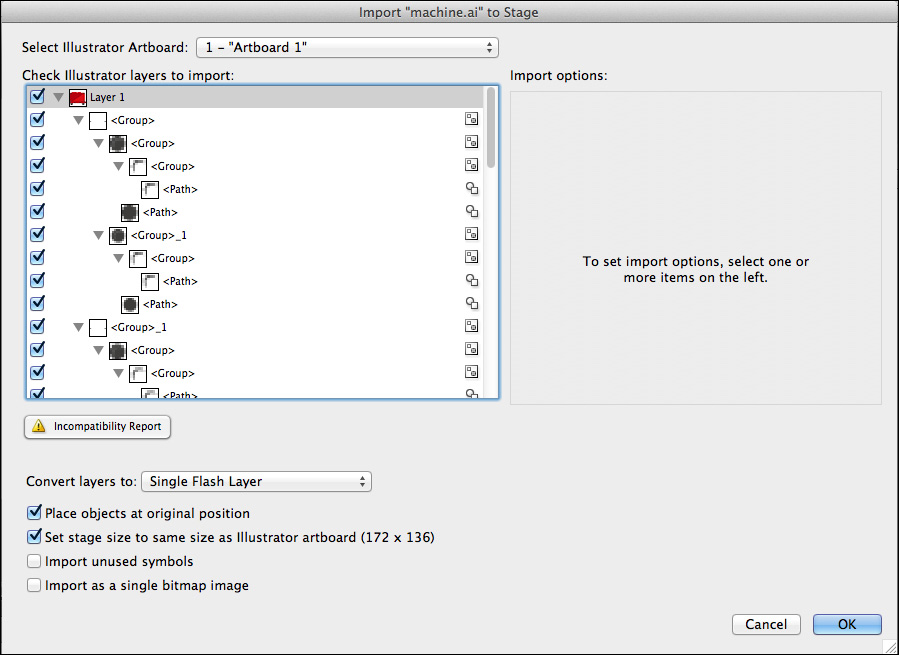
- Navigate to File | Import | Import to Stage, choose
machine.ai, and click on Open. - Set the Convert layers to: Single Flash Layer option and mark the following two options:
- Place objects at original position
- Set stage size to same size as Illustrator artboard (172 x 136)
We need some extra space around the machine, so we will enlarge the canvas.
- Navigate to Modify | Document and make the dimensions 10 pixels wider and 10 pixels higher. Put the machine in the middle of the canvas. It doesn't have to be the exact middle though.
- In the timeline, right-click on
frame 2and choose Insert Keyframe or press F6 on your keyboard. Hit the right arrow key to move the machine 1 pixel to the right. - Right-click on
frame 3and choose Insert Keyframe. Hit the left arrow key to move the machine 1 pixel to the left. - Right-click on
frame 4and insert another keyframe. Move the machine 1 pixel up. - Right-click on
frame 5, insert a keyframe, and move the machine 1 pixel down.
- Press the Enter key to test the movement.
- Save the file as
machine.fla. - Use the combination keys Ctrl/Cmd + Enter to create the
.swffile and to view the infinite loop. The.swffile will be placed in the same folder as the.flafile.
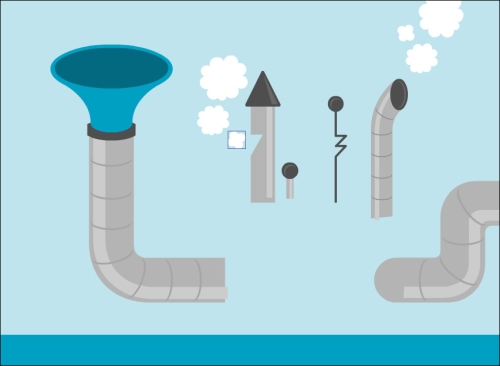
We will use the pipes.ai file for our smoke animations. We will use the whole file because location of the clouds is easier that way.
We can pop out smoke clouds by performing the following steps:
- Open a new empty Flash file and import
pipes.ai. Use the same settings as for the machine import. - Click somewhere on the canvas to select the whole illustration (notice a small blue line around it) and navigate to Modify | Break Apart.
- Deselect all the objects by pressing the Esc key or clicking somewhere on the canvas.
- Create a new layer by clicking on the most bottom-left button in the timeline or by navigating to Insert | Timeline | Layer. Double-click on the layer and rename it as
cloud1_1. - Select the smallest cloud of the clouds to the extreme left on the canvas (just click on it once).
- Press Ctrl/Cmd + X, click on the new layer, and navigate to Edit | Paste in Place.
- Insert another two layers and name them
cloud1_2andcloud1_3. Move the second cloud of the three leftmost clouds to thecloud1_2layer, and then move the third cloud to thecloud1_3layer. Use Paste in Place instead of the usual paste. - Right-click on
frame 10present in thecloud1_1layer and choose Insert Frame or press F5 on your keyboard. Now, the smallest cloud will be visible for 10 frames. - Click on the second cloud in the canvas and press Ctrl/Cmd + X. Right-click on
frame 10in thecloud1_2layer and choose Insert Keyframe. Navigate to Edit | Paste in Place to put the second cloud back on the canvas. - Right-click on
frame 20in thecloud1_2layer and choose Insert Frame. Now, the second cloud will be visible for the frame between 10 and 20. - Click on the timeline somewhere on
frame 1and select the third cloud on the canvas. Choose Ctrl/Cmd + X. Right-click onframe 20in thecloud1_3layer and choose Insert Keyframe. - Navigate to Edit | Paste in Place to put the third cloud back on the canvas.
- Right-click on
frame 30in thecloud1_3layer and choose Insert Keyframe. Now, the third cloud will be visible for the frame between 20 and 30. - To make the rest of the illustration visible in all frames, right-click on
frame 30in thepipes.ailayer and choose Insert Frame.The timeline should look similar to the following one:

It's nice if the large cloud fades out and there's a pause at the end of the animation so that it doesn't start over again right away.
- Right-click on
frame 30in thecloud1_3layer and choose Create Motion Tween. Click on OK to the question Do you want to convert and create a tween? - Right-click on
frame 40in thecloud1_3layer and navigate to Insert Keyframe | All. - Click on
frame 40in the timeline, then click on the third cloud on the canvas, open the Properties panel, and choose the Alpha option in the Color Effect menu. Put the slider to 0%. - Now right-click on
frame 85in thecloud1_3layer and choose Insert Frame. - Also, right-click on
frame 85in thepipes.ailayer and choose Insert Frame again.The timeline should look similar to the following one:

- Save the file as
pipes.flaand press Ctrl/Cmd + Enter to create and view the.swffile so far.
Now, let's move the second set of clouds to the middle of the machine. This explanation will be shorter. The following are the steps that needs to be performed:
- Delete the smallest of the three clouds.
- Create two new layers
cloud2_1andcloud2_2and move the clouds to these layers. - Now create the animations. The smallest cloud should be visible from frame 15 till frame 25 and the other one from frame 25 till 35.
- If you paste a cloud in a new frame, the cloud will be visible automatically till frame 85. For the
cloud2_1layer, remove the frames afterframes 25and for thecloud2_2layer, remove the frames after frame 35. - For this animation, you don't have to create a fade out. Not every animation should be the same. Clouds don't behave the same either.
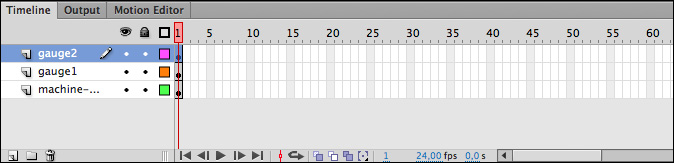
So far, the timeline will look like the following screenshot:

Do you think you can create the last cloud's animation by yourself? Make it almost the same as the first animation, with a fade-out effect for the last cloud. We deleted one of the smallest clouds, so three clouds are left.
The timeline would look as follows:

Ready for the last set of animations? Let's animate a few gauges.
- Open a new empty Flash file and import
machine-gauges.ai. Use the same settings as you did for the machine import. - Click on the machine and navigate to Modify | Break Apart.
- Click on the gauges and navigate to Modify | Break Apart again.
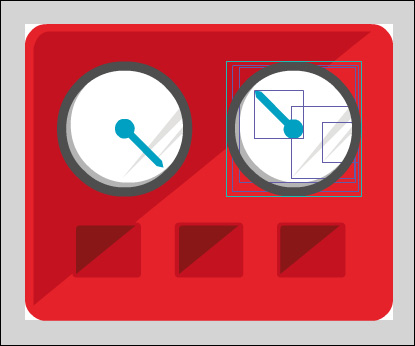
- Click on the left gauge, navigate to Modify | Break Apart, and do the same for the right gauge. Now, the pointers are separate objects, as shown in the following screenshot:
- Add a new layer and name it
gauge1. - Click on the pointer in the left gauge, press Ctrl/Cmd + X to cut the pointer, select the new layer, and navigate to Edit | Paste in Place to paste the pointer on the same place of the canvas.
- Select the pointer of the left gauge on the canvas and navigate to Modify | Convert to Symbol. Fill in the name
gauge1and make sure Movie Clip is selected.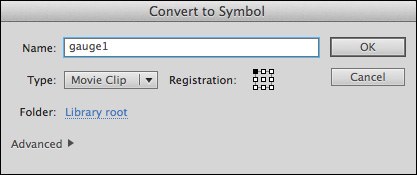
- Double-click on the pointer; now you are inside the movie clip. At the top-left part, there's the name of the movie clip
gauge1, next toScene 1. - Right-click on the timeline of
frame 1and choose Create Motion Tween. Click on OK for the question Do you want to convert and create a tween? - Click-and-drag the last frame to frame 20. The animation should last for 20 frames.
- Select the Free Transform Tool in the Tools panel and move the rotation point to the center of the circle of the pointer, as shown in the following screenshot:

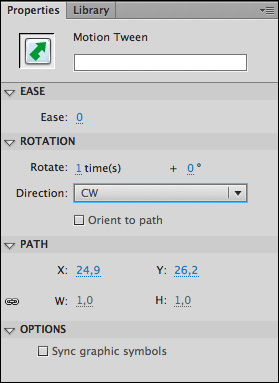
- Now, click on the timeline, choose Properties panel, open the Rotation menu (if it's not already open), and fill in Rotate: 1 time(s), as shown in the following screenshot:
- Save the file as
machine-gauges.fla. - Press Enter to test the animation.
- Click on
Scene 1in the top-left corner to return to the root timeline. - Since the gauge is a movie clip, you can only test the animation when you use Ctrl/Cmd + Enter. The
machine-gauges.swffile is automatically created.
You can create the animation for the second gauge exactly the same way. This animation should last for about 85 frames, so it's much slower than the first gauge.
Since we used movie clips, you don't see any animations in the root timeline. The animations are inside the timeline of the movie clips.
Let's create the third gauge's animation by performing the following steps:
- Open a new empty Flash file and import
gauge3.ai. Use the same settings that you used to import the machine. If you get the question This file appears to be part of a sequence of images. Do you want to import all the image of the sequence?, just click on No. - The pointer of this gauge should make a whole rotation in steps (and not smooth like the previous animations). In each step, the pointer should rotate 10 degrees. This means it takes 36 steps to complete a whole rotation (360 degrees).
- Click on the gauge on the canvas and navigate to Modify | Break Apart.
- Select the pointer and move it to a new layer.
- Select the Free Transform tool and move the rotation point to the center of the circle of the pointer.
- Right-click on
frame 10in the new layer and choose Insert Keyframe. Open the Transform panel (Ctrl/Cmd + T) and fill in10,0for the Rotate option, as shown in the following screenshot: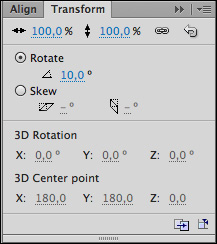
- Right-click on
frame 20, choose Insert Keyframe, open the Transform panel, and fill in20for Rotate. - Repeat this until you reached a rotation of 360 degrees. To be honest, this is not the most fun part.
- Now, your last frame of the pointer layer is frame 360.
- Right-click on
frame 360in thegauge3.ailayer and choose Insert Frame. - Your timeline should look like the following screenshot:

- Save the file as
gauge3.fla, and use Ctrl/Cmd + Enter to create and view the.swffile.It's time for the last animation. We're almost finished.
- Open a new, empty Flash file and import
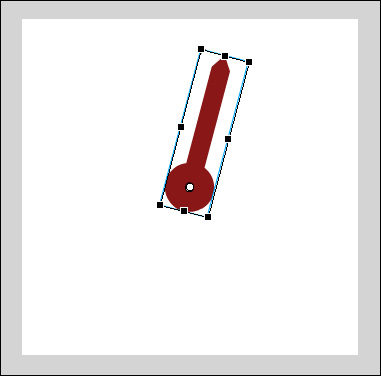
gauge4.ai. This will be the gauge with the nervous pointer. - Click on the gauge on the canvas and navigate to Modify | Break Apart.
- Select the pointer and move it to a new layer.
- Right-click on the new layer on
frame 1and choose Create Motion Tween. Click OK to the question Do you want to convert and create a tween?. - Click-and-drag the last frame of the motion tween to frame 3.
- Use the Free Transform tool to move the rotation point to the center of the circle of the pointer.
- While the Free Transform tool is still selected, rotate the pointer a few degrees to the right, as shown in the following screenshot:
- Right-click on
frame 6in the new layer and navigate to Insert Keyframe | All. Rotate the pointer back to the middle. - Right-click on
frame 8(not frame 9, that would make the animation too smooth) in the new layer and navigate to Insert Keyframe | All. Rotate the pointer back a few degrees to the left. - Right-click on
frame 11in the new layer, navigate to Insert Keyframe | All, and rotate the pointer back to the middle. - Right-click on
frame 11in thegauge4.ailayer and choose Insert Frame. - Save the file as
gauge4.flaand use Ctrl/Cmd + Enter to create and view the.swffile. It is shown in the following screenshot: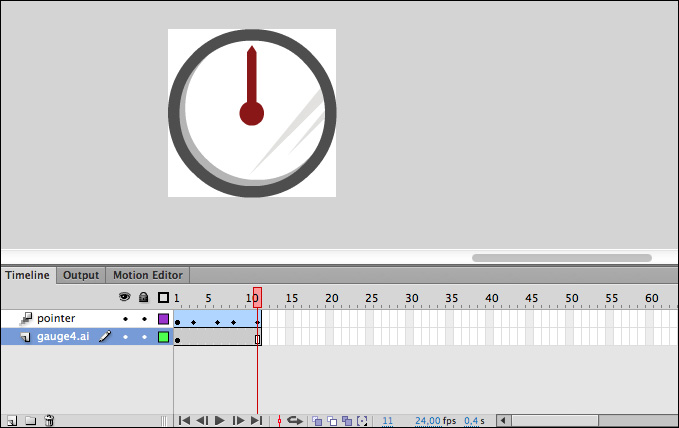
We created all the animations for our prezi with Adobe Flash Professional. We used the .ai files for input and created different kinds of animations. We created motion tweens, frame-by-frame animations, and animations in movie clips.
Now, everything is finished to create our prezi.
We created a single file for every animation. It's also possible to create one file with all the animations in it. Most of the time this is more complicated. Also, with different files, you are more flexible in Prezi if you want to change something.
If you're already familiar with Flash, you could use separate movie clips for every animation and put them together in one file. Movie clips have their own timeline, which means that the cloud animations are not dependent on each other. The first cloud could start over again before the last cloud is finished. This makes your animations less predictable and, therefore, more real.