
Now that we have already done so much work for our presentation, completing our presentation is really easy.
Everything that should've been done, you did in the previous seven steps. So, now you have everything ready to create your prezi.
First, we transform the logo of Seats2meet.com from an EPS file to a SWF file. SWF files are the only vector files that Prezi can read. If you have AI files, you can work the same way and transform them to SWF files as well.
The following steps show you how to convert an EPS file to a SWF file using Adobe Illustrator. If you don't have an EPS or AI file, use a high resolution JPG or PNG file directly in Prezi and skip this step.
- Open the EPS file in Adobe Illustrator.
- Navigate to File | Export.
- Choose the format option Flash (swf) and click on the Export button. Change the name of the file if necessary.
- If you have other EPS or AI files, transform them to SWF as well.
Next, we go to prezi.com and start working on our prezi. In the following steps, we'll be working on the project we described in this project. Of course, you can use your own images and information based on your own storyboard.
- Click on New Prezi on prezi.com and select Start blank prezi.
- Delete all the objects on the canvas.
- Navigate to Insert | Symbols & shapes... and select the Photographic category. Find the graphic of the office building and drag it to the canvas.
- Then, insert the logo by navigating to Insert | Images. Make it the right size and put it on the office building.
Next, let's change the theme and choose our fonts and colors by performing the following steps:
- Click on Themes and then click on the Clear style. Of course, you are free to pick another style.
- Navigate to Themes | Customize Current Theme if you want to customize the style yourself and switch to mode Advanced if you want to enter colors as RGB codes.
- Click on Done to leave the Theme Wizard.
Now, we're going create the windows where we can put our information. Perform the following steps:
- Navigate to Insert | Symbols & shapes..., select the Shapes category, and draw a rectangle on the office building.
- Click the rectangle on the canvas, click on Style, and choose a light color.
- Make the rectangle the right size and position it on the office building; five windows should fit on one row.
- If the first rectangle is positioned, click on it once and use the Ctrl/Cmd + D keys to duplicate it several times. Fine-tune the position of the windows.
- Select all five windows by holding down the Shift key and dragging a rectangle around the windows, and then duplicate the windows with the Ctrl/Cmd + D keys to make more rows.
Our prezi now looks like the following image:

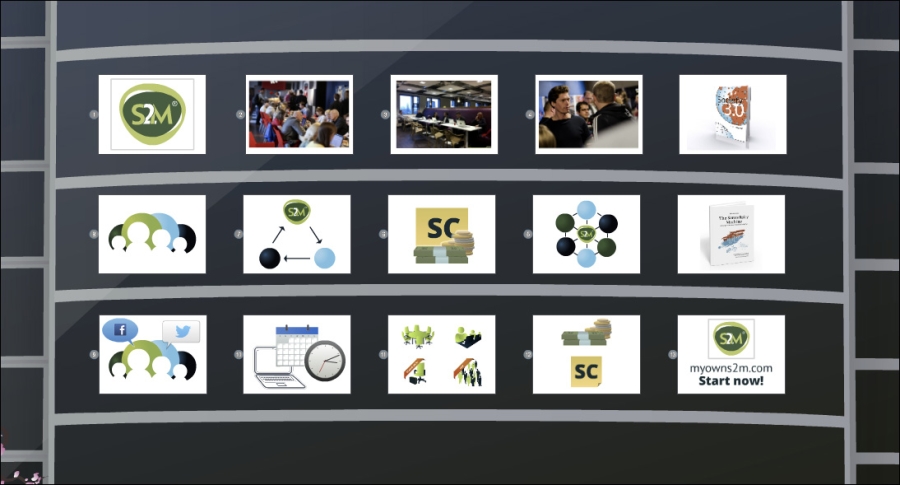
Now, put all the information, text and graphics, in the windows of the building. Make sure the information is in a logical order. After this, we will create the path and we don't want to make large jumps. We want the path to be smooth. In the first row, we place the information from left to right, in the second row from right to left, and in the third row again from left to right. This way, we won't have to make large jumps in our presentation.
Also, avoid large blocks of text. A few words is fine, but try to tell your story with as many images as possible. The result of our prezi so far is shown in the following screenshot:
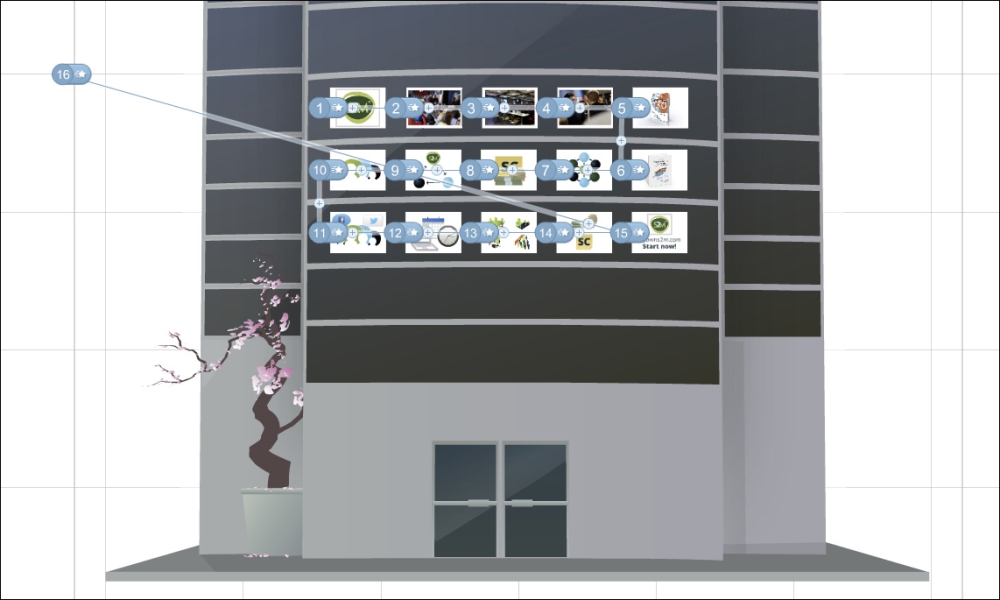
If everything is in the right position, create a path from window to window. Draw an invisible frame around the whole prezi. This will be your last path step; an overview of the complete prezi is shown in the following screenshot:
Finally, test your prezi.