
Finally, we are ready to create our prezumé in Prezi. This is the most fun part!
For our prezi, we'll use the Scrapbook template of Prezi.com. You'll find the link to this template at www.prezihotshot.com. You'll also need the paper where you wrote your job, message, and goal, as well asyour résumé with the most important parts highlighted and your visual material.
The following steps should be performed to create your prezumé in Prezi:
- Make a copy of the Scrapbook prezi and click on Edit to open the prezi, as shown in the following screenshot:
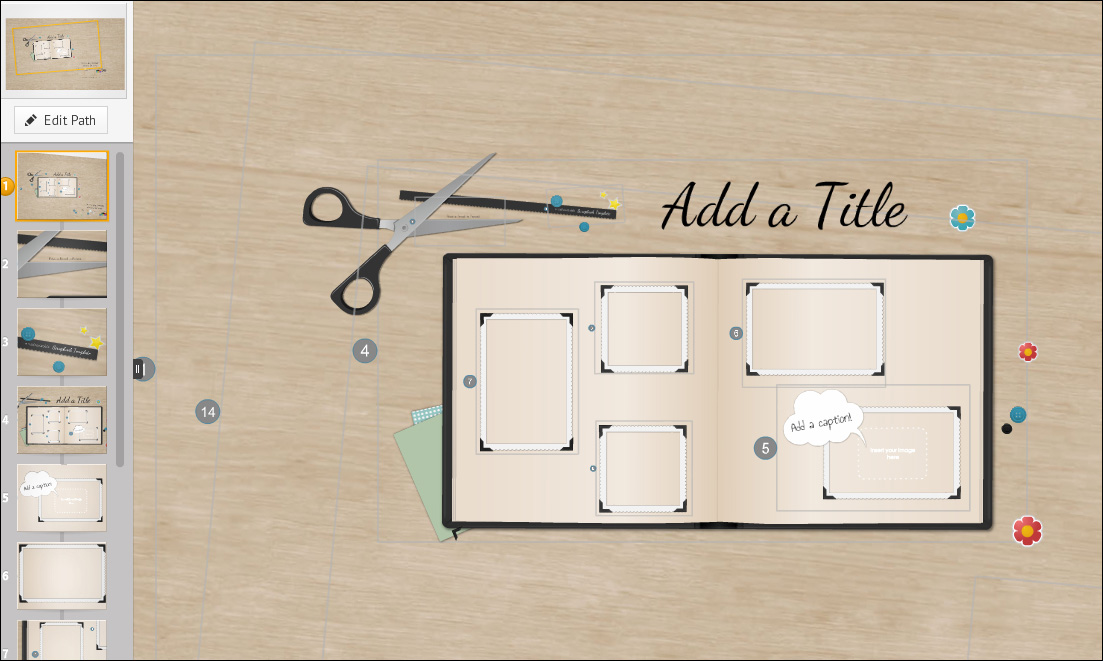
Let's get rid of the things we don't need.
- Click on the Edit Path button and choose Clear All to remove the existing path. We'll create our own path later.
- Then, remove the things that are already in and around the scrapbook, such as the scissors, the flowers, the buttons, and the photo frames. We'll leave one photo frame in the scrapbook for our photograph, as shown in the following screenshot. For now, you can leave the assets in the right-hand side corner of the canvas. You might need these later.
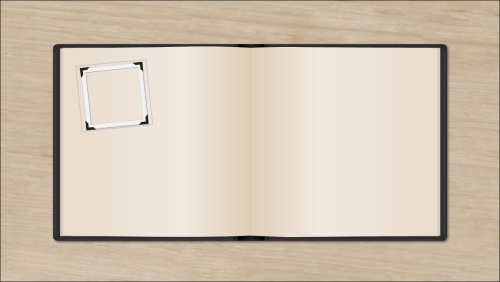
Now, we have an almost empty scrapbook and we can start filling it.
- First, insert our photograph by navigating to Insert | Image. Resize and rotate the picture to fit it in the photo frame. If it's on top of the frame, use the right mouse button and click on Send Backward till your photo is between the scrapbook and the photo frame. Do not use Send to Back because then it will disappear behind the scrapbook.
- Maybe you have to crop the picture for an exact fit in the photo frame. Click on the image once, choose Crop Image, and drag the corners till the image has the right size.
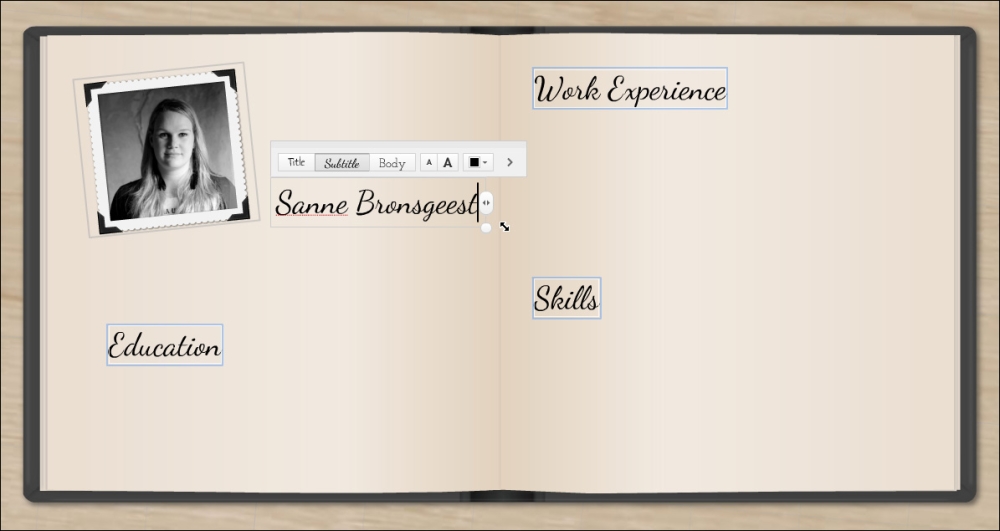
- Type in the details of your education, work experience, and skills on the canvas. Choose the Subtitle style for these texts. Then, type your name and make your name as big as the other text by dragging the round handle in the right bottom corner. If you see a blue square around the other text, the text is the same size.
- Add your job title in another text style (Title or Body).
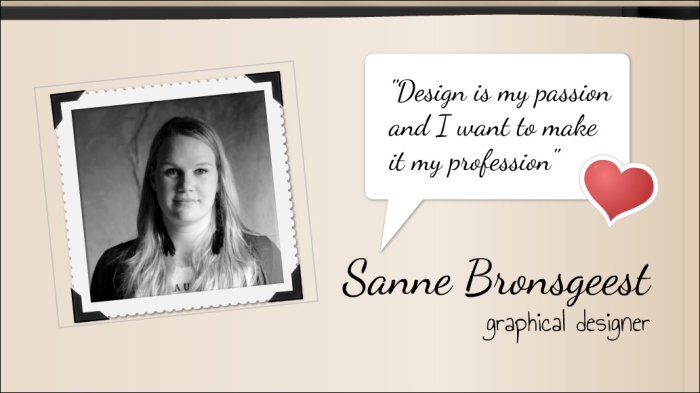
We would like to start our prezumé with our personal message. In the assets of the scrapbook, there is a nice text balloon we can use.
- Zoom in to the assets, choose the text balloon you want to use, make it bigger, and drag it next to the photo.
- Then, click on the canvas to add text and in the text box type the message from the paper where you wrote your job, message, and goal. Resize the text to fit it nicely in the box.
- If you want, you can add a heart from the assets to visually show that this is your real passion.
- Now, add the rest of the text to your prezi. Use the highlighted parts from your résumé.
For this prezumé, it's important to show our work. So, we'll leave enough space for our Work Experience. Here, we want to show our portfolio.
- Add images of your work to the canvas. If you have less visual work, you could use text; however, you should really try to find some images.
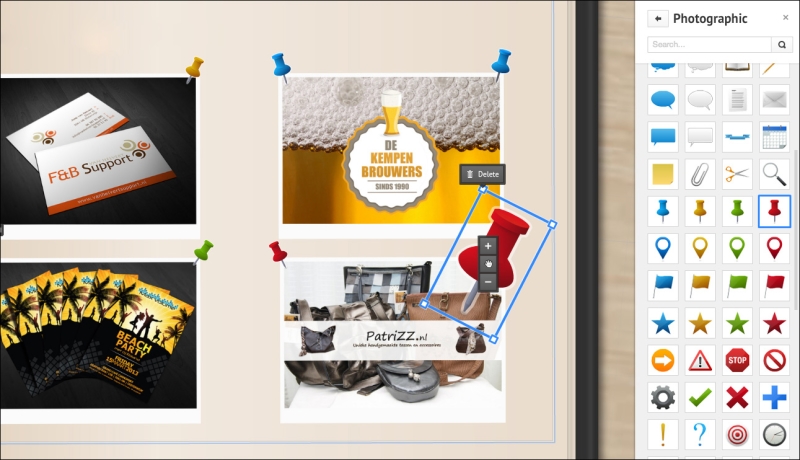
- We like nice details, so we want to add some pins to lock the images. Navigate to Insert | Symbols & shapes, choose a style (we used Photographic), and drag the pin to the canvas. Resize and rotate the pin.
We are almost done with our prezumé.
- Make a screenshot of your website (or an important project) and add it to your prezi. Navigate to Insert | Symbols & shapes, select Simple Dark, and add the tablet symbol to the canvas. Place the screen of your website in the tablet. Make sure the image is between the tablet and the scrapbook.
- Add another photo frame (or copy the existing one) and place it just outside the scrapbook. It's nice to use a contact photo if you have one (or just make one). Add another text balloon for your contact details. Use social media symbols from the symbols library.

Our prezumé is full.
- Now, remove the things that you don't need anymore from your canvas. The easiest way to do this is to hold down the Shift key, click and drag a rectangle around the items, and delete everything at once.
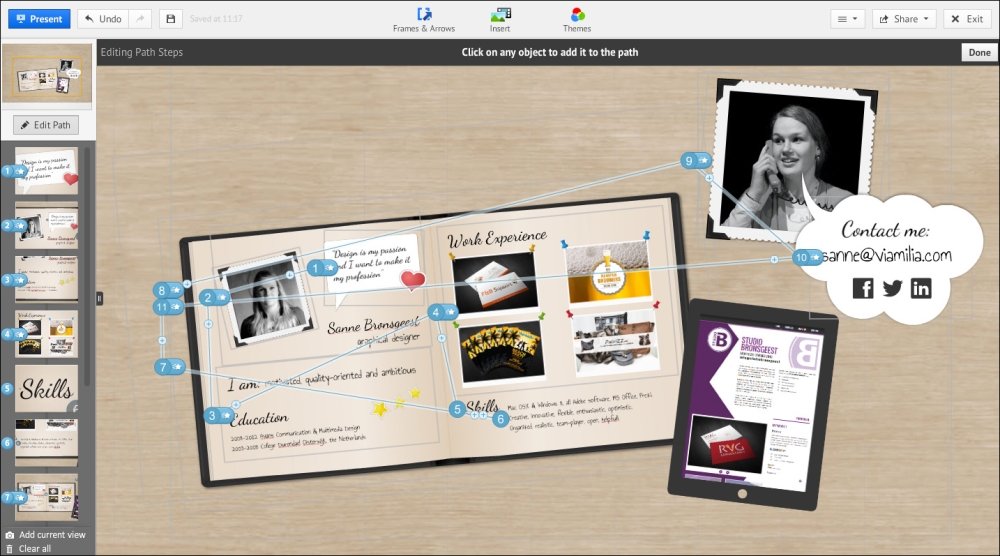
- Let's add a path to our prezi and we're done! We'll start our prezi with our message.
- Zoom into the text balloon, navigate to Frames & Arrows | Draw Invisible Frame, and draw an invisible frame around the text balloon. Rotate the frame a bit to give the frame a different rotation than the text balloon.
- Add an invisible frame to the path.
- Zoom out till your photo and your name are visible. Then, draw a new invisible frame around your photo, name, and text balloon. Add this frame to the path.
- Do the same for your Education, Work Experience, and Skills.
- The next path steps are: the whole scrapbook, the whole prezi, zoom in to contact photo, zoom in to contact details, and the last step is the complete overview of your prezi. So, our prezumé is finished! It is shown in the following screenshot:
We used an existing template to create our prezumé in Prezi, and we did a good job of collecting and structuring content before we started our prezi. Therefore, our complete focus was on our prezi and not on choosing what to add to our prezumé. This is more efficient and gives a better result.
We started our prezi with an empty scrapbook and added the text and images. We used a few nice symbols to spice it up and finally, we added a path to create a logical flow. Don't make the path too long, because you want the visitor to reach the end of your prezumé.