Before we can start creating our animations, we have to build the basics first. The basics are all the illustrations we need for our prezi and the animations. We are not building one big illustration-animation file and putting that in Prezi. All the parts will be separate to make the prezi most flexible.
The following are the most important parts for our prezi:
- A happy girl
- A machine
- A machine with gauges
- Pipes
- Small parts such as clouds, hearts, and a bird with letter
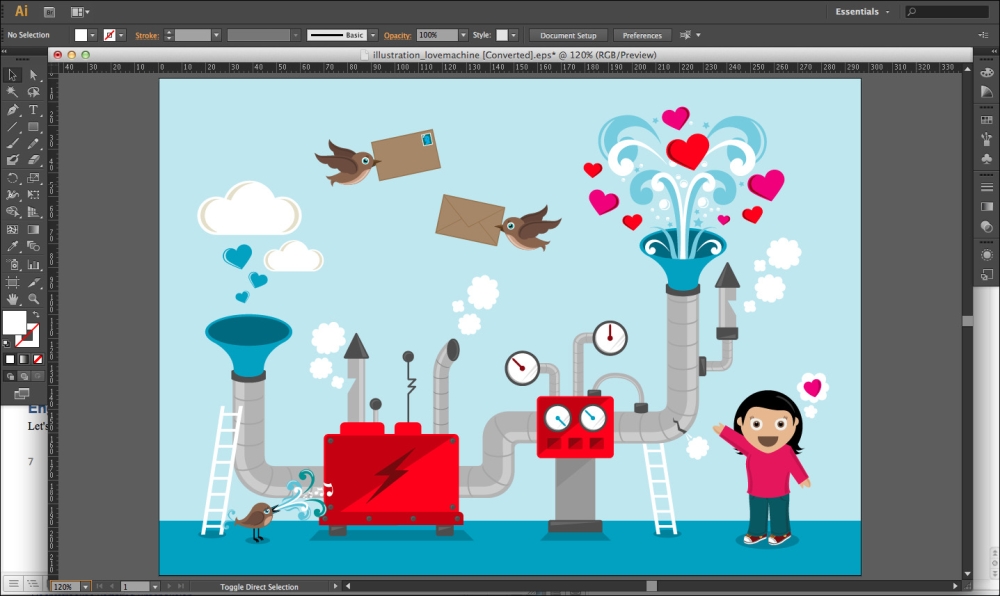
We'll be using the Adobe Illustrator for this task. Open the downloaded .eps file in the Adobe Illustrator, as shown in the following screenshot:
The happy girl asks an important question, so we'll start with her.
The happy girl is in the .eps file on a separate layer, let's first select and separate her. We will create the happy girl by performing the following steps:
- Open the Layers panel by navigating to Window | Layers.
- Open
Layer 1and<Group>to find the layer with the girl. Click on the circle present at the right side of the layer to select the girl. The girl is selected if you can see all the blue lines shown in the following screenshot: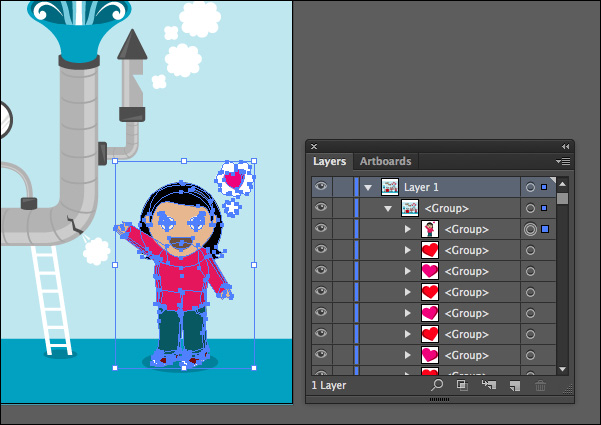
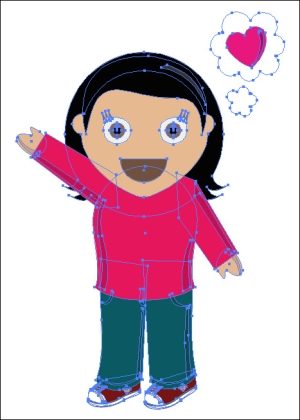
- Press Ctrl/Cmd + C to copy the selection, open a new file by navigating to File | New (just click on OK with the default values of the new file), and paste the selection of the girl in the new file by pressing Ctrl/Cmd + V.
- Navigate to Object | Artboards | Fit to Artwork Bounds to trim the canvas.
- Navigate to View | Zoom In to get a good view of the girl, as shown in the following screenshot:
We need to change the color of the heart and put it on the T-shirt, but the whole graphic is grouped. To solve this, we need to perform the following steps:
- Navigate to Object | Ungroup and deselect all by clicking on the canvas.
- Select the heart and navigate to Object | Ungroup again. Now, we can change the color of the heart. Click on the heart, navigate to Window | Color, and pick a nice color.
- Rotate the heart a bit and put it on the shirt. To rotate move the mouse slightly off the squares of the selection box until a double-sided arrow appears. If you want, you can change the color of the T-shirt or trousers too.
- Now, we want to flip the whole graphic vertical to put the outstretched arm to the other side.
- Select the whole graphic by pressing Ctrl/Cmd + A.
- Find the Rotate Tool in the toolbox (in the Tools panel), click and hold down the mouse, and choose Reflect Tool. Double-click on the Reflect Tool, choose Vertical, and click on OK. The whole image will be flipped, as shown in the following screenshot:

Our happy girl is finished, so let's save her as a .swf file. We'll need that for Prezi.
- Navigate to File | Export.
- Choose the Flash (swf) format, type the name
girl.swf, and click on Export. - Click on OK present in the next screen. Save the original file of the girl as
girl.ai, in case you want to makes changes later. Close the file, and you'll return to the.epsfile of the whole machine.
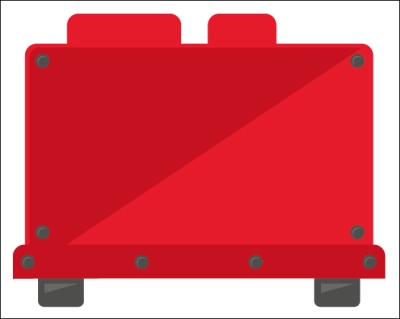
- Open the Layers panel again by navigating to Window | Layers and find the layer of the big machine. Select the layer by clicking on the circle behind the layer. Copy the machine and paste it in a new file.
- Navigate to Object | Artboards | Fit to Artwork Bounds to trim the canvas.
- Select the machine and navigate to Object | Ungroup. Deselect all, select the lighting sign, and delete it.
- Navigate to File | Save as and save the file as
machine.ai.This file is ready to create an animation in the next task. We don't need it in the Adobe Illustrator anymore so close it now. The machine would look similar to the one shown in the following screenshot:
In the same way, we can separate the machine with gauges. If you want to animate other gauges as well, you should separate them too. We saved the files as machine-gauges.ai, gauge3.ai, and gauge4.ai. A machine with gauges would look similar to the ones shown in the following screenshot:

The pipes of our machine consist of a lot of parts. It's easier to work the other way round and remove the parts we don't need.
- First, we'll need to make a copy of the whole image.
- Press Ctrl/Cmd + A to select the whole graphic and press Ctrl/Cmd + C to copy it. Open a new file and paste the graphic in it.
- Remove all the parts you don't need for the pipe's file. It should look similar to the one shown in the following screenshot. Save it as
pipes.aiand close it.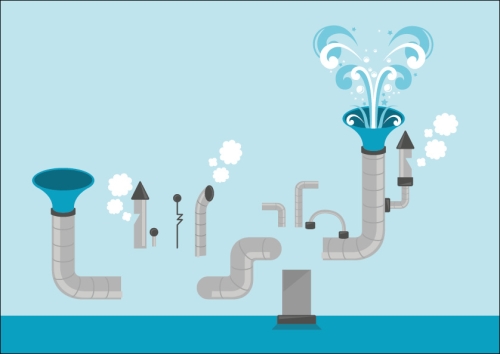
We are almost done with the basics. We only have to create the .swf files for the rest of the small parts, such as clouds, hearts, and the bird with the letter. There are three different hearts: a blue, a pink, and a red one. We can create hearts of different sizes and rotations in Prezi. The same works for the clouds. If you can reuse your graphics, please do so.
We created bird.swf, heart-blue.swf, heart-pink.swf, heart-red.swf, and cloud.swf, as shown in the following screenshot: