
We have all the pieces ready now and are ready to create our presentation in Prezi.
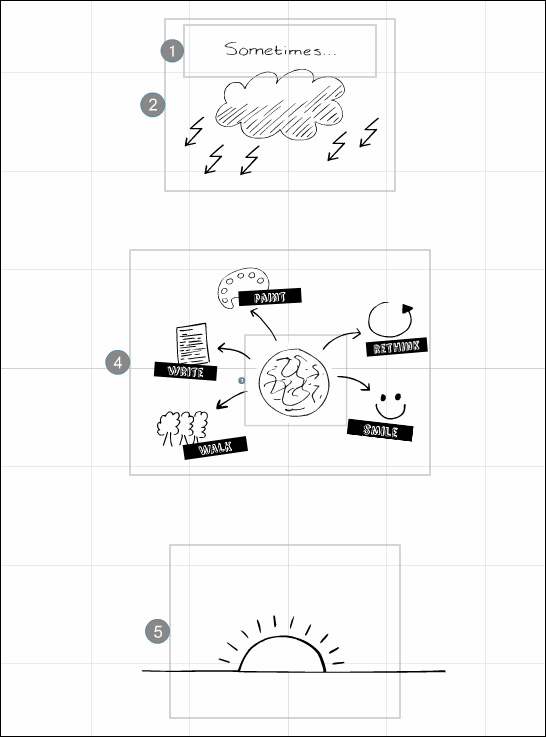
Open a new blank prezi. Our presentation consists of three parts: the introduction with the dark cloud, the solution with five ideas, and the end with the sunrise. We'll put these parts vertically one below the other.
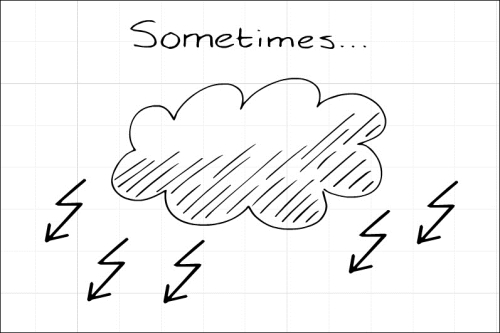
Let's start with the introduction. Insert the cloud, the word Sometimes..., and a lightning arrow. You probably have to resize the objects in Prezi. You can duplicate the arrow with the Ctrl/Command + D keys.
Your canvas should look like the following screenshot:
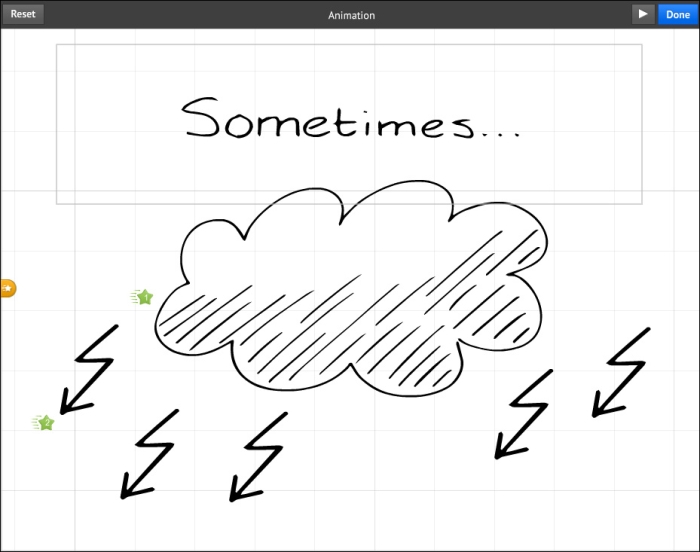
Now, we'll put two invisible frames on the canvas. One frame around the word Sometimes (that's where we'll start our prezi) and one frame around the whole picture. After we've showed the word Sometimes, we'll zoom out and add the other elements, as shown in the following screenshot:

First, add the small frame to the path and then the larger frame. Select all the lightning arrows (by pressing Shift and then clicking and dragging) and group them. Now, enter the path and click on the star of path step 2 to create a fade-in animation. First, click on the cloud and then on the arrows, as shown in the following screenshot:
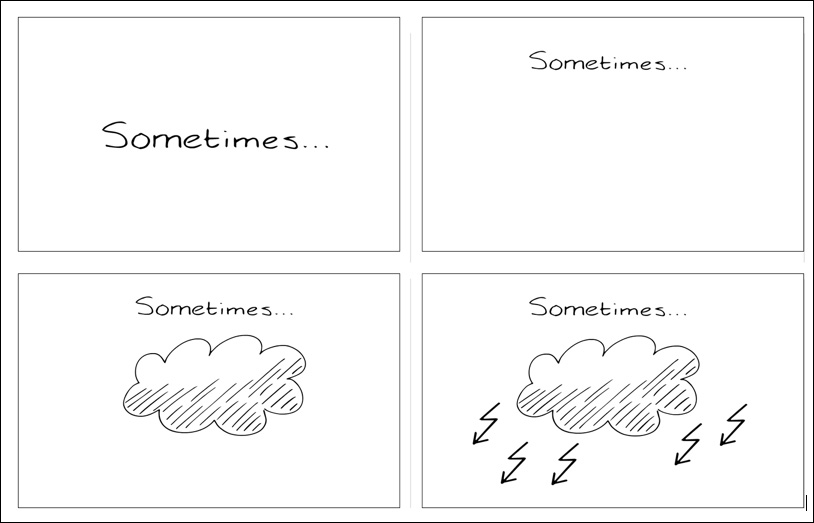
Leave the path. The introduction is finished. The flow of the prezi you created so far is shown in the following screenshot:
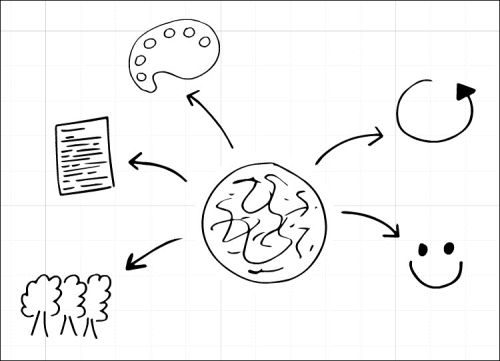
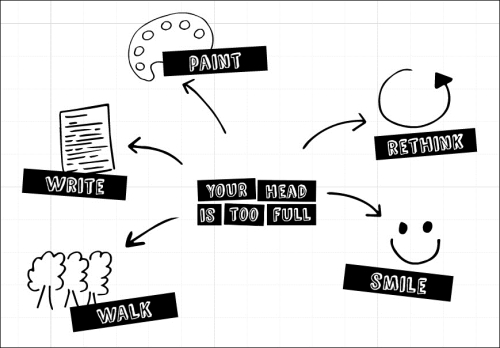
Let's move on with the middle part of the presentation. Add the eleven drawings of the middle part to the canvas and position them nicely, as shown in the following screenshot:
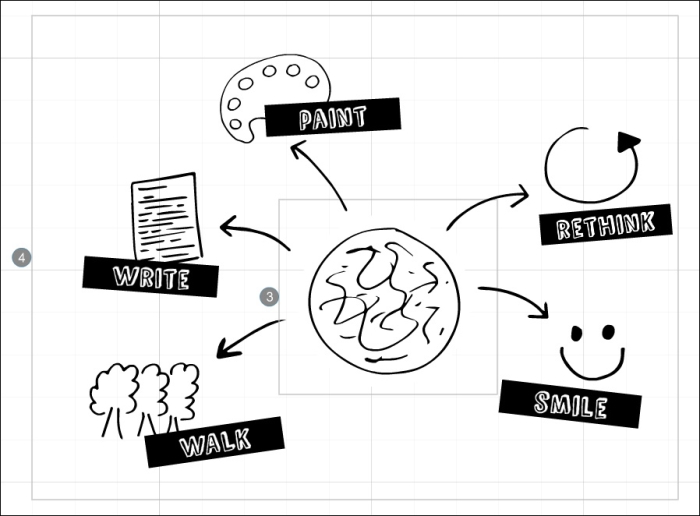
While working on this prezi, we got the idea to add labels to the ideas. Before we make the drawing of the full head (the circle) visible first, show the text YOUR HEAD IS TOO FULL.
We created the labels with a black rectangle and white text. We grouped the rectangle with the text before positioning it. We gave the labels with the text YOUR HEAD IS TOO FULL a small rotation so that it looks it a bit more playful.
If we put the circle on top of the center text, we will still see the text through because our vector drawings are transparent. To solve this, we created a plain white circle in Adobe Illustrator and exported it as SWF. Then, we put that circle behind the transparent circle and grouped it. Now, we can use fade-in animation to make the circle visible on top of the text YOUR HEAD IS TOO FULL, as shown in the following screenshot:
Add two invisible frames and add them to the path, as shown in the following screenshot:
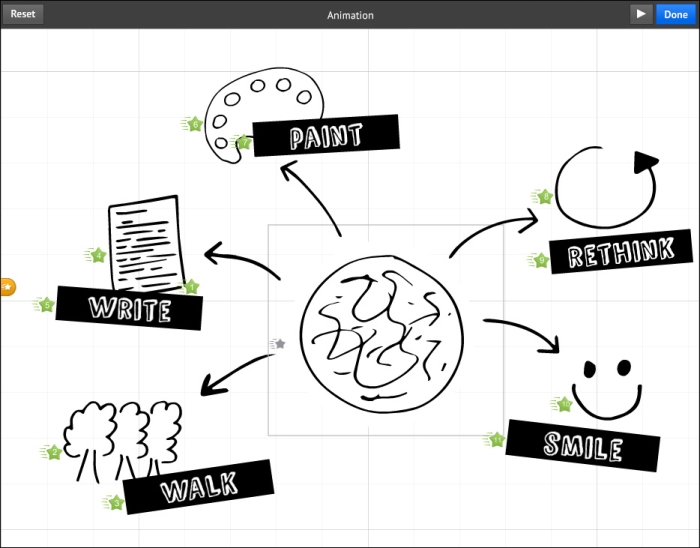
Use fade-in animation to create the right flow, as shown in the following screenshot:
The last part is very simple. Just add the drawing of the sunrise to your canvas, draw an invisible frame around it, and add the frame to the path. We would like the two ends of the horizon to not be visible on screen, so we draw the frame a bit smaller. The whole prezi now looks like the following screenshot:
.
In this task, we put all the small drawings together in one presentation. We did the last modifications of positioning and scaling in Prezi and we used invisible frames and fade-in animations to create a nice flow. Of course, you can view the prezi online at www.prezihotshot.com.