Understanding Live Trace
Learning Live Trace modes
Setting Live Trace options
Tracing with Live Trace
In this chapter, I introduce Live Trace, which takes the art of using bitmap images as the basis for Illustrator documents to a new and exciting level. You can use this tool to create vector-based graphics from raster images, but that description hardly even hints at the possibilities that Live Trace opens up for you.
As you're aware by now, Illustrator is primarily a vector-based graphics application. Quite simply put, Illustrator is able to handle vector images with far more adeptness than it can raster (or bitmap) images. To most people, however, the format of an image is far less important than how that image appears. Sometimes, only a bitmap will do the job. For example, digital photos are always bitmap images — never vector images. If you need to use a digital photo in your Illustrator document, you have to import it as a bitmap image.
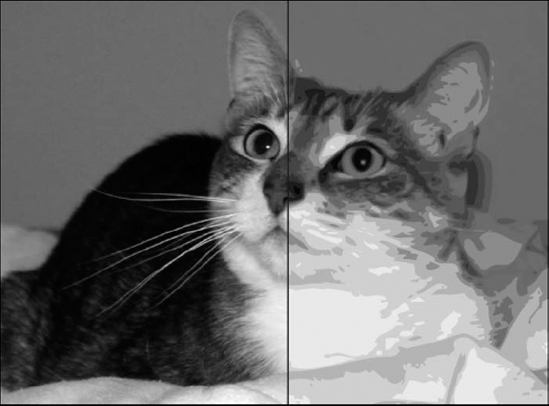
Even though you have to import digital photos as bitmap images, you may not have to leave them in that format inside of Illustrator. There are many instances where a vector-based representation of the photo is just what you need. Consider the example shown in Figure 13.1. The image on the left is a digital photo, and on the right is the result of using the Live Trace tool to convert the image into a drawing that looks like a hand-drawn sketch. If you create an image to use for a logo for a Web site that advertises a pet-sitting business, the hand-drawn sketch appearance may well serve your needs better than the digital photo.
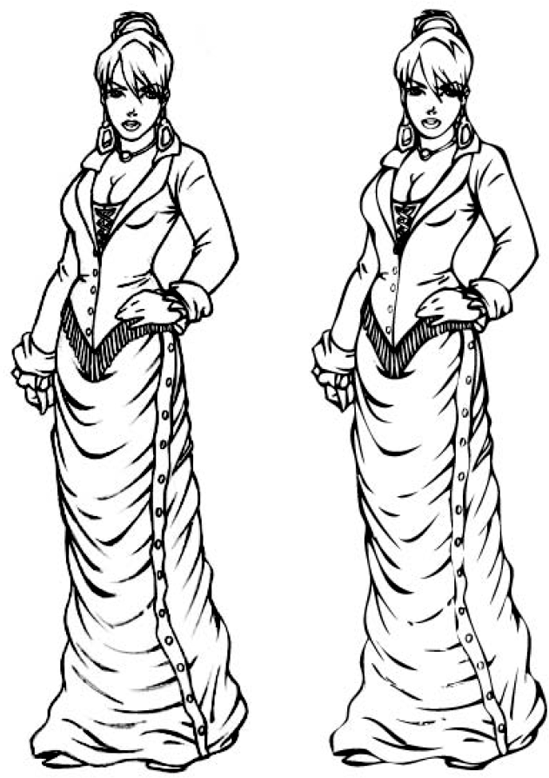
Figure 13.1. The left image is the raw imported bitmap, and the right image was traced using the Live Trace tool to produce a hand-drawn sketch appearance.
So, just what does Live Trace do? Live Trace uses color or contrast information in an imported bitmap to create path and anchor points so that the bitmap image can be converted into a vector-based image. The tool uses the parameters that you set in the Tracing Options dialog box to determine how closely the vector image matches the bitmap image. Using various presets and options that are available in the dialog box, you can create a result that looks virtually identical to the bitmap or you can go to the other extreme of having a result that contains only a few strokes that look like a very basic sketch with almost no detail. The important point to remember is that the Live Trace tool is extremely versatile, so you need to spend a little time trying out various options in order to achieve the final results you want.
Live Trace has three tracing modes. These modes create very different end results, so a good place to start in understanding how Live Trace functions is to examine each tracing mode.
You choose a tracing mode by using the choices in the Vector dropdown list (popup menu) in the Tracing Options dialog box, as shown in Figure 13.2. Choose Object
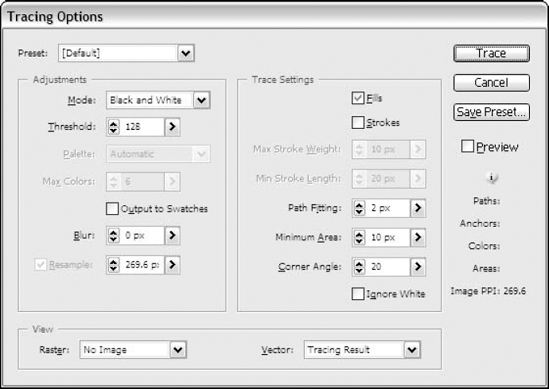
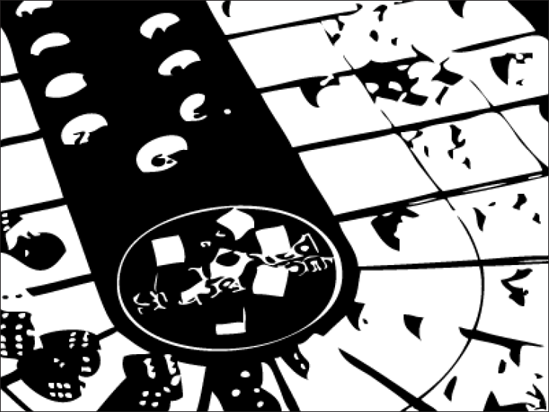
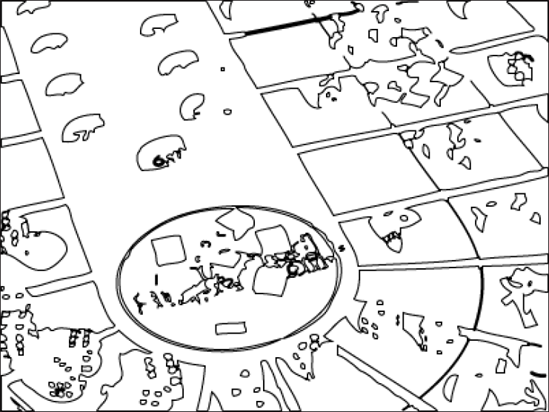
In Outline mode, the Live Trace tool creates strokes that outline any shapes in the bitmap image that seem to be a single fill area. Figure 13.3 shows an example of using Outline mode to trace a bitmap image.
Note
For more on Outline mode, see Chapter 2.
Tip
Outline mode is also called Fill mode because it outlines the fills in the image.
As Figure 13.3 shows, Outline mode creates an image lacking any fills. You can, of course, add a fill to any area, but this mode is probably most appropriate for images where you want to produce a pen-and-ink style of drawing.
In Tracing Result mode, the Live Trace tool creates stroked paths of variable widths, as shown in Figure 13.4. In this example, I chose the Color 6 preset to make it easier to see the differences between the tracing modes. The end result is an image that has fills without outlining strokes.
Tip
Tracing Result mode is sometimes called Stroke mode because it fills the strokes that are traced in the image.
The image in Figure 13.4 shows just one possible result you might see when using Tracing Result mode.
If you choose the Outlines with Tracing option in the Vector dropdown list (popup menu), Illustrator combines Outline and Tracing Result modes, as shown in Figure 13.5.
Tip
When a traced image is selected, you can use the Preview different views of the vector result button on the Control panel to see each of the different tracing modes. Likewise, you can use the Preview different views of the raster image button to see different views of the bitmap image.
Although you can achieve many effects just by changing the tracing mode, that's only the beginning. In the following sections, you learn how to use the other options in the Tracing Options dialog box to create the exact effect you want.
If you were to simply choose Object
Probably the best place to begin experimenting with the Live Trace options is by choosing one of the settings in the Preset dropdown list (popup menu) in the Tracing Options dialog box. After you choose a preset that produces results close to your desired end result, you can play around with the remaining options in the dialog box to fine-tune the output.
Tip
Always ensure that you click the Preview check box in the Tracing Options dialog box. That way, you can immediately see the results of any selections you make.
Figure 13.6 shows an example of the Default preset option. In this case, the output is a black-and-white image with no shading.
The next preset is the Color 6 preset, as shown in Figure 13.7. In this preset, the vector image has six colors.
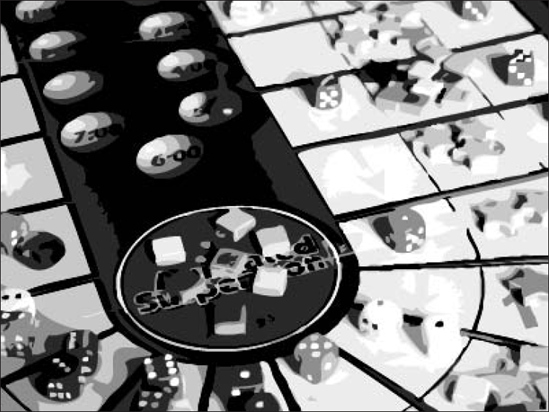
Figure 13.8 shows an example of the Color 16 preset. Although the appearance is similar to the Color 6 preset, Color 16 uses 16 shades for a more realistic appearance.
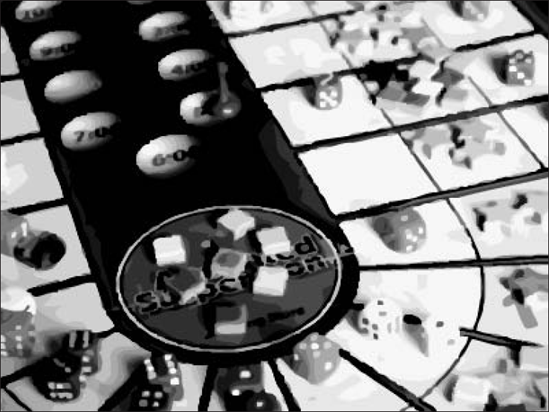
Figure 13.8. Using the Color 16 tracing preset produces a color image that uses 16 colors and has more subtle shading.
Figure 13.9 shows an example of the Photo Low Fidelity preset. It can be a bit difficult to see the differences between Color 16 and Photo Low Fidelity, but Photo Low Fidelity tends to have fewer paths and anchor points than does Color 16.
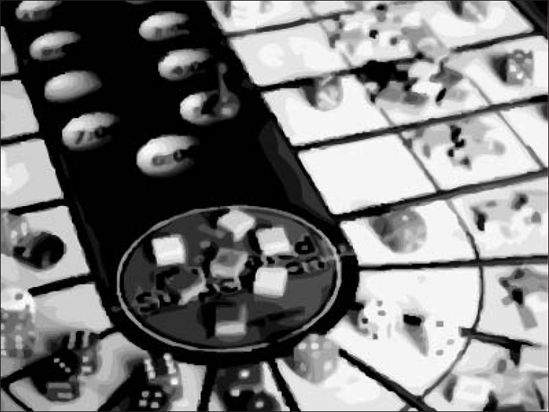
Figure 13.9. Using the Photo Low Fidelity tracing preset produces a color image that uses 16 colors but has a slightly different appearance than the Color 16 preset.
The Photo High Fidelity preset shown in Figure 13.10 produces a very realistic-looking image. In this preset, 64 colors are used, and the result looks very much like the original raster image.

Figure 13.10. Using the Photo High Fidelity tracing preset produces a color image that uses 64 colors for an almost photographic appearance.
The Grayscale preset shown in Figure 13.11 produces a result similar to the Color 6 preset but with all the colors replaced by shades of gray.
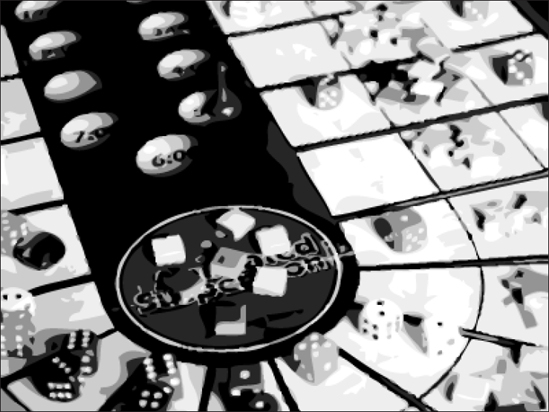
Figure 13.11. Using the Grayscale tracing preset produces a grayscale image that uses six shades of gray.
Believe it or not, the example shown in Figure 13.12 is the same image used in the previous examples. The only difference is the selection of the Hand Drawn Sketch preset. Obviously, this preset works better with other raster images, but comparing the results for the same image throughout is interesting.

Figure 13.12. Using the Hand Drawn Sketch tracing preset produces a very different result with the sample image.
Figure 13.13 shows how the Detailed Illustration preset renders the image. In this case, the result is similar to the Default preset but with slightly more detail.
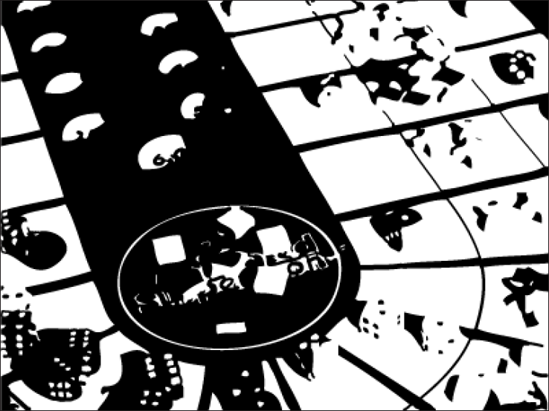
Figure 13.14 shows an example of the Comic Art preset. Again, this preset is probably best suited to images other than this example, such as ones with a lot of contrasting colors. This shows less detail than the Default setting.
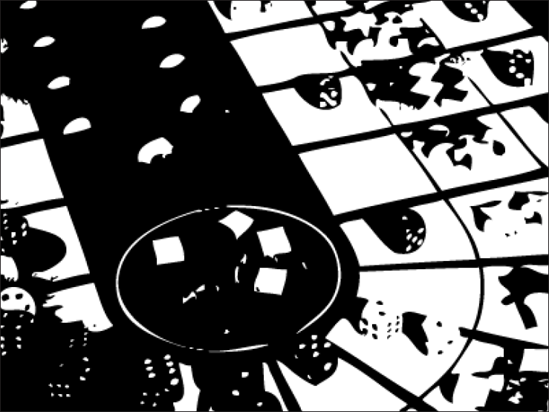
Figure 13.14. Using the Comic Art tracing preset produces a black-and-white image that can be very difficult to discern.
Figure 13.15 shows the image traced by using the Technical Drawing preset.
The Black and White Logo preset shown in Figure 13.16 is somewhat similar to the Default and the Detailed Illustration presets, but for this image, the results seem a bit more pleasing, with just a hint of more detail and smoother curves.
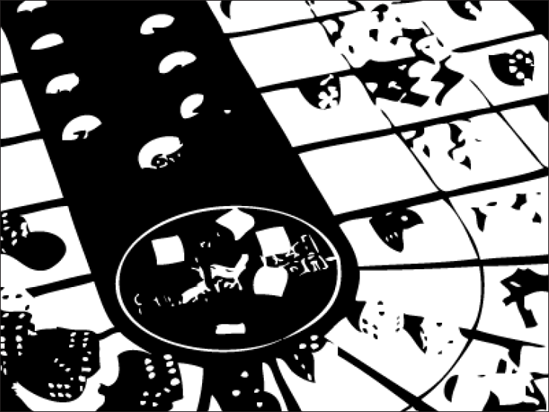
Figure 13.16. Using the Black and White Logo preset produces a black-and-white image that's fairly striking.
Figure 13.17 shows the Inked Drawing preset. Although the results are similar to the Black and White Logo preset results, this preset has a very different overall effect.
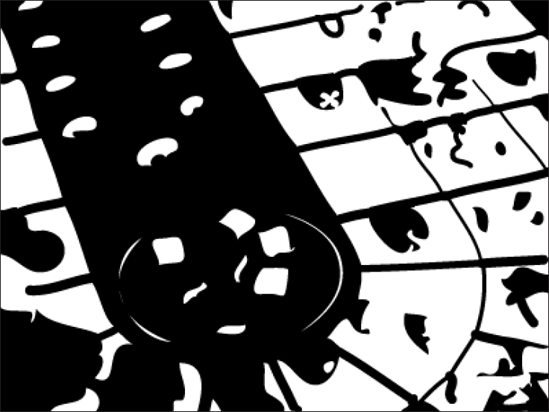
Figure 13.17. Using the Inked Drawing preset also produces a black-and-white image that has some interesting differences from similar presets.
The final preset, Type, is shown in Figure 13.18. Again, the preset options produce a black-and-white image, but the end result shows more detail than some of the other images.
After you choose a preset that gets you at least close to your desired result, you likely want to experiment with the other options in the Tracing Options dialog box. In doing so, you have the opportunity to fine-tune the appearance of the vector output.
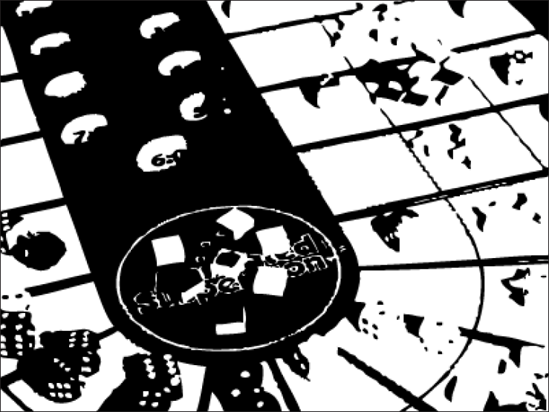
Figure 13.18. Using the Type preset also produces a black-and-white image but with more detail than some of the other black-and-white presets.
These are the available options:
Mode: This option allows you to choose Color, Grayscale, or Black and White for the format of the vector image.
Threshold: This option allows you to choose the threshold between black and white (only for black and white images).
Palette: This option allows you to choose a custom library for color selection for color and grayscale images. The only choice here is Automatic, unless you've loaded a custom swatch library by choosing Window

Max Colors: Use this option to specify the number of colors to use (between 2 and 256) for color and grayscale images.
Output to Swatches: Choose this option to output the colors used to the Swatches panel.
Blur: Use this to specify the size of the Blur effect to apply during raster image processing to remove small jagged edges. The higher the value, the more detail around edges is lost, resulting in smoother lines.
Resample: This option allows you to specify the sampling resolution to use on the raster image. You may want to choose a lower resolution to reduce the size of the document.
Tracing Fills/Strokes: These options allow you to choose the desired Trace mode.
Max Stroke Weight: Use this to specify the maximum weight of a stroke that's converted into a stroked path.
Min Stroke Length: Use this to specify the minimum length of a stroke that's converted into a stroked path.
Path Fitting: Use this to control how closely paths should be traced.
Minimum Area: This option allows you to specify the area (in pixels squared) that's rejected during trace. Use this setting to reduce the complexity of the resulting vector image.
Corner Angle: Use this to specify the sharpness of a turn in the raster image that's turned into a corner in the vector image.
It's probably best to experiment with small changes in a single option at a time to narrow in on your desired results. As long as the Preview check box is selected, Illustrator redraws the vector image after each change you make. If you find that it takes too long to generate the previews, you can work with Preview off, but doing so makes it more difficult to fine-tune the results.
Aside from choosing the set of options that best suits your particular needs, actually using the Live Trace tool is quite simple. Follow these steps to trace a raster image using the Live Trace tool:
Choose File
Choose the bitmap image that you want to trace.
Click Place to close the dialog box and return to your document.
Ensure that the newly placed image is selected. If the image is not selected, click it with the Selection tool.
Choose Object
Choose a preset from the Preset dropdown list (popup menu).
Click the Preview check box to preview the tracing.
Choose any options in the Tracing Options dialog box that you want.
Click Trace to close the Tracing Options dialog box and return to your document.
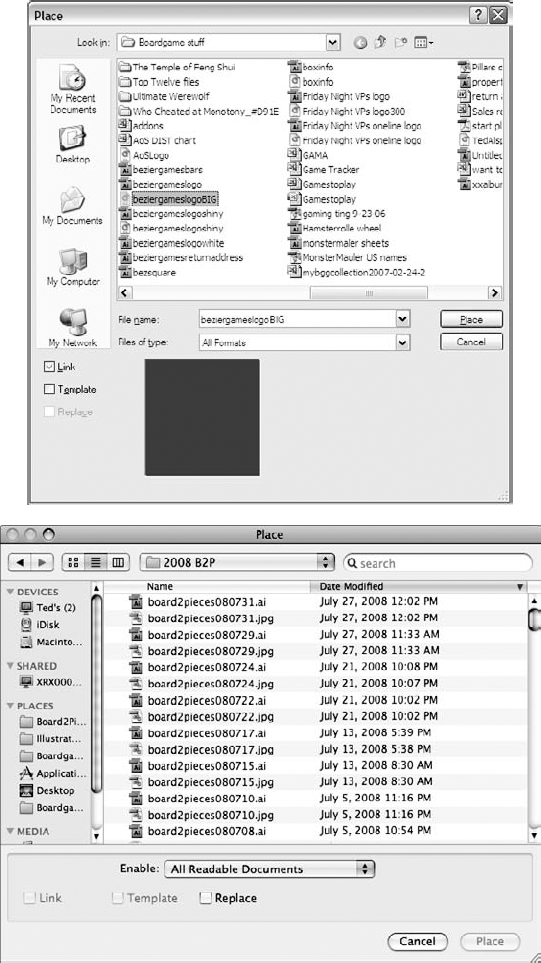
Figure 13.19. Open the Place dialog box to choose a bitmap image to place into your document (Windows at top and Mac at bottom).
You can also click the Tracing Presets and Options dropdown list (popup menu) on the Control panel and then choose a preset or the Tracing Options command from the dropdown list (popup menu). Then, click the Live Trace button on the Control panel to trace the image.
Tip
Instead of using the up/down arrows to change the settings for one of the Live Trace options, click the existing value and then type the new value. This is especially important when the Preview option is selected or when you're typing values using the Control panel because Illustrator redraws the tracing whenever there's a value change.
After an image is traced, you can modify the image in several ways. As explained in Chapter 14, you can use the Live Paint tool to change the colors in the image. Even if you trace the image in black and white, you can still colorize it. Another way to modify the traced image is to choose Object
You can quickly trace a raster image and then expand it into editable paths by using the Object
In this chapter, you learned how to use the Live Trace tool, which can quickly create vector graphics from raster-based images. Here are some important things you learned:
Live Trace has three modes for tracing raster images.
Live Trace has a number of presets that you can use to quickly trace raster images.
The Tracing Options dialog box offers an almost unlimited range of tracing options.
You can convert traced images into ordinary Illustrator objects by expanding them.