IN THIS CHAPTER
Customizing Illustrator
Altering preferences
Creating actions
Customizing actions
You know that you can use Illustrator to do all types of incredible artwork, but you should also see the practical, real-world side of Illustrator where deadlines must be met and there's little or no time for play. This chapter focuses on the real-world applications of Illustrator and how to get the most out of the software.
Under the Help menu (Illustrator menu on a Mac), you find some useful information about the creators of Illustrator and its plug-ins.
About Illustrator displays a dialog box, as shown in Figure 17.1, with the user information and credits for the Illustrator team (click Credits to see the list). The Credits box lists everyone who ever helped with getting Illustrator updated and created and makes you aware of the large number of people who are involved in creating, maintaining, and updating the software.
No two illustrators work the same. To accommodate the vast differences among styles, techniques, and habits, Illustrator provides many settings that each user can modify to personalize the software.
Illustrator provides four major ways to change preferences:
You can control how Illustrator works by accessing the Preferences submenu, which you do by choosing Edit

A second way to make changes is by changing preferences relative to each document. You usually make these changes in the Document Setup dialog box, but a few other options are available. You can find more information on document-specific preferences later in this chapter.
The third way to customize preferences happens pretty much automatically. When you quit Illustrator, it remembers many of the current settings for the next time you run it. These settings include panel placements and values in Tools panel settings.
The fourth way is to use the Window
Illustrator has a few settings that you can't customize. These features can really get under your skin because most of them seem like things that you should be able to customize. A section later in this chapter discusses what you can't customize.
The General section of the Preferences dialog box, accessed by choosing Edit
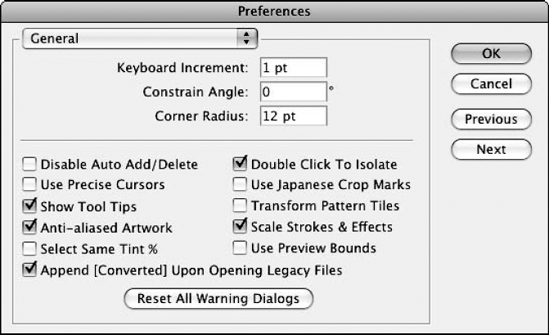
Figure 17.2. The General section of the Preferences dialog box enables you to customize Illustrator.
The cursor key increment that you specify in this setting controls how far an object moves when you select it and press the keyboard arrows.
The default for this setting is 1 point, which many people feel is small enough. I make my increment smaller when I'm working in 800% or 1600% views.
The Constrain Angle setting controls the angle at which all objects are aligned. By default, rectangles are always drawn flat, aligning themselves to the bottom, top, and sides of the document window. When you press Shift, lines that you draw with the Pen tool and objects that you move align to the Constrain Angle, or 45°, 90°, 135°, or 180°, plus or minus the constraining angle.
The Constrain Angle also affects how the four transformation tools transform objects. The Scale tool can be very hard to use when the Constrain Angle is not 0°, and the Shear tool becomes even more difficult to use than normal at different constrained angles. Pressing Shift when using the Rotate tool constrains the rotational angle to 45° increments added to the Constrain Angle.
Note
For more on the Rotate tool and the other transformation tools, see Chapter 11.
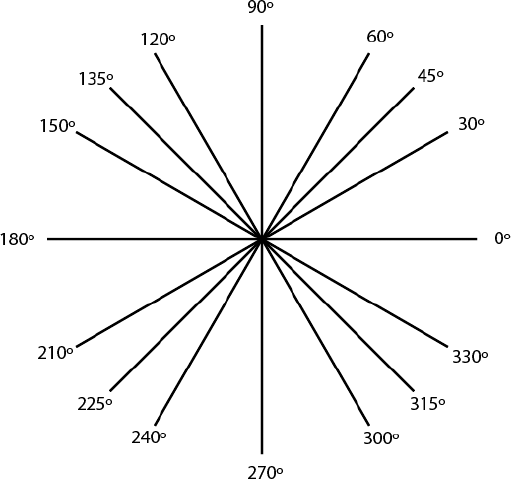
In Illustrator, 0° is a horizontal line and 90° is a vertical line. Figure 17.3 shows Illustrator angles.
If you set the Constrain Angle to 20°, objects are constrained to movements of 20°, 65°, 110°, 155°, and 200°. Constrain Angles of 90°, 180°, and −90° (270°) affect only type, patterns, gradients, and graphs; everything else works normally.
When copying objects using the Alt (Option) shortcut, you can press Shift in conjunction with a Constrain Angle to duplicate objects at a specific angle. To copy with the Alt (Option) shortcut, press Alt (Option) while dragging an object and then release the mouse button before releasing Alt (Option) to produce a duplicate of the object at the new location.
The Corner Radius option affects the size of the curved corners on a rounded rectangle.
Note
For more on the Corner Radius option and rounded rectangles, see Chapter 5.
The corner radius value changes each time you type a new value in the Rounded Rectangle dialog box. This dialog box opens when you click the Rounded Rectangle tool without dragging in a document. If, for example, you create one rounded rectangle with a corner radius of 24 points, all rounded rectangles that you create from that point forward have a radius of 24 points. You can change the corner radius in only two ways:
Click the Rounded Rectangle tool without dragging in a document and then type a new value in the Rounded Rectangle dialog box.
Type a new value in the Corner Radius text field in the Preferences dialog box.
The real advantage to changing the corner radius in the Preferences dialog box is that the corner radius affects manually created (dragged with the Rounded Rectangle tool) rounded rectangles immediately. Changing the corner radius in the Rectangle dialog box requires that you know the exact dimensions of the rectangle or that you draw a rectangle by typing information in the Rounded Rectangle dialog box (clicking with the Rounded Rectangle tool without dragging) and then specify the corner radius. You must then delete the original rectangle in order to manually draw a rounded rectangle with the correct corner radius.
Warning
Because you can change the corner radius setting easily, be sure to check it before you manually draw a series of rounded rectangles. You can't easily or automatically change the corner radius on existing rounded rectangles.
If you use 0 points as the corner radius setting, the corners aren't rounded at all.
The 11 check boxes in the General section of the Preferences dialog box are Illustrator's version of the Battlestar Galactica ragtag fleet of unwieldy spacefaring craft. Some are quite powerful, and others seem like they aren't capable of transferring millions of people across the galaxy, much less defending themselves against the evil menace of the Cylon Empire. Okay, that wasn't the best analogy. The fact is, you won't find another place in Illustrator where so many totally unrelated options share the same dialog box, and I had to come up with a snazzy introduction.
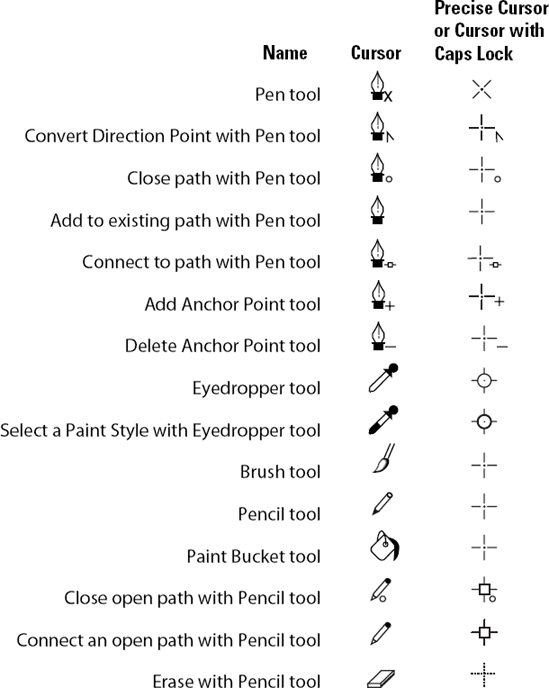
Precise cursors are cursors that appear as a variation of a crosshair instead of in the shape of a tool. Figure 17.4 shows cursors that are different when the Use Precise Cursors option is selected.
Tip
Caps Lock toggles between standard cursors and precise cursors. When the Use Precise Cursors option is selected, Caps Lock makes the cursors standard. When the Use Precise Cursors option is deselected, Caps Lock activates the precise cursors.
I usually keep this option selected and rarely engage Caps Lock to change the cursors back to normal. In particular, I find the precise cursor for the Brush tool to be quite useful because the standard Brush cursor is a giant amorphous blob.
This option displays little popup names for the tools if you rest your cursor above them for one second. It's a great idea to keep this option selected because not only do you see the name of the tool but also the key to press to access that tool.
The Anti-aliased Artwork option turns on anti-aliasing for on-screen representation of vector objects. Curved and diagonal edges appear smooth instead of jagged (or stairstepped). The resulting effect is for on-screen viewing only, and it won't affect output or rasterization of your artwork.
This option specifies that the objects must have the same tint percentage when selecting objects with the same color. If this option isn't selected and you select a color, all tints of that color are selected.
When you open an older version of an Illustrator file (prior to Illustrator CS), a dialog box appears with the following message: "This file contains text that was created in a previous version of Illustrator. This legacy text must be updated before you edit it." Because the text engine was revamped in Illustrator CS, all old type needs to be updated. By default, this option is selected so that all files with legacy type or other functions, such as older files before gradients and transparency, are updated when opening the file.
This option controls how the Pen tool behaves. With the option deselected (the default), clicking on an anchor point on an existing path deletes the point, and clicking on an existing path adds a new anchor point. If you click this check box, the Pen tool doesn't add or remove points from existing paths but instead always creates a new path/segment when selected.
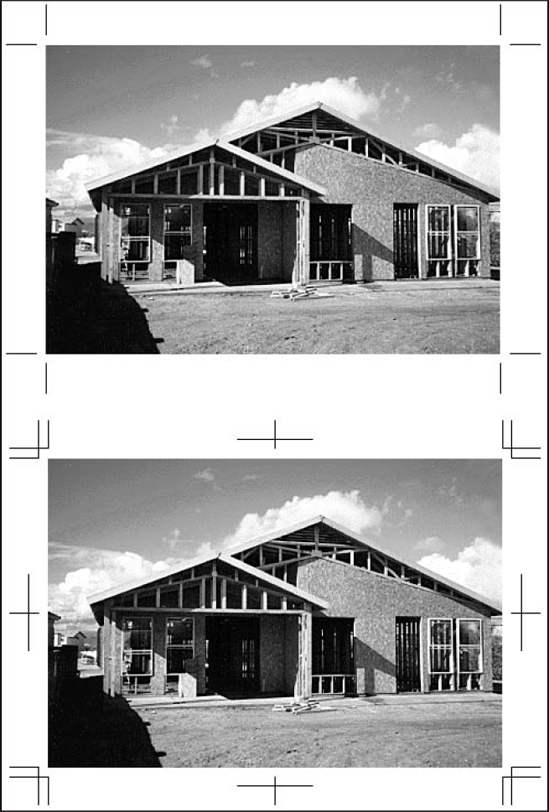
When selected, the Use Japanese Crop Marks option changes the standard crop marks, usually created with Effect
Select the Transform Pattern Tiles option if you want patterns in paths to be moved, scaled, rotated, sheared, or reflected when you use the transformation tools. When this option is selected, opening a transformation dialog box (Move, Scale, Rotate, Shear, or Reflect) automatically selects the Pattern check box. When the option is deselected, the Pattern check box is not selected in a transformation dialog box. This option controls whether selected patterns are transformed when the Transform panel is used.
I usually click the Transform Pattern Tiles check box, which sets all patterns to automatically transform and move with the objects that are being transformed and moved. This feature is especially useful when you want to create perspective in objects because the transformations of patterns can enhance the intended perspective.
When the Scale Strokes & Effects feature is on, it automatically increases and reduces line weights and applied effects relative to an object when you uniformly scale that object manually. For example, if a path has a stroke weight of 1 point and you reduce the path uniformly by 50%, the stroke weight changes to 0.5 points.
Note
Scaling objects nonuniformly (without pressing Shift) doesn't change the stroke weight on an object, regardless of whether the Scale Strokes & Effects feature is on or off.
When you select the Use Preview Bounds option, it affects how the Info panel measures the dimension of the selected object. With the Use Preview Bounds option selected, Illustrator's Info panel includes the size of the stroke width and other elements, such as feathered shadows, in the dimensions.
The Reset All Warning Dialogs option reverts all of Illustrator's lovely warnings. For example, a warning appears when you try to delete a point and don't click the point. You can turn this off by clicking the Don't show this again check box. When you choose to reset all warning boxes, it's turned on again.
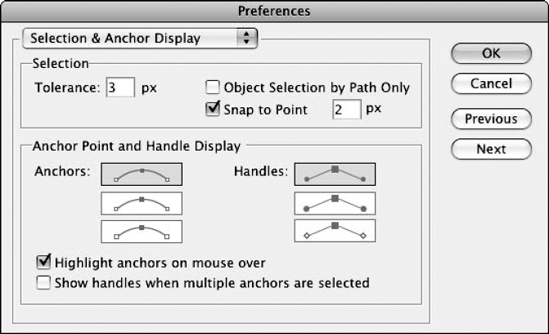
As shown in Figure 17.6, this section controls how paths are selected as well as how anchor points and their handles are displayed.
This setting controls how far away from an object you can be in order to select it, measured in screen pixels.
With Object Selection by Path Only selected, you must select the object's path with a Selection tool to select the object rather than click the fill. If you deselect this option, you can click the fill with the Selection tool to select it.
This option makes it easier to select an anchor point (as opposed to selecting another part of a path or object). The pixel amount is measured in screen pixels.
For each of these, click the appropriate check box to select how anchors and handles appear when selected.
This option highlights anchors (in the color of the layer where the path resides) as the tip of your mouse passes over them.
Clicking this check box shows all the control handles for all points selected when you're using the Direct Selection tool.
The Type preferences enable you to customize your type options. You have nine type options to choose from. Figure 17.7 shows the Type section of the Preferences dialog box.
You can set these 10 type preference options:
When you select Font Preview, you have an additional option of Size.
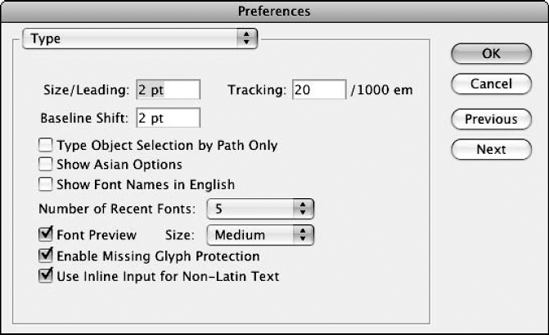
Figure 17.7. The Type section of the Preferences dialog box enables you to select the options for type used in your documents.
You can use the keyboard to increase and decrease type size by pressing Ctrl+Shift+> (
You can increase or decrease the type size and leading only until you reach the upper and lower limits of each. The upper limit for type size and leading is 1296 points; the lower limit for each is 0.1 points.
Tip
I keep my settings fairly high, at 10 points, because I have found that I require large point changes, usually quite a bit more than 10 points. If I need to do fine-tuning, I either type the exact size that I want or use the Scale tool.
The Baseline Shift feature moves selected type up and down on the baseline, independent of the leading. The increment specified in this box is how much the type is moved when you press the arrow keyboard commands. To move type up one increment, press Alt+Shift+↑ (Option+Shift+↑). To move type down one increment, press Alt+Shift+↓ (Option+Shift+↓).
Tip
I keep the Baseline shift increment at 1 point so that I can adjust path type better; specifically, I like to be able to adjust the baseline shift of type on a circle.
Tracking changes the amount of space between selected characters, and the setting in this text field represents the amount of space (measured in thousandths of an em space) that the keyboard command adds or removes. To increase tracking, press Ctrl+→ (
To increase the tracking by five times the increment in the Type & Auto Tracing section of the Preferences dialog box, press Shift+Alt+Ctrl+ (Shift+Option+
The value in the Tracking text field also affects incremental changes in kerning. Kerning is the addition or removal of space between one pair of letters only. Kerning is done instead of tracking when a blinking insertion point is between two letters, as opposed to at least one selected character for tracking.
Selecting this option makes it possible to select text by clicking on the text path itself. The default is turned off, allowing you to click anywhere on the type with the Selection tool to select the type.
Select the Show Asian Options option to view and set the options for Asian fonts. The Asian fonts include Chinese, Japanese, and Korean.
If you have a font from another language installed on your system (like Kanji, a Japanese character set), this option allows you to see these typefaces in the font/type menus as English words.
Use the Number of Recent Fonts setting to specify how many font names are displayed in the Type
When the Font Preview check box is selected, Illustrator displays fonts in the Type
This option removes characters that aren't present when a font is missing. It helps avoid those nasty boxes that can appear for missing characters.
The Units & Display Performance preferences enable you to select the measurement system you want to use and set the performance of the Hand tool. Figure 17.8 shows the Units & Display Performance section of the Preferences dialog box.
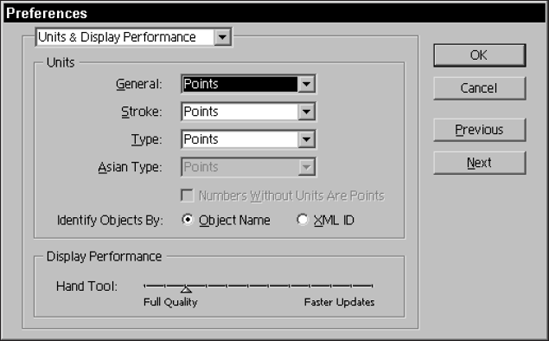
Figure 17.8. The Units & Display Performance section of the Preferences dialog box allows you to choose the measurement units for Illustrator.
The General dropdown list (popup menu) in the Units section changes the measurement system for the current document and all future new documents. Illustrator contains five measurement units: inches, picas, points, millimeters, and centimeters. The areas for which the measurement can be specified are the following:
General: Applies to the Measure tool and the rulers
Stroke: Applies to the weight of the path's stroke
Type: Sets the type measurement increments
Asian Type: Sets the type measurement increments for Asian type
Warning
Changing the General units in the Units & Display Performance Preferences dialog box changes the ruler units in the Document Setup dialog box. Access this dialog box by choosing File
The other areas under Units that can be changed are the Numbers Without Units Are Points check box and Identify Objects By (Object Name or XML ID) radio buttons:
Numbers Without Units Are Points: When you type a number with no measurement indicator (in for inches, pt for points, etc.), the default is points.
Identify Objects By: In this area, click a radio button to identify objects by name or XML ID. If you save your document in SVG format for use with other Adobe products, select XML ID to ensure that object names conform to XML naming conventions.
Being aware of which measurement system you're working in is important. When you type a measurement in a dialog box, any numbers that aren't measurement system–specific are applied to the current unit of measurement. For example, if you want to move something 1 inch and you open the Move dialog box by choosing Object
Usually a corresponding letter or letters indicates the measurement system: in for inch, pt for points, and cm for centimeters.
Warning
The default measurement is points, so if you ever toss your preferences file or reinstall Illustrator, be aware that you may have to change the measurement system.
The Hand tool's viewing performance is what you're adjusting under the Display Performance area. Click and drag the slider to the left so you see more quality when moving around your screen. Drag the slider to the right to get a quicker update with less quality viewing. A quicker update shows a rough preview as you're dragging rather than an exact preview of your illustration as you move around.
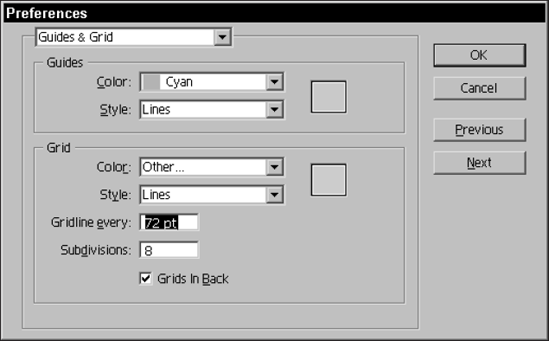
The Guides & Grid section of the Preferences dialog box lets you control the color and style of your guides and grids as well as the spacing of your grid. Figure 17.9 shows the Guides & Grid section of the Preferences dialog box. For more on grids and guides and their options, see Chapter 8.
Smart Guides are helpers that show you the angle of the line and list the line as a path. You can select or deselect four Display Options as well as adjust the angles and snapping tolerance. The Smart Guides snap to other objects, aiding you in aligning, editing, and transforming. Figure 17.10 shows the Smart Guides section of the Preferences dialog box.
These hints and lines pop up when you drag your mouse over an object. They tell you what each area is. For example, if you drag your mouse over a line, the hint pops up with the word "path." If you drag your mouse over an anchor point, the hint says "anchor point." As you move your cursor around, lines appear to help you align new objects and existing ones. The options below control which hints and lines appear when Smart Guides are on:
Color: This popup menu allows you to select the color of the hints.
Alignment Guides: These are incredibly handy lines that appear when the object you're dragging is aligned to any edge or center of another object on your screen.
Object Highlighting: This option highlights the object to which you're pointing.
Transform Tools: When you're rotating, scaling, or shearing an object with this option selected, Smart Guides show up to help you out.
Anchor/Path Labels: This displays the words "anchor" and "path" when the cursor is over one of these.
Measurement Labels: These labels display how far from your last click, how big objects are that you're creating, etc.
Construction Guides: This lets you view guidelines when using Smart Guides.
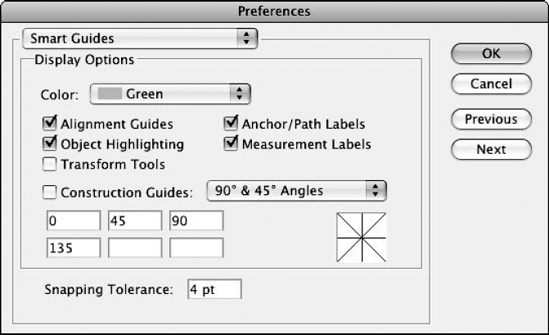
The angles that you can choose in the Smart Guides section of the Preferences dialog box let you pick what angles display construction guides when you drag an object. You can choose from seven presets or create custom angles. The lines indicate the standard guide angles. When you add your own angled lines, a line appears representing the particular angle you typed.
The Snapping Tolerance setting allows you to choose how close one object must be to another object before the first object automatically snaps to the second object. Set the Snapping Tolerance in points; the lower the number, the closer you must move the objects to each other. The Snapping Tolerance default is 4 points. That means when you're within 4 points to another object, your selected object snaps to the second object. I tend to stick with the default.
Slices are subdivisions of a Web-based graphic and used for Web pages. Options under Slice are the Show Slice Numbers check box and Line Color dropdown list (popup menu). If selected, the Show Slice Numbers option shows the numbers for each slice. The Line Color option lets you change the slice lines to a color of your choice. The default is to use a contrasting color.
Note
For more on slicing, see Chapter 19.
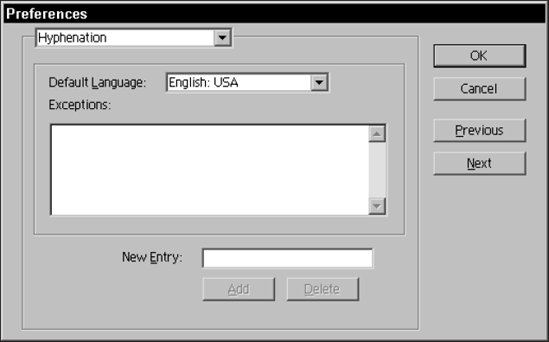
The Hyphenation section of the Preferences dialog box contains options for customizing the way Illustrator hyphenates words. At the top of the dialog box is a dropdown list (popup menu) that lists various languages. Select a default language. Typically, if you use Illustrator in English, you don't have to change anything. If you use a different language, you need to have that language installed on your computer. Then, you can choose the language you want to use as the default. At the bottom of the dialog box is an area where you can add to the list of hyphenation exceptions. These exceptions are words that you don't want Illustrator to hyphenate under any circumstances. Figure 17.11 shows the Hyphenation section of the Preferences dialog box.
The next item in the dropdown list (popup menu) in the Preferences dialog box is a two-trick pony, the Plug-ins & Scratch Disks section, as shown in Figure 17.12. The first section in this dialog box enables you to specify a folder for plug-ins. The default is the plug-ins folder in the Adobe Illustrator folder.

Figure 17.12. Use the Plug-ins & Scratch Disks section of the Preferences dialog box to specify file locations.
The second section in the Plug-in & Scratch Disks section of the Preferences dialog box lets you define what drives to use as scratch disks (places where Illustrator stores information when it runs out of RAM). Typically, you should assign the fastest, largest drive to be your primary scratch disk. The settings you choose don't take effect until you restart Illustrator.
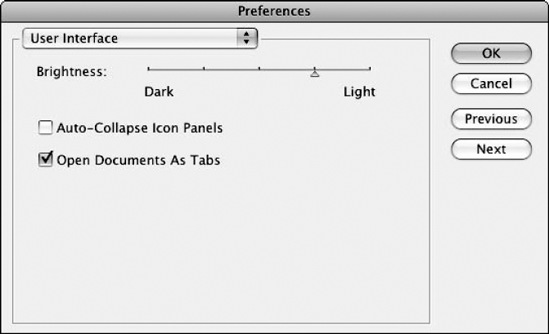
The User Interface preferences let you change how bright the UI (mostly panels) is. In addition, you can set Icon panels to automatically collapse after you access a control in them and whether to use the tabbed document interface (deselecting this option removes the tabs from the top of the document work area, making the documents only accessible via the Window menu). You set these preferences in the User Interface section of the Preferences dialog box, as shown in Figure 17.13.
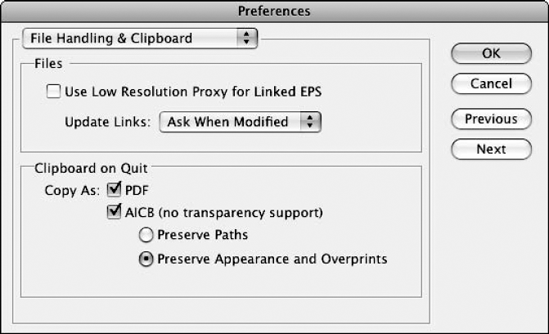
The File Handling & Clipboard preferences let you change how files are saved with extensions and links and how to handle the Clipboard files. You set these preferences in the File Handling & Clipboard section of the Preferences dialog box, as shown in Figure 17.14.
The File Handling preferences are used when saving and updating files. Click the Use Low Resolution Proxy for Linked EPS check box to display a low-resolution image for a linked EPS to save file space. You can also set how links are updated; choose from Automatically, Manually, or Ask When Modified in the Update Links dropdown list (popup menu).
The Clipboard is another area that can be altered in preferences. When you copy and paste, the Clipboard holds that information. Objects copied to the Clipboard are PDF files by default. You can change that to AICB (Adobe Illustrator Clip Board), and you won't have any transparency support. Under the AICB option, you can select Preserve Paths or Preserve Appearance and Overprints. All the AICB options enable you to do more with editing but also take up more file space.
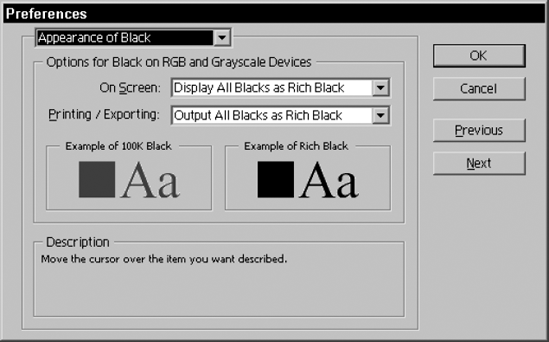
In the Appearance of Black section of the Preferences dialog box, you have two options for controlling how Illustrator displays and prints black. In each case, you can choose to accurately depict black or make black into a deeper, richer-appearing color. Figure 17.15 shows the Appearance of Black section of the Preferences dialog box.
Most Illustrator users take many preferences for granted. But if Illustrator didn't remember certain preferences, most Illustrator users would be quite annoyed.
Panels (including the Tools panel) remain where they were when you last used Illustrator. Illustrator remembers their size and whether they were open. Values in the Tools panel are still whatever you set them to the last time you used a specific tool. For example, the options in the Paintbrush/Eyedropper dialog box remain the same between Illustrator sessions.
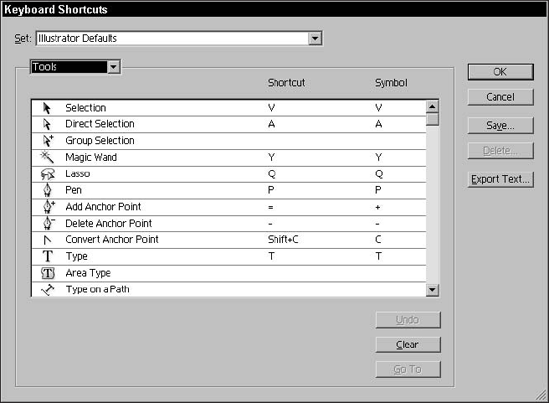
Longtime users of Illustrator have noticed keyboard shortcut changes. Although they may be frustrating, there's a method to Adobe's madness. It wants to make working between programs seamless, and that means making keyboard shortcuts the same throughout its programs. If you liked a certain keyboard command, you can always customize the keyboard to what you like.
Choose Edit
Note
You can't use Ctrl (
Several things can't be customized in Illustrator, and they can be annoying:
Type information always defaults to 12-point Myriad Pro, Auto Leading, 100% Horizontal Scale, 0 Tracking, Flush Left, Hyphenation Off.
Every new document begins with only one layer. It's called Layer 1 and is light blue.
When you create new objects, they always have a 0% Black fill and a 1-point stroke.
The Selection tool is always the active tool when you first launch Illustrator.
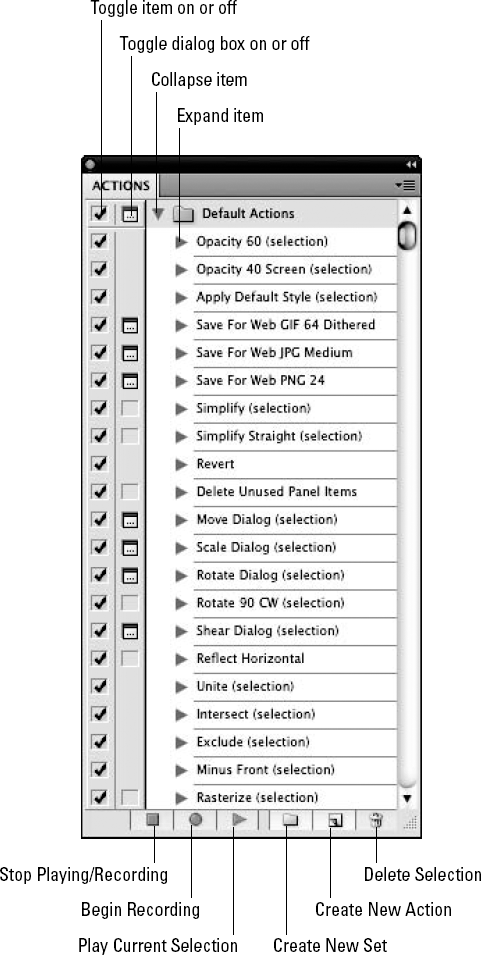
Adobe has brought the same technology from Photoshop into Illustrator to ease repetitive tasks. The tasks of applying color, object transformations, and text functions are easily automated using the Actions panel. Illustrator comes with some prerecorded actions, and you can create your own.
In the Actions panel, the box on the far-left side toggles an item off or on. The next box toggles the dialog box off or on. The buttons at the bottom enable you to record your own actions.
Accessing Default Actions requires little effort. To activate a Default Action, click the action to highlight it and then click the Play Current Selection button.
If the numerous default actions aren't enough, you can create your own actions. To start recording a new action, you need to create a new action. Click the Create New Action button at the bottom of the Actions panel or choose New Action from the Actions panel's popup menu to open the New Action dialog box so that you can name the action. After typing a name (I prefer to give it a descriptive name so I know what action it does), click Record and then start doing your action. After you finish, you can move the order or delete parts of your action.
Warning
Not everything can be recorded. If an action can't be recorded, Illustrator displays a warning dialog box.
When you create a new action, it's put into a folder with a set of actions. You can have multiple actions in a folder or just one. A new action needs to be a part of a set (or in a folder). It can be an existing set or a new set. Think of actions as packages. To create a new set, click the Create New Set button at the bottom of the panel or select New Set from the Actions panel's popup menu.
In Illustrator, not everything is recordable. As with anything, there are limits. The following actions are recordable in the Actions panel:
File: New, Open, Close, Save, Save as, Save for Microsoft Office, Save a Copy, Revert, Place, and Export
Edit: Cut, Copy, Paste, Paste in Front, Paste in Back, Clear, Select All, and Deselect All
Object: Transform Again, Move, Scale, Rotate, Shear, Reflect, Transform Each, Arrange, Group, Ungroup, Lock, Unlock All, Hide Selection, Show All, Expand, Rasterize, Blends, Mask, Compound Path, and Cropmarks
Type: Block, Wrap, Fit Headline, Create Outlines, Find/Change, Find Font, Change Case, Rows & Columns, Type Orientation, and Glyph Options
Effects: Colors, Create, Distort, and Stylize
View: Guides-related only
Panels: Color, Gradient, Stroke, Character, MM Design, Paragraph, Tab Ruler, Transform, Pathfinder, Align, Swatch, Brush, Layer, and Attribute
Tools panel: Ellipse, Rectangle, Polygon, Star, Spiral, Move (Selection tool), Rotate, Scale, Shear, and Reflect
Special: Bounding Box Transform, Insert Select Path, Insert Stop, and Select Objects
You can duplicate an action when you want to modify an existing action but don't want to record the whole darn thing again. To duplicate an action, first select an action in the Actions panel and then choose Duplicate from the Actions panel's popup menu. This makes a copy of the action.
To change the name of the action, double-click the action to open the Action Options dialog box, as shown in Figure 17.18. You can change the name of an action this way but not the name of the action set. You can also see which set the selected action is a part of. Assign a function key here, especially if it's an action that you use repeatedly. You can also change the color of the action button listed in the Actions panel.
Deleting an action is pretty easy. Select the action that you want to delete and then drag it to the trash icon at the bottom of the panel or use the Actions panel's popup menu.

To start recording, do one of the following:
Create a new action set and action.
Select an existing action and then click the Begin Recording button at the bottom of the panel.
Activate an action and then select Start Recording in the Actions panel's popup menu.
To stop recording, do one of the following:
Click the Stop Playing/Recording button.
Select Stop Recording in the Actions panel's popup menu.
If you have either duplicated an action or want to add to an action, you may want to insert an item into the action. To insert a menu item, activate an action, start recording, and then select Insert Menu Item from the Actions panel's popup menu. This allows you to record most menu items, such as File, Edit, Object, Type, Effect, and guide-related Views. You don't have to use this to record a menu item.
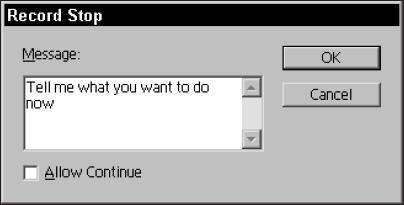
Record Stop enables you to stop the playback of an action at a point where you may want to make the action stop so you can add something to a certain area each time you replay it. During your recording, select Insert Stop in the Actions panel's popup menu. You can have some fun with this one. You're creating your own dialog box when you insert a stop, as shown in Figure 17.19.
Put a message in this dialog box just for fun. Always allow the user to continue if he or she wants. That way, you continue with the rest of the action after the stop. This is great for using Actions to partially do the creation but pauses so you can type specifics in a dialog box.
The Action Options are where you name or rename the action, move it to a set, assign a function key, or assign a color to the action. The function key option is a cool feature that lets you assign a function key to an action so you can just press F5, for example, and your action starts.
The Playback Options dialog box, which you access by choosing Playback Options from the Actions panel's popup menu, lets you customize your actions even further. This dialog box is shown in Figure 17.20.
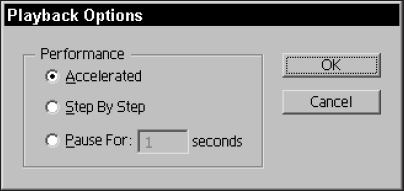
You can accelerate, step through, or pause your Actions as follows:
Accelerated: Plays the action all at once — and quickly. This is great for monotonous, repetitive actions, such as renaming figures or adding a tagline.
Step By Step: Plays the action one step at a time. This lets you decide whether you want to perform a step or add in-between steps.
Pause For: Stops at each step for the specified time. This is a good choice if you want to closely examine how something was recorded and want to stop the recording at a certain spot.
You can't record the Pen tool or the Pencil tool, but you can record a path. Follow these steps:
Draw a path.
While the path is selected, start recording.
Choose Insert Select Path from the Actions panel's popup menu.
Stop recording.
You've just created an action to place a path.
If you want to select an object to use later in your recording, you need to apply text to it and then select an object or path first. Follow these steps:
Select the object or path.
Select Show Note from the Attributes panel's popup menu.
Type the text you want to apply to the object in the bottom field and then click the Begin Recording button on the Actions panel to record the new setting.
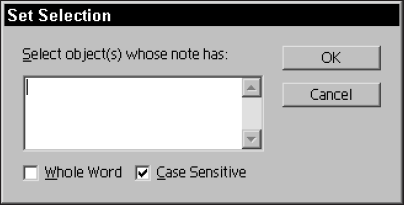
When you need to select the object or path, choose Select Object from the popup menu to display the Set Selection dialog box, as shown in Figure 17.21, type the name you gave it in the Attributes panel, and then click OK. The object or path is now selected.
Whew! Even after creating a bunch of cool actions, you want more options. You can clear, reset, load, replace, and save actions. Now you can create, delete, load sets, and save to your heart's content by choosing the appropriate item in the Actions panel. The following describes what each option does:
Clear Actions: Deletes all the action sets in the Actions panel
Reset Actions: Resets the panel to the Default Actions
Load Actions or Replace Actions: Lets you navigate to a folder where the action sets are and lets you select one. You can find a ton of prerecorded actions and action sets on the application CD.
Save Actions: Lets you save actions after you record them. You must save your new action just like a file if you want to use it the next time you launch Illustrator. Select Save Action from the popup menu and then navigate to where you want to save your action set (maybe the Action Sets folder within the application folder).
You can customize and automate Illustrator to make the program work the way you want. In this chapter, you learned about the following topics:
The different preference areas can be changed in Illustrator.
You can customize many preferences, including keyboard shortcuts, in the various panes in the Preferences dialog box.
The Constrain Angle option controls the angle at which objects are drawn and moved when Shift is pressed.
The General Units option controls the measurement units for Illustrator.
Use the Actions panel to streamline repetitive tasks in Illustrator.