
In this section, we will design a 3D model of the robot. The 3D model is mainly used for simulation purpose. The modeling will be done using Blender. The version must be greater than 2.6 because we only tested the tutorials on these versions.
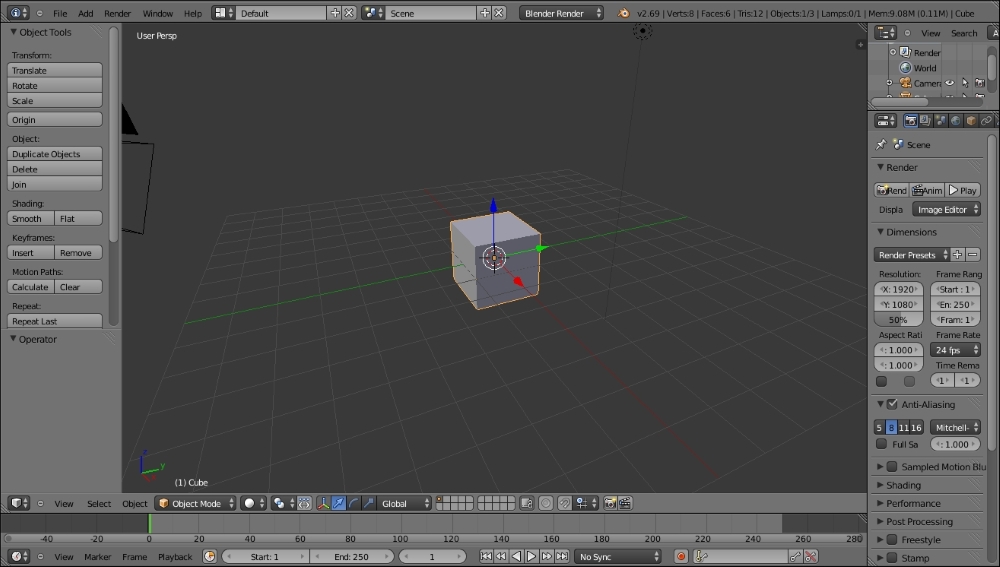
The following screenshot shows the blender workspace and tools that can be used to work with 3D models:
The main reason why we are using Blender here is so that we can model the robot using Python scripts. Blender has an inbuilt Python interpreter and a Python script editor for coding purpose. We are not discussing about the user interface of Blender here. We can find a good tutorial of Blender on its website. Refer to the following link to learn about Blender's user interface:
http://www.blender.org/support/tutorials/
Let's start coding in Blender using Python.
Blender is mainly written in C, C++, and Python. Users can write their own Python script and access all the functionalities of Blender. If you are an expert in Blender Python APIs, you can model the entire robot using a Python script instead of manual modeling.
Blender uses Python 3.x. Blender. Python API is generally stable, but some areas are still being added to and improved. Refer to http://www.blender.org/documentation/blender_python_api_2_69_7/ for the documentation on Blender Python API.
Let's discuss Blender Python APIs that we will use in our robot model script.
Python APIs in Blender can do most of the functionalities of Blender. The main jobs that can be done by these APIs are as follows:
- Edit any data inside Blender, such as scenes, meshes, particles, and so on
- Modify user preference, key maps, and themes
- Create new Blender tools
- Draw the 3D view using OpenGL commands from Python
Blender provides the bpy module to the Python interpreter. This module can be imported in a script and gives access to blender data, classes, and functions; scripts that deal with Blender data will need to import this module. The main Python modules we will use in bpy are:
- Context Access: This provides access to Blender user interface functions from the (
bpy.context) script. - Data Access: This provides access to the Blender internal data (
bpy.data). - Operators: This provides Python access to calling operators, which includes operators written in C, Python, or Macros (
bpy.ops).
For switching to scripting in Blender, we need to change the screen layout of Blender. The following screenshot shows the option that helps you to switch to Scripting layout:
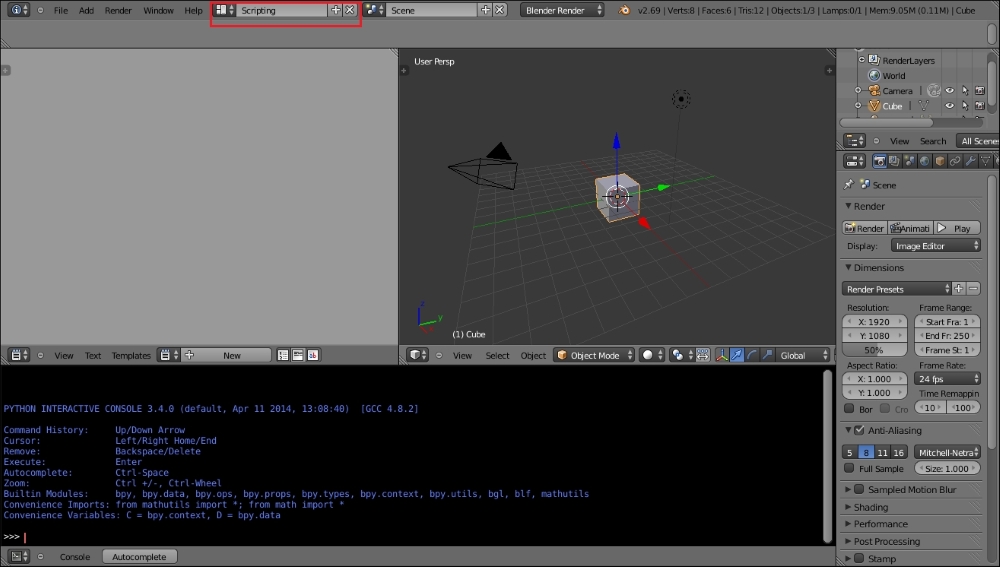
After selecting the Scripting tab, we can see a text editor and Python console window in Blender. In the text editor, we can code using Blender APIs and also try Python commands via the Python console. Click on the New button to create a new Python script and name it robot.py. Now, we can design the 3D model of robot using only Python scripts. The upcoming section has the complete script to design our robot model. We can discuss the code before running it. We hope you have read the Python APIs of Blender from their site. The code in the upcoming section is split into six Python functions to draw three robot plates, draw motors and wheels, draw four support tubes, and export into the STereoLithography (STL) 3D file format for simulation.
The following is the Python script of the robot model that we will design:.
- Before starting Python script in Blender, we must import the
bpymodule. Thebpymodule contains all the functionalities of Blender and it can only be accessed from inside the Blender application:import bpy
- This following function will draw the base plate of the robot. This function will draw a cylinder with a radius of 5 cm and cut a portion from the opposite sides so that motors can be connected using the
Booleanmodifier inside Blender:#This function will draw base plate def Draw_Base_Plate():
- The following two commands will create two cubes with a radius of 0.05 meter on either side of the base plate. The purpose of these cubes is to create a modifier that subtracts the cubes from the base plate. So in effect, we will get a base plate with two cuts. After cutting the two sides, we will delete the cubes:
bpy.ops.mesh.primitive_cube_add(radius=0.05, location=(0.175,0,0.09)) bpy.ops.mesh.primitive_cube_add(radius=0.05, location=(-0.175,0,0.09)) #################################################### #################################################### #Adding base plate bpy.ops.mesh.primitive_cylinder_add(radius=0.15, depth=0.005, location=(0,0,0.09)) #Adding boolean difference modifier from first cube bpy.ops.object.modifier_add(type='BOOLEAN') bpy.context.object.modifiers["Boolean"].operation = 'DIFFERENCE' bpy.context.object.modifiers["Boolean"].object = bpy.data.objects["Cube"] bpy.ops.object.modifier_apply(modifier="Boolean") ###################################################### ###################################################### #Adding boolean difference modifier from second cube bpy.ops.object.modifier_add(type='BOOLEAN') bpy.context.object.modifiers["Boolean"].operation = 'DIFFERENCE' bpy.context.object.modifiers["Boolean"].object = bpy.data.objects["Cube.001"] bpy.ops.object.modifier_apply(modifier="Boolean") ############################################################################################################## #Deselect cylinder and delete cubes bpy.ops.object.select_pattern(pattern="Cube") bpy.ops.object.select_pattern(pattern="Cube.001") bpy.data.objects['Cylinder'].select = False bpy.ops.object.delete(use_global=False) - The following function will draw the motors and wheels attached to the base plate:
#This function will draw motors and wheels
def Draw_Motors_Wheels():
- The following commands will draw a cylinder with a radius of 0.045 and 0.01 meter in depth for the wheels. After creating the wheels, it will be rotated and translated into the cut portion of the base plate:
#Create first Wheel bpy.ops.mesh.primitive_cylinder_add(radius=0.045, depth=0.01, location=(0,0,0.07)) #Rotate bpy.context.object.rotation_euler[1] = 1.5708 #Transalation bpy.context.object.location[0] = 0.135 #Create second wheel bpy.ops.mesh.primitive_cylinder_add(radius=0.045, depth=0.01, location=(0,0,0.07)) #Rotate bpy.context.object.rotation_euler[1] = 1.5708 #Transalation bpy.context.object.location[0] = -0.135 - The following code will add two dummy motors to the base plate. The dimensions of motors are mentioned in the 2D design. The motor is basically a cylinder and it will be rotated and placed in the base plate:
#Adding motors bpy.ops.mesh.primitive_cylinder_add(radius=0.018, depth=0.06, location=(0.075,0,0.075)) bpy.context.object.rotation_euler[1] = 1.5708 bpy.ops.mesh.primitive_cylinder_add(radius=0.018, depth=0.06, location=(-0.075,0,0.075)) bpy.context.object.rotation_euler[1] = 1.5708 - The following code will add a shaft to the motors, similar to the motor model; the shaft is also a cylinder and it will be rotated and inserted into the motor model:
#Adding motor shaft bpy.ops.mesh.primitive_cylinder_add(radius=0.006, depth=0.04, location=(0.12,0,0.075)) bpy.context.object.rotation_euler[1] = 1.5708 bpy.ops.mesh.primitive_cylinder_add(radius=0.006, depth=0.04, location=(-0.12,0,0.075)) bpy.context.object.rotation_euler[1] = 1.5708 ############################################################################################################## - The following code will add two caster wheels on the base plate. Currently, we are adding a cylinder as wheel. In the simulation, we can assign it as a wheel:
#Adding Caster Wheel bpy.ops.mesh.primitive_cylinder_add(radius=0.015, depth=0.05, location=(0,0.125,0.065)) bpy.ops.mesh.primitive_cylinder_add(radius=0.015, depth=0.05, location=(0,-0.125,0.065)) - The following code will add a dummy Kinect sensor:
#Adding Kinect bpy.ops.mesh.primitive_cube_add(radius=0.04, location=(0,0,0.26)) - This function will draw the middle plate of the robot:
#Draw middle plate def Draw_Middle_Plate(): bpy.ops.mesh.primitive_cylinder_add(radius=0.15, depth=0.005, location=(0,0,0.22)) #Adding top plate def Draw_Top_Plate(): bpy.ops.mesh.primitive_cylinder_add(radius=0.15, depth=0.005, location=(0,0,0.37)) - This function will draw all the four supporting hollow tubes for all the three plates:
#Adding support tubes def Draw_Support_Tubes(): ############################################################################################# #Cylinders bpy.ops.mesh.primitive_cylinder_add(radius=0.007, depth=0.30, location=(0.09,0.09,0.23)) bpy.ops.mesh.primitive_cylinder_add(radius=0.007, depth=0.30, location=(-0.09,0.09,0.23)) bpy.ops.mesh.primitive_cylinder_add(radius=0.007, depth=0.30, location=(-0.09,-0.09,0.23)) bpy.ops.mesh.primitive_cylinder_add(radius=0.007, depth=0.30, location=(0.09,-0.09,0.23)) - This function will export the designed robot to STL. We have to change the STL file path before executing the script:
#Exporting into STL def Save_to_STL(): bpy.ops.object.select_all(action='SELECT') # bpy.ops.mesh.select_all(action='TOGGLE') bpy.ops.export_mesh.stl(check_existing=True, filepath="/home/lentin/Desktop/exported.stl", filter_glob="*.stl", ascii=False, use_mesh_modifiers=True, axis_forward='Y', axis_up='Z', global_scale=1.0) #Main code if __name__ == "__main__": Draw_Base_Plate() Draw_Motors_Wheels() Draw_Middle_Plate() Draw_Top_Plate() Draw_Support_Tubes() Save_to_STL() - After entering the code in the text editor, execute the script by pressing the Run Script button, as shown in the following screenshot. The output 3D model will be shown on the 3D view of Blender. Also, if we check the desktop, we can see the
exported.stlfile for the simulation purposes: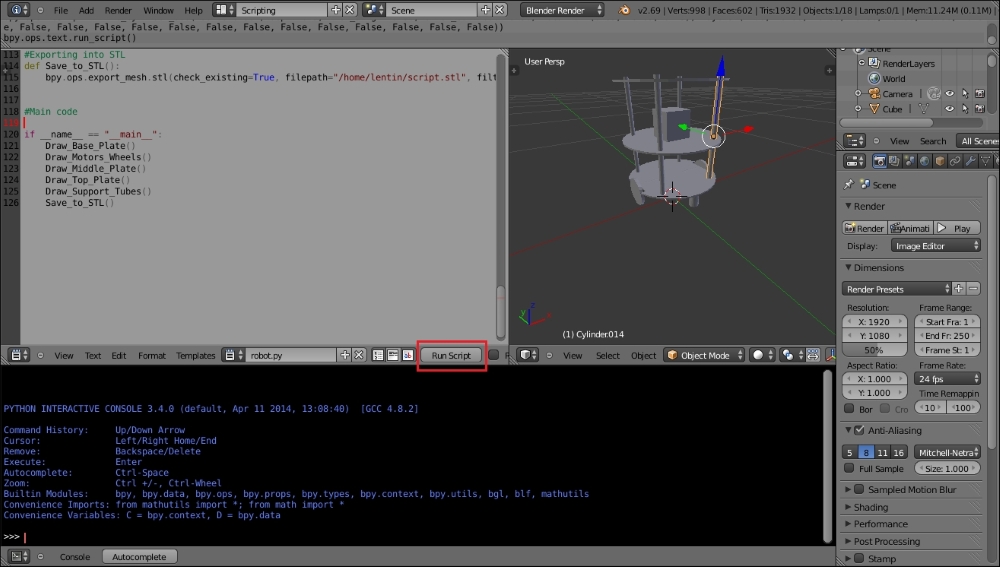
The
exported.stlfile can be opened with MeshLab and the following is a screenshot of MeshLab: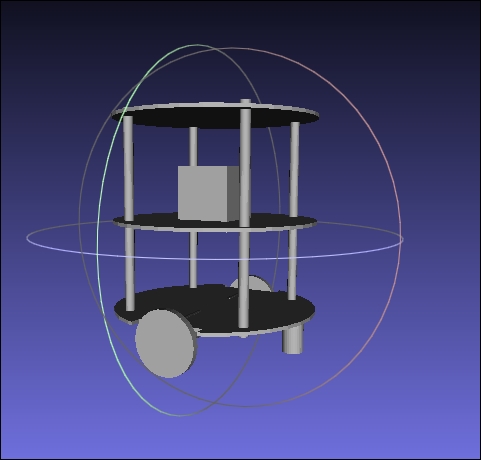
Tip
Downloading the example code
You can download the example code files for all Packt books you have purchased from your account at http://www.packtpub.com. If you purchased this book elsewhere, you can visit http://www.packtpub.com/support and register to have the files e-mailed directly to you.