
After installing the PyQt and PySide packages, we can see how to write a Hello World GUI using PyQt and PySide. The main difference between PyQt and PySide is only in some commands; most of the steps are the same. Let's see how to make a Qt GUI and convert it into Python code.
Qt Designer is the tool for designing and inserting control into Qt GUI. Qt GUI is basically an XML file that contains the information of its components and controls. The first step to work with GUI is its designing. The Qt Designer tool provides various options to make excellent GUIs.
Start Qt Designer by entering the command designer-qt4 in the terminal. The following image shows what you will be able to see after running this command:
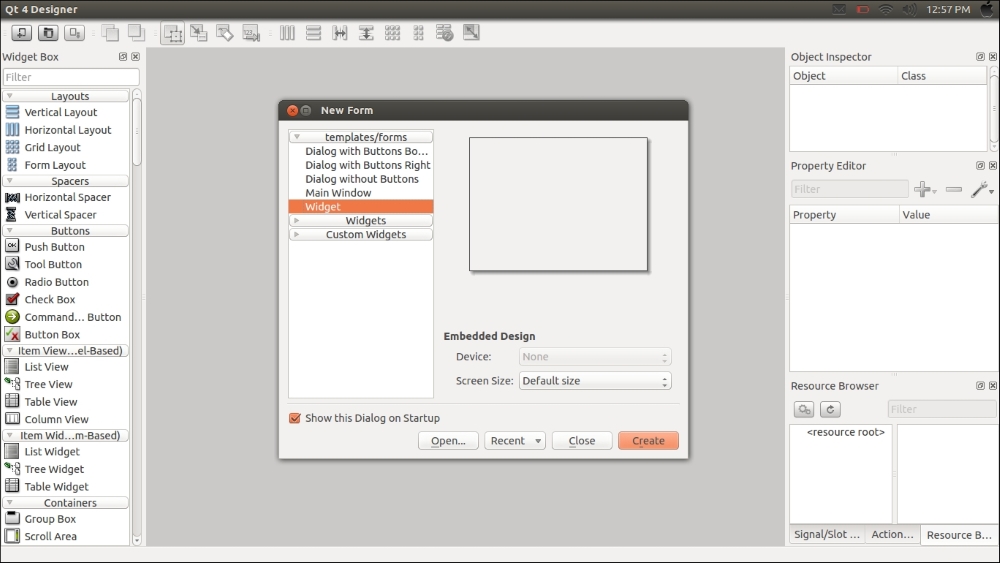
The preceding image shows the Qt designer interface. Select the Widget option from the New Form window and click on the Create button. This will create an empty widget; we can drag various GUI controls from the left-hand side of Qt 4 designer to the empty widget. Qt widgets are the basic building blocks of Qt GUI.
The following image shows a form with a PushButton dragged from the left-hand side window of Qt Designer:
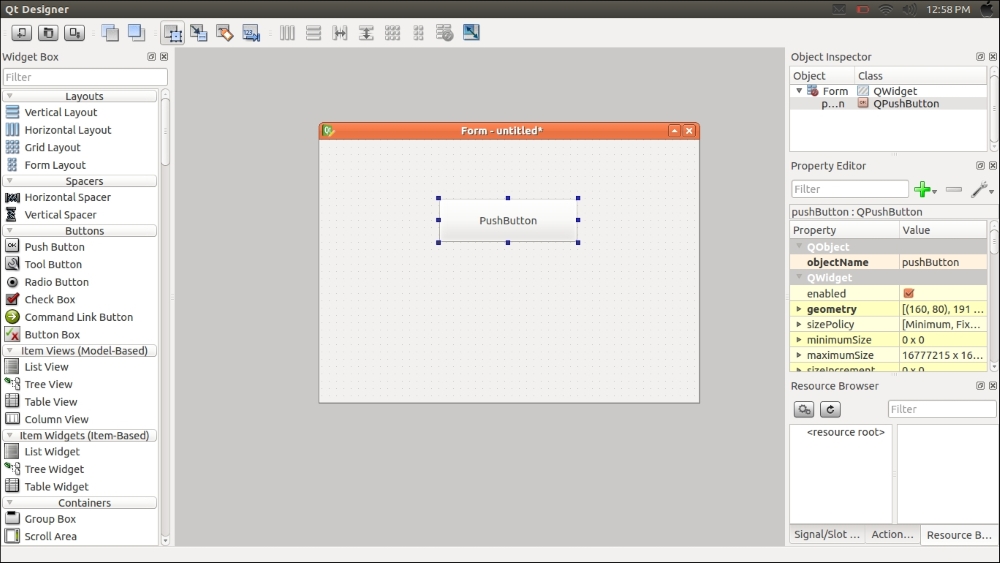
The Hello World application that we are going to build has a PushButton, when we click on the PushButton, a Hello World message will be printed on the terminal. Before building the Hello World application, we need to understand what Qt signals and slots are, because we have to use these features for building the Hello World application.
In Qt, GUI events are handled using the signals and slots features. A signal is emitted from the GUI when an event occurs. Qt Widgets have many predefined signals, and users can add custom signals for GUI events. A slot is a function that is called in response to a particular signal. In this example, we are using the clicked() signal of PushButton and creating a custom slot for this signal. We can write our own code on this custom function. Let's see how we can create a button, connect a signal to a slot, and convert the entire GUI to Python.
Here are the steps involved in creating the Hello World GUI application:
- Drag and create a PushButton from Qt Designer to the empty Form.
- Assign a slot for the button clicked event, which emits a signal called
clicked(). - Save the designed UI file in the
.uiextension. - Convert UI files to Python.
- Write the definition of the custom slot.
- Print the Hello World message inside the defined slot/function.
We have already dragged a button from Qt Designer to an empty Form. Press the F4 key to insert a slot on the button. When we press F4, the PushButton turns red, and we can drag a line from the button and place the ground symbol(![]() ) in the main window. This is shown in the following screenshot:
) in the main window. This is shown in the following screenshot:
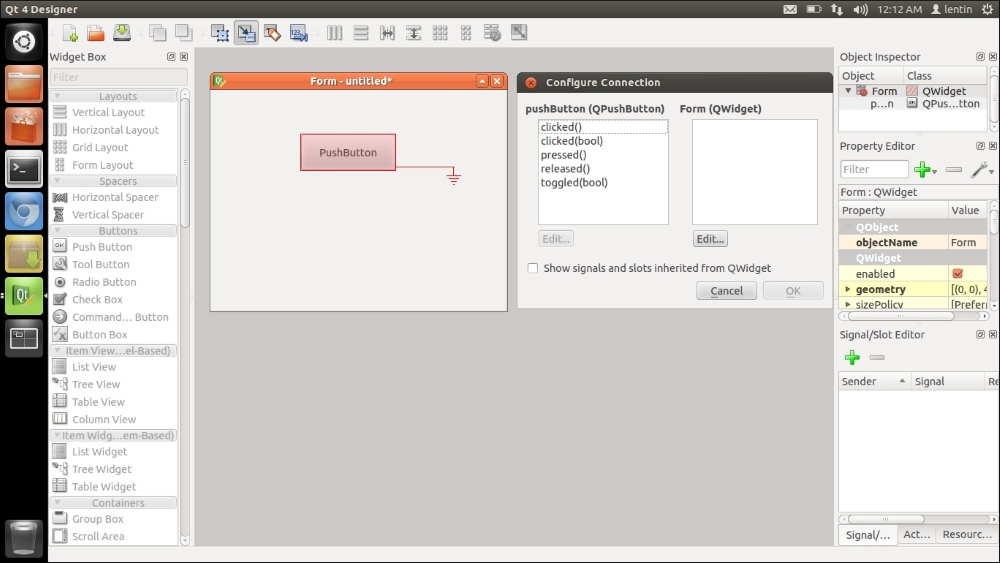
Select the clicked() signal from the left-hand side and click on the Edit.. button to create a new custom slot. When we click on the Edit.. button, another window will pop up to create a custom function. You can create a custom function by clicking on the + symbol.
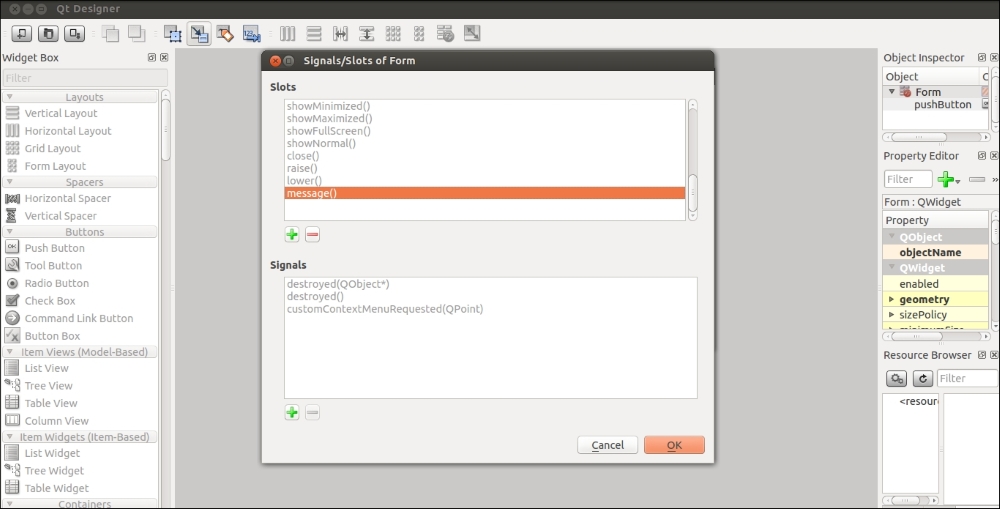
We created a custom slot called message(), as shown in the screenshot below:
Click on the OK button and save the UI file as hello_world.ui, and quit the Qt designer. After saving the UI file, let's see how we can convert a Qt UI file into a Python file.
After designing the UI file, we can convert the UI file into its equivalent Python code. The conversion is done using a pyuic compiler. We have already installed this tool while installing PyQt/PySide. The following are the commands to convert a Qt UI file into a Python file.
We have to use different commands for PyQt and PySide. The following command is to convert UI into its PyQt equivalent file:
$ pyuic4 -x hello_world.ui -o hello_world.py
The pyuic4 is a UI compiler to convert a UI file into its equivalent Python code. We need to mention the UI filename after the -x argument and mention the output filename after the -o argument.
There are not many changes for the PySide command, instead of pyuic4, PySide uses pyside-uic to convert UI files into Python files. The remaining arguments are the same:
$ pyside-uic -x hello_world.ui -o hello_world.py
The preceding command will generate an equivalent Python code for the UI file. If we run this Python code, the UI designed in Qt Designer will pop up. The generated script will not have the definition of the custom function message(). We should add this custom function to generate the code. The following procedure will guide you through adding the custom function; so when you click on the button, the custom function message() will be executed.
The generated Python code from PyQt is given here. The code generated by pyuic4 and pyside-uic are the same, except in importing module names. All other parts are the same. The explanation of the code generated using PyQt is also applicable to PySide code . The code generated from the above conversion is as follows. The code structure and parameters can change according to the UI file that you have designed:
from PyQt4 import QtCore, QtGui

try:
    _fromUtf8 = QtCore.QString.fromUtf8
except AttributeError:
    _fromUtf8 = lambda s: s

class Ui_Form(object):

    def setupUi(self, Form):
        Form.setObjectName(_fromUtf8("Form"))
        Form.resize(514, 355)

        self.pushButton = QtGui.QPushButton(Form)
        self.pushButton.setGeometry(QtCore.QRect(150, 80, 191, 61))
        self.pushButton.setObjectName(_fromUtf8("pushButton"))

        self.retranslateUi(Form)
        QtCore.QObject.connect(self.pushButton, QtCore.SIGNAL(_fromUtf8("clicked()")), Form.message)
        QtCore.QMetaObject.connectSlotsByName(Form)


    def retranslateUi(self, Form):
        Form.setWindowTitle(QtGui.QApplication.translate("Form", "Form", None, QtGui.QApplication.UnicodeUTF8))
       self.pushButton.setText( QtGui.QApplication.translate("Form", "Press", None, QtGui.QApplication.UnicodeUTF8))

if __name__ == "__main__":
   import sys
    app = QtGui.QApplication(sys.argv)
    Form = QtGui.QWidget()
    ui = Ui_Form()
    ui.setupUi(Form)
    Form.show()
    sys.exit(app.exec_())
The preceding code is the equivalent Python script of the Qt UI file that we designed in the Qt designer application. Here is the step-by-step procedure of the working of this code:
- The code will start executing from
if __name__ == "__main__":. The first thing in a PyQt code is to create aQApplicationobject. AQApplicationclass manages the GUI application's control flow and main settings. TheQApplicationclass contains the main event loop, where all events from the Windows system and other sources are processed and dispatched. It also handles initialization and finalization of an application. TheQApplicationclass is inside theQtGuimodule. This code creates an object ofQApplicationcalledapp. - The
Form = QtGui.QWidget()line creates an object calledFormfrom theQWidgetclass that is present inside theQtGuimodule. TheQWidgetclass is the base class of all the user interface objects of Qt. It can receive the mouse and keyboard event from the main Windows system. - The
ui = Ui_Form()line creates an object calleduifrom theUi_Form()class defined in the code. TheUi_Form()object can accept theQWidgetclass that we created in the previous line and it can add buttons, text, button control, and other UI components into thisQWidgetobject. TheUi_Form()class contains two functions:setupUi()andretranslateUi(). We can pass theQWidgetobject to the function calledsetupUi(). This function will add UI components on this widget object such as buttons, assigning slots for signals, and so on. TheretranslateUi()function will translate the language of the UI to other languages if needed, for example, if we need translation from English to Spanish, we can mention the corresponding Spanish word in this function. - The
Form.show()line displays the final window with buttons and text.
The next thing is to create the slot function, which prints the Hello World message. The slot definition is created inside the Ui_Form() class. The following steps insert the slot called message() into the Ui_Form() class.
The message() function definition is as follows:
    def message(self):
    print "Hello World"
This should be inserted as a function inside the Ui_Form() class. Also, change the following line in the setupUi() function inside the Ui_Form() class:
QtCore.QObject.connect(self.pushButton, QtCore.SIGNAL(_fromUtf8("clicked()")), Form.message)The Form.message parameter should be replaced with the self.message parameter. The preceding line connects the PushBbutton signal clicked() to the self.message() slot that we already inserted in the Ui_Form() class.
After replacing the Form.message parameter with the self.message parameter, we can execute the code and the output will look like this:
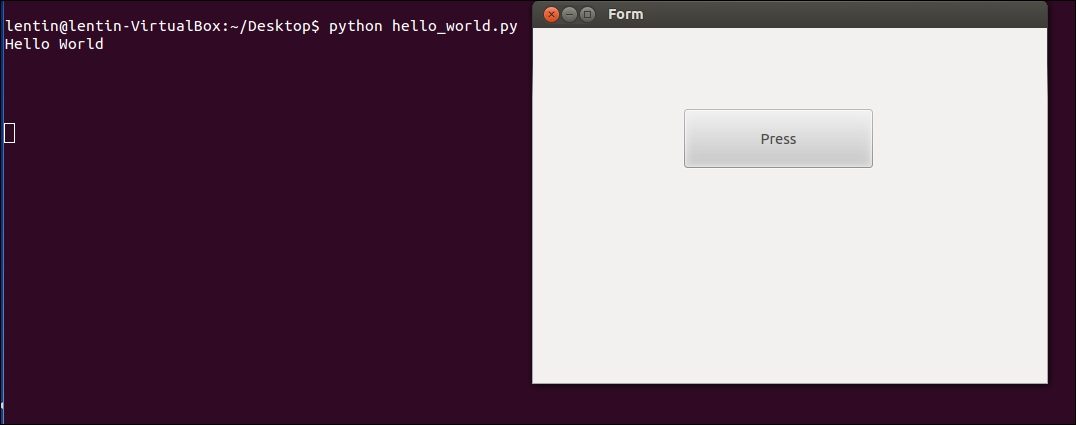
When we click on the Press button, it will print the Hello world message. This is all about setting a custom GUI with Python and Qt.
In the next section, we will see the actual GUI that we are designing for the robot.