
The game file that needs to be imported and loaded for this session is 5961_04_17.stencyl. Execute the following instructions:
- Open the Manage Player Collisions actor behavior.
- In the left-hand panel, click on the Collides with Enemies event title.
- Right-click on the kill Self block and select Remove in the pop-up menu.
- In the block palette, click on the Behavior section button and ensure that the Triggers category is selected.
- Drag the trigger event text in behavior text for self instruction block into the orange when Self hits a … block. Double-check that the correct instruction block has been selected (there are several blocks with similar names).
- In the left-hand textbox of the trigger event … in behavior … for Self block, type
RestartLevel—this must be typed so that it is identical to the name entered into the custom event block that we created previously, so check the capitalization. - In the right-hand textbox of the trigger event RestartLevel in behavior … for Self block, click on the drop-down arrow and select Behavior Name | H | Health from the drop-down menu, as shown in the following screenshot:

- Test the game. Observe what happens when the monkey collides with an enemy actor, such as the croc.
We have created a trigger for our custom RestartLevel event! When the monkey collides with an enemy actor, it is no longer instantly killed. It is relocated to its starting position in the scene, so the player can have another attempt at completing the level.
The first step was to remove the kill Self block, as we no longer needed it. We then inserted the new trigger event … in behavior … for Self block, which needs two pieces of information—the name of the event to trigger, and the name of the behavior that holds the event.
It's absolutely vital to ensure that the event name (the name of the trigger) is typed exactly the same as it is in the custom event, otherwise the trigger just won't work.
Tip
Trigger names cannot have spaces, so it's often considered good practice to capitalize the first letter of each word in the trigger's name, so that they are easier to read.
Another useful tip is to copy the name of the trigger from the custom event block, and paste it into a trigger … block, so it can be guaranteed that the names match.
If we glance back to the block palette, where the various trigger … blocks are currently on view, we can see that that there are two trigger … blocks in the For Actor subcategory. We used the first block because we only have one custom event, called RestartLevel, and we know the name of the behavior that holds the event.
We could have been a little lazy and used the second block, which does not require us to specify the behavior name. There isn't really a problem with using that block; other than it having a trivial effect on the performance of the game, the player wouldn't notice anything slow down. However, it's a good idea to specify the behavior name when possible because, first, it helps us to understand what is happening right now and, secondly, if we need to review or modify the game in six months' time, it will remind us in which behavior to find the custom event.
Nevertheless, there is a very good reason for sometimes using the second trigger … block, which does not require the behavior name, and that is because we can create multiple custom events with the same trigger name. Imagine that we have four different behaviors that need to do something when an actor dies, we could create a custom event in each of those behaviors, and give each custom event the same trigger name, such as PlayerDied. We could trigger all those custom events with a single trigger … block, thus saving ourselves a lot of work.
In the section Time for action – triggering the custom event, we used the first trigger … block, which can be found in the For Actor subcategory of the Behaviors section of the palette, and we also discussed the use of the second block in the same subcategory.
Consider how these additional trigger … blocks could be used, and particularly when it might be beneficial to use the For Both trigger, which can trigger actor and scene events.
It's impossible to master the tools that are available to us, without knowing which tools are available.
In this chapter, we have created some very useful behaviors, but we have only used a small subset of the instruction blocks that are available to us.
Take some time to methodically work through the instruction block palette, and examine each block carefully, for example, does it have a drop-down option menu such as the block shown in the following screenshot?
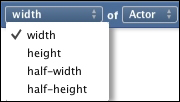
If it does have a drop-down option menu, discover what the available options are, and consider how they might be useful in game design. Don't worry if the purpose of each block and the options available don't make sense immediately, some of the features are quite advanced, and are rarely used. However, knowing that these features are available will help to solve game design problems as they arise in the future.
For the moment, concentrate on the following sections and categories in the block palette:
- Actor: Position and Properties
- Flow: Conditional, Looping, and Time
- Flow: Debug and Commenting
- Numbers & Text: Math, Trig / Exponents, and Text
Just being aware of all the blocks in the previously mentioned Sections and Categories is a great start to being able to solve many of the problems that we face when designing and creating computer games.
The behaviors that have been provided with Stencyl are an excellent source of information and inspiration. They can be edited and modified just like our own custom behaviors. In fact, the behaviors provided with Stencyl are just custom behaviors that have been created by someone else.
It's certainly a valuable exercise to examine the built-in behaviors that we have used in our game. The built-in behaviors that we have used are as follows:
- Cannot Exit Scene
- Camera Follow
- Jump and Run Movement
These behaviors can be located in the Dashboard, along with our behaviors that we have created—just double-click on the behavior's icon to view the instruction blocks that have been used to create the events.
Be aware that making changes to the built-in behaviors is very likely to cause problems in our game, so be careful to ensure they are not modified in any way.
Tip
Make a duplicate of the game, and experiment with it, rather than making experimental changes to our original game file. To make a duplicate of a game, save it first, to ensure that any recent changes have been saved to disk. Then, on the Stencyl menu, select File | Save Game As, and provide a name for the duplicate game. At this point, we can make changes without risk of affecting our original game.