
Color ramps are used in multiple applications when styling data. A color ramp is a series of continuous or discrete colors that can be applied to raster or vector data values. QGIS contains a number of color ramps that are ready to use and also allows you to add new color ramps. In this section, we will first demonstrate how to manage the QGIS color ramp collection and then how to add new color ramps.
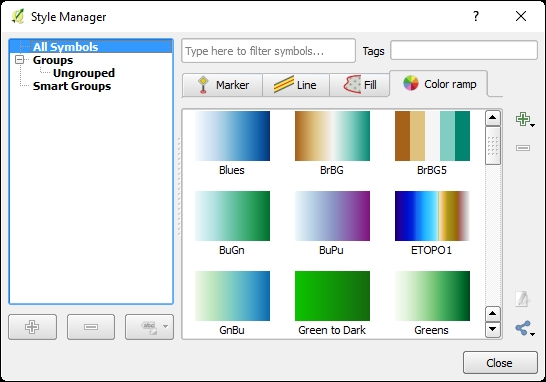
Color ramps can be managed and created using the Style Manager window. The Style Manager window provides an interface to manage the marker, line, fill, and color ramps that are available in the Style tab of the layer property window. To open the Style Manager, navigate to Settings | Style Manager and then click on the Color ramp tab. The Style Manager window is shown in the following screenshot:
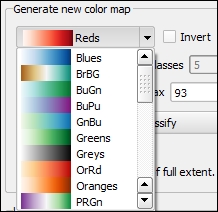
The color ramps displayed in the Color ramp tab are available for quick access from drop-down selection boxes when you style the data. For example, the following screenshot shows the quick-access color ramps in a drop-down box when we specify a color ramp to apply a pseudocolor to a singleband raster:
Six operations are available to manage color ramps in the Style Manager: rename, remove, export, import, add, and edit. Each of these operations will be explained now.
To rename a color ramp, click once on the color ramp to select it, pause, and then click on it a second time (this is a slow double-click) to make the name editable. Type in the new color ramp name, then press Enter to save it.
To remove a color ramp, select the color ramp and then click on the Remove item button (![]() ). The color ramp will no longer be available.
). The color ramp will no longer be available.
To export a color ramp, click on the Share button (![]() ) in the lower-right corner. Then click on Export to open the Export symbol(s) window (shown in the following screenshot):
) in the lower-right corner. Then click on Export to open the Export symbol(s) window (shown in the following screenshot):
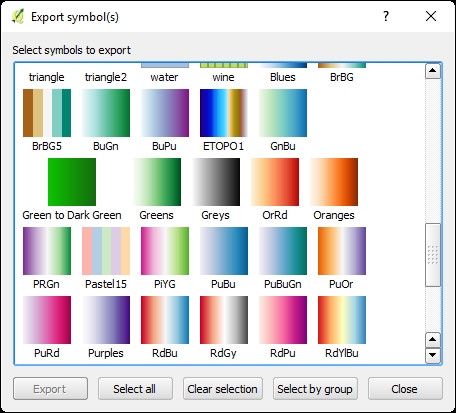
Select the symbols that you wish to export and then click on Export to export the selected symbols to an XML file. The exported symbols can later be imported to the Style Manager using the Import function.
To import color ramps from an XML file, click on the Share button (![]() ) in the lower-right corner; then click on Import to open the Import symbol(s) window (shown in the following image):
) in the lower-right corner; then click on Import to open the Import symbol(s) window (shown in the following image):

Exported color ramp styles can be imported from an XML file or a URL that is pointing to an XML file. To import from a file, select file specified below for the Import from parameter, then click on Browse to select the XML file. Once the Location value is specified, the color ramps will be displayed. Select the color ramps that you wish to import, select the group into which you wish to import the color ramps, and then click on Import. The imported color ramps (and other symbol types, if selected) will be added to the color ramp list in the Style Manager.
Using the Add item button (![]() ), three types of color ramps—Gradient, Random, and ColorBrewer—can be added to the color ramp list in the Style Manager. These color ramp types can be created from scratch, or they can be selected from a large collection of existing color ramps from the cpt-city archive of color gradients.
), three types of color ramps—Gradient, Random, and ColorBrewer—can be added to the color ramp list in the Style Manager. These color ramp types can be created from scratch, or they can be selected from a large collection of existing color ramps from the cpt-city archive of color gradients.
Let's add one color ramp of each type and then add a cpt-city color ramp.
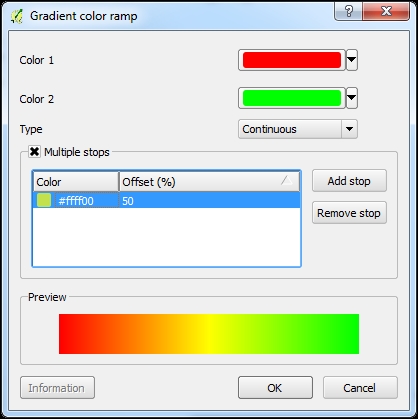
To add a Gradient color ramp, click on the Add item button (![]() ) and then choose Gradient. This will open the Gradient color ramp window. A Gradient color ramp uses two colors, which are specified as Color 1 and Color 2, to set the start and end colors. QGIS applies an algorithm to create a gradation between the two colors. More colors can be added to the gradient by clicking first on Multiple stops and then on Add stop; this will open the color picker. Once a color is chosen, you can enter the percentage along the gradient to apply the stop's color. More stops can be added by again clicking on Add stop. As an example, in the following screenshot, a gradient is created between red and green with a yellow stop at the 50 percent location:
) and then choose Gradient. This will open the Gradient color ramp window. A Gradient color ramp uses two colors, which are specified as Color 1 and Color 2, to set the start and end colors. QGIS applies an algorithm to create a gradation between the two colors. More colors can be added to the gradient by clicking first on Multiple stops and then on Add stop; this will open the color picker. Once a color is chosen, you can enter the percentage along the gradient to apply the stop's color. More stops can be added by again clicking on Add stop. As an example, in the following screenshot, a gradient is created between red and green with a yellow stop at the 50 percent location:
When all the gradient parameters have been set, click on OK to save the gradient. QGIS will prompt you to name the gradient. Once it is named, the gradient will appear in the Style Manager's list of color ramps after the default color ramps.
To add a Random color ramp, click on the Add item button (![]() ) and then choose Random. This opens the Random color ramp window (shown in the following screenshot). A Random color ramp generates a number of randomly generated colors that fall within specified Hue, Saturation, and Value ranges. The Classes parameter determines how many colors to generate. Colors are randomly generated each time any one of the parameters are changed. As an example, in the following screenshot, five random colors are generated with different hues (between
100 and 320) but with the same saturation and value:
) and then choose Random. This opens the Random color ramp window (shown in the following screenshot). A Random color ramp generates a number of randomly generated colors that fall within specified Hue, Saturation, and Value ranges. The Classes parameter determines how many colors to generate. Colors are randomly generated each time any one of the parameters are changed. As an example, in the following screenshot, five random colors are generated with different hues (between
100 and 320) but with the same saturation and value:
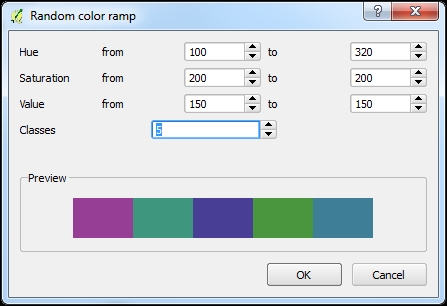
When all the parameters have been set, click on OK to save the Random color ramp. QGIS will prompt you to name the color ramp. Once it is named, the Random color ramp will appear in the Style Manager's list of color ramps.
To add a ColorBrewer color ramp, click on the Add item button (![]() ) and then choose ColorBrewer. This opens the ColorBrewer ramp window (shown in the following figure). A ColorBrewer color ramp generates three to eleven colors using one of the available schemes. The Colors parameter determines how many colors to generate and the Scheme name parameter sets the color scheme that will be used. As an example, in the following screenshot, five colors are generated using the RdGy (Red to Grey) color scheme:
) and then choose ColorBrewer. This opens the ColorBrewer ramp window (shown in the following figure). A ColorBrewer color ramp generates three to eleven colors using one of the available schemes. The Colors parameter determines how many colors to generate and the Scheme name parameter sets the color scheme that will be used. As an example, in the following screenshot, five colors are generated using the RdGy (Red to Grey) color scheme:
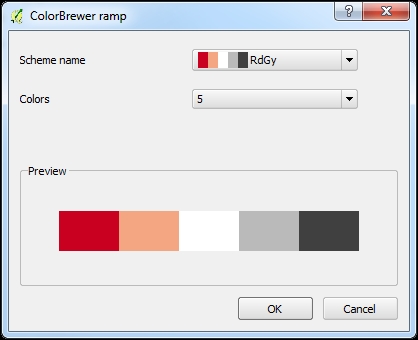
When all the parameters have been set, click on OK to save the ColorBrewer color ramp. QGIS will prompt you to name the color ramp. Once it is named, the ColorBrewer color ramp will appear in the Style Manager's list of color ramps.
Note
The ColorBrewer color ramps are based on the work of Cynthia Brewer. For more information and an interactive color selector, visit the ColorBrewer website at http://colorbrewer2.org/.
If you do not want to add a color ramp from scratch, a large collection of existing color ramps from the cpt-city archive of color gradients is available for use in QGIS. To add a cpt-city color ramp, click on the Add item button (![]() ) and then choose cpt-city. This opens the cpt-city color ramp window (shown in the following screenshot):
) and then choose cpt-city. This opens the cpt-city color ramp window (shown in the following screenshot):
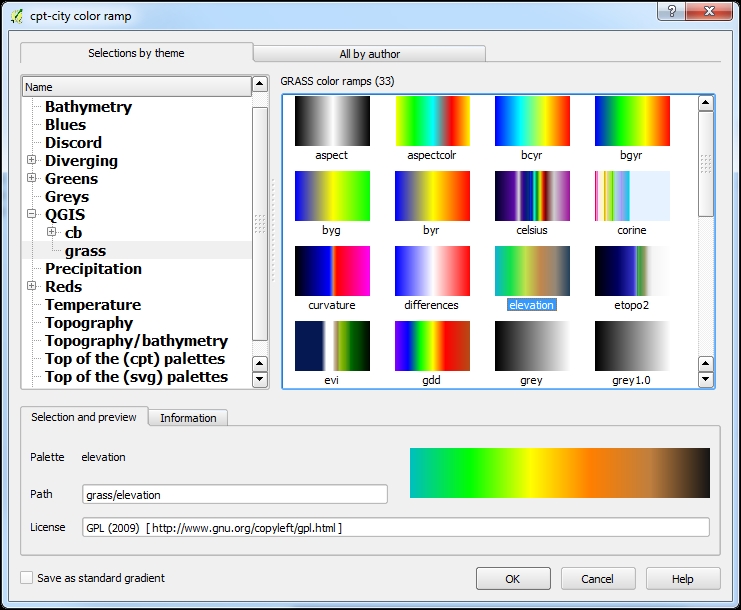
Color ramps can be selected by theme or by author by choosing the appropriate tab at the top of the window. In either case, the color ramps are presented in an expandable tree on the left with a listing of color ramps in each tree element on the right. When a color ramp is selected, the Selection and preview and Information tabs are populated.
There are two ways to add a cpt-city color ramp to the list in the Style Manager: as a cpt-city or as a standard Gradient color ramp.
To save the color ramp as a cpt-city color ramp, click on OK with a color ramp selected. This will keep the link between the added color ramp and the cpt-city color ramp list. The color ramp cannot be modified if it is added as a cpt-city color ramp.
To save the color ramp as a standard gradient color ramp, check Save as standard gradient and then click on OK. This will save the color ramp as a gradient color ramp and the color ramp will not link back to the cpt-city color ramp collection. The color ramp can be modified later as it has been converted to a standard gradient color ramp.
The following is something you should have a look at:
Note
The cpt-city archive of gradients is available at http://soliton.vm.bytemark.co.uk/pub/cpt-city/. The archive contains thousands of gradients. The gradients that are most applicable to style geographic data have been included in the QGIS cpt-city collection.
To edit a color ramp, select the color ramp and then click on the Edit item (![]() ) button. This will open one of the four types of windows depending on which type of color ramp was selected: Gradient, Random, ColorBrewer, or cpt-city. Using the opened window, the properties of the color ramp can be modified.
) button. This will open one of the four types of windows depending on which type of color ramp was selected: Gradient, Random, ColorBrewer, or cpt-city. Using the opened window, the properties of the color ramp can be modified.
Now that color ramps have been discussed, we will put the color ramps to work by styling raster data with color ramps; and later, we will use color ramps to style vector data.