Accessibility relates to the way a page is structured and how it will render in devices that are used by people who have vision problems or who need other special browser considerations.
Good HTML/XHTML practices such as using valid code and meaningful alt tags, and not relying on JavaScript or Flash for key elements such as navigation, will prevent most accessibility problems.
In this exercise, you will create code that violates accessibility standards, and then you will repair the error.
Note
USE the CH3 sample site you modified in the previous exercise.
OPEN the CH3 site if it isn’t already open, and display the default.htm page.
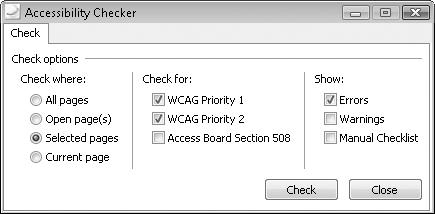
On the Tools menu, click Accessibility Reports to open the Accessibility Checker.
Using the default Accessibility Checker settings, click Check.
The Accessibility task pane opens below the Design pane and shows errors that exist in the open page.
Close the Accessibility task pane.
Because you’re not going to find any errors in this Expression Web 2 template, you need to create an error.
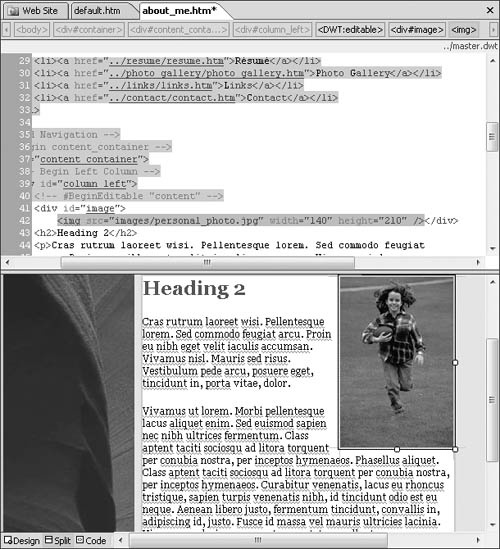
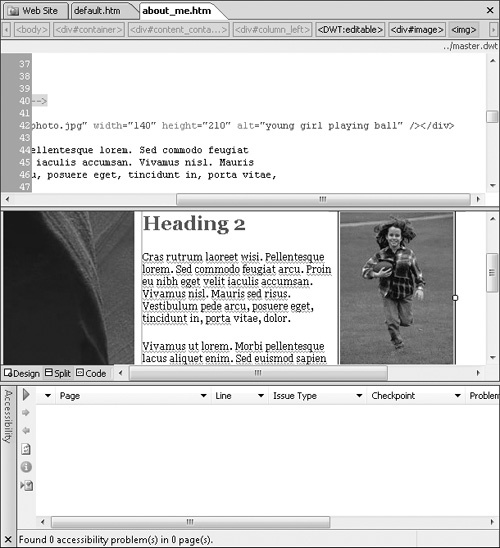
In the Folder List, expand the about_me folder, and then open the about_me.htm page. If your screen is not in Split view, click Split at the bottom of the workspace.
Select the image that is in the Design pane, and find the code for the image in the Code pane. In the tag for that image, remove the alt attribute (alt="").
Accessibility rules dictate that every image must have an alt attribute even if the attribute is empty, as shown in this page.
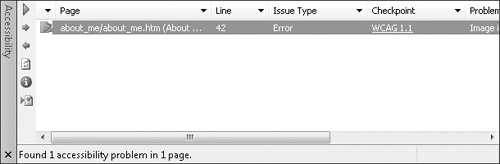
On the toolbar, click the Save button. On the Tools menu, click Accessibility Reports to open the Accessibility Checker, and then click Check.
An error is now visible in the Accessibility task pane.
Rather than simply replacing the previously removed, empty alt attribute, let’s put something meaningful there.
Set the insertion point immediately in front of the closing image tag that you modified in step 5, type alt="Young girl playing ball", and click Save.
In the Accessibility task pane, click the Refresh button.
The error no longer appears.
Click the Close button on the Accessibility task pane to close it.
Tip
You can generate a report by clicking Generate HTML Report in the Accessibility task pane. Expression Web 2 generates a new page that has the errors reported. This report can be generated for a page, for a selection of pages, or for a site, and is a valuable tool when redesigning or analyzing a site. You can save or print the report for your own records or for your customer.