
Thriving businesses usually have something in common: They offer excellent customer service. If you want to make sure your customers know they are first in your book, treat them well by knowing who they are, following up on your promises, keeping track of their questions and purchases, and making online experiences on your site as easy for them as possible.
To take good care of your customers, you need to know who they are—and that’s where Contact Manager really shines. Contact Manager in Office Live Small Business is a powerful (but free!) application that enables you to collect, organize, update, and follow up on the contacts that are the heart of your business.
With Contact Manager, you can organize and track information in a variety of ways, all designed to help you serve your customers better. This section introduces you to the features in Contact Manager you are likely to use most often. Click Contact Manager in the left navigation bar to get started.
The Contact Manager window (see Figure 10-1) provides all the tools you need to create, organize, and track contacts in Office Live Small Business. The navigation bar on the left gives you the tools for displaying different customer groups (after you create them, of course) and displaying information about personal contacts, companies, opportunities, and products.
The center column of the Contact Manager window displays a list of your current contacts. Below the Get Started With Contact Manager help box, you’ll find the quick Add Contact box, which enables you to add basic customer information quickly. Finally, the column on the right side of the window shows you which team members are logged into the site and what items, if any, are shared with your Web site.
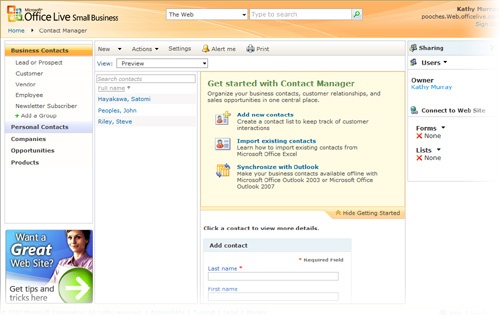
Figure 10-1. Contact Manager gives you a professional way to organize, track, and manage contact information for customers, vendors, and team members.
One of the first things you’ll want to do in Contact Manager involves adding new contacts to your contacts list. Click the New arrow to display the options you need to create a new contact (see Figure 10-2).

You can choose to add a contact, a company, or an opportunity. Here’s what each of those items means in Contact Manager:
A contact is an individual customer record that stores name, e-mail, address, and much more.
A company account has vendor or client information and includes business contacts together in one company group.
An opportunity enables you to create an item that tracks a bid, proposal, or sale that’s in progress. You connect the opportunity to either a company account or an individual contact so that it gets tracked in Contact Manager.
You’ll create a new contact when you have information about a specific individual you want to add to your contact list. Suppose you just met someone at the coffee shop who might be interested in your product. You can create a new contact for him or her by using the information from a business card. Or perhaps someone new just ordered from your Web site. You can add that information directly into your Contact Manager so that you can follow up with future mailings and e-marketing pieces.
To add a contact in Contact Manager, follow these steps:
Click Contact Manager in the left navigation bar of the Office Live Small Business Home page.
Click the New arrow.
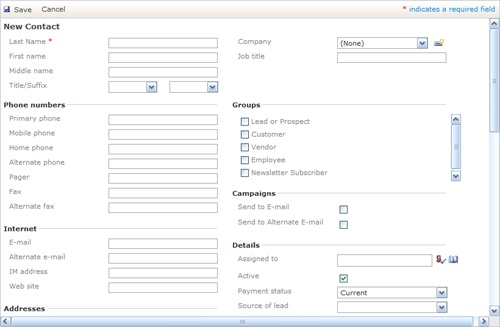
Click Contact. The New Contact window appears, as shown in Figure 10-3.
Click in the Last Name field and enter the contact’s information. Press Tab to move through the boxes and fill in all the information you have available.
In the Groups area, click the check box of any group you want to add the contact to.
In the Campaigns area, click whether you want e-mail messages sent to the contact’s primary or alternate e-mail address.
Scroll down the page to display the Addresses, Personal, Activity, and Comments areas. Continue adding information as needed.
Click Save at the top of the form to save the new contact.
The individual contact records are the building blocks that make up your contact management system, but creating company accounts enables you to group individual contacts and track your relationship with the entire company. Create a new company account by following these steps:
Click the New arrow and choose Company. The New Company window appears.
In the Company data fields, add all information that is relevant for your business.
In the Company Details area, you can assign a specific staff person to the new company account by clicking Check Names to the right of the Assigned To box; then choose the staff member from the list. Also in this area you can select whether the company is in good standing and indicate whether its accounts are current or overdue.
Scroll down to the Business Contacts area. In this section, you can add individual contacts into the company group by clicking Add New or Add Existing. Add New enables you to create a new contact entry for an individual and add it to the company group at the same time. Add Existing lets you add an existing contact to this company group. Click the check box of the contact you want to add and click OK.
Click Save to add the new company account.
All business owners love opportunities—they are those hopeful possibilities that can mean the next big client, an award-winning project, or professional acclaim for your business. Office Live Small Business enables you to keep track of your opportunities, which helps you think them through carefully and keep an eye on their progress. Here’s how to create an opportunity:
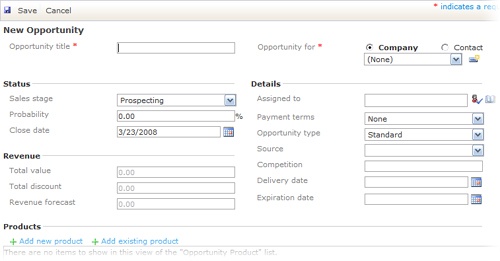
Click the New arrow and choose Opportunity. The New Opportunity window appears, as shown in Figure 10-4.
Enter a title for the opportunity in the Opportunity Title box. For example, Pampered Pooches might use a title such as "Groomer training."
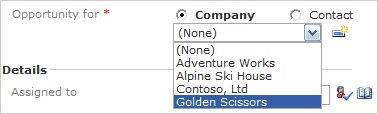
Click whether the opportunity relates to a company or a contact. After you make your selection, click the down arrow and choose the name of the company or contact from the list. This connects the opportunity to that company or contact’s record.
In the Status area, click the Sales Stage arrow and choose where you are in this opportunity process. You can choose from Prospecting, Qualification, Need Analysis, Proposal/Price Quote, Negotiation/Review, Closed Won, or Closed Lost.
Add the Close Date if applicable, and fill in all other data as needed in the Revenue and Details areas.
In the Products area, you can add the specific products you are presenting to this client as part of the opportunity. You can add a new product by clicking Add New Product or select a product you’ve previously added by clicking Add Existing Product.
See Also
The next section, Adding a Product, shows you how to add a product to Contact Manager.
Click Save to save the opportunity and affiliate it with the company or contact you selected. This new opportunity will now appear in the Activity area of the company or contact.

Office Live Small Business also enables you to keep track of specific products in your product line. By creating product listings, you can stay on top of inventory, costs, discounts, and more. You can also import product listings from data sheets and spreadsheets and then export the information as needed—a great help for a small-business owner trying to single-handedly keep inventory and sales under control.
You can add a new product by clicking Add New Product in the Products area of the New Opportunity window or by clicking Products in the left navigation bar of the Contact Manager window, clicking the New arrow, and then choosing New Item.
In the New Product window (see Figure 10-5), enter the name of the product, a description, and the quantity you have on hand. In the Details area, enter the unit cost, unit price, and your discount percentage; and indicate whether the item is subject to a sales tax.
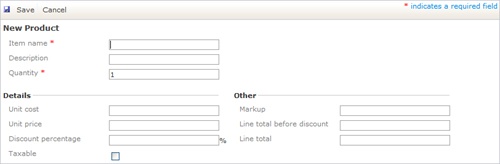
Figure 10-5. Enter your product in the New Product window to make it available when you add opportunities.
The Markup information items are calculated automatically for you to let you know how much you’ve invested in inventory for this item and how much you stand to gain at the point of sale.
Click Save to add the product to your available list. Now this product will be available when you click Add Existing Product in the Opportunities window.