
In addition to these three major business applications (Contact Manager, Document Manager, and the Team Workspace), Office Live Small Business includes more than a dozen additional applications you can add to tailor the services to your own business needs.
To add a business application to Office Live Small Business, follow these steps:
Click Business Applications in the Office Live Small Business Home page.
Click Add Application in the left navigation panel.
Choose one of the six application groups to see the applications that are available in that group. Table 10-2 introduces the groups and lists the applications available in each one.
Click the application you want to add (see Figure 10-10).
Click OK to add the application.
Table 10-2. Application Groups and Items
GROUP | INCLUDES |
|---|---|
Collaborate With Co-workers And Clients | Project Manager, Customer Workspace, Team Workspace |
Schedule Meetings And Events | Time Manager, Basic Meeting Workspace, Blank Meeting Workspace, Decision Meeting Workspace, Social Meeting Workspace |
Manage And Share Documents | Document Manager, Wiki Workspace, Blog |
Manage Your Business | Company Assets, Competition Tracker, Customer Support, Employee Directory, Estimates, Expenses, Jobs And Hiring, Training |
Add Or Find Custom Applications | Upload A Custom Application, Find More Custom Applications, Upload Template |
Your Custom Application | Blank Workspace |
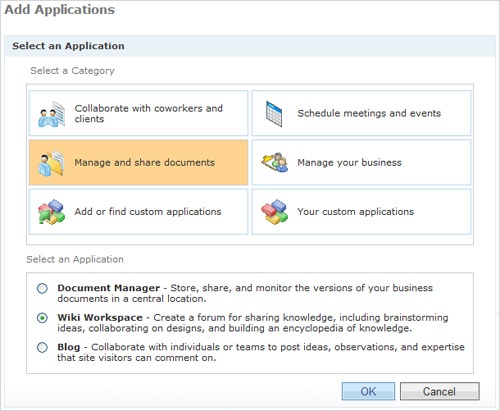
Figure 10-10. Click the category of the application you want to add, and then choose the application from the list.
Your new application is added to the list in the left navigation panel of the Business Applications page so that you can access it easily.
At some point you might realize that you have added a business application you don’t really use. To clear up space on your navigation panel, you can delete unwanted applications. Here’s how to do that:
Click Business Applications in the Office Live Small Business Home page.
In the left navigation panel, click the name of the application you want to remove.
Click [Settings] on the right of the application title in the window.
In the Site Settings page, scroll down to the Develop And Customize settings.
Click Delete This Application.
In the Site Manager list, find the application you want to remove (in this case, Wiki Workspace; see Figure 10-11), and click the Delete link in the right column.
Click OK when prompted to confirm that you want to delete the application.
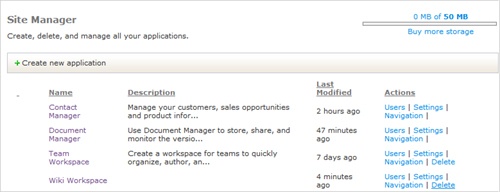
Figure 10-11. Click Delete in the right column of the Site Manager list to remove an application you no longer need.
There’s no limit to the number of applications you can add to your Office Live Small Business account, and—best of all—the applications are free. In addition to all the utilities available in the program, you can create and add your own custom applications that help support the specific business tasks you need to accomplish.