
Working with lookups presents a new set of challenges. In a lookup we are basically pointing to existing values populated in another entity. We are looking for the ID of the target selected entity.
For the purpose of this recipe we will be using the existing solution we have already created. If you have not created a solution already, now is a good time to do so.
Add to your solution the Contact entity. We've been focusing on making changes to this entity, and this recipe will follow that same pattern. Note that you can do this with any system entity, whether out of the box or custom.
In order to read the selected value in a lookup, follow these steps:
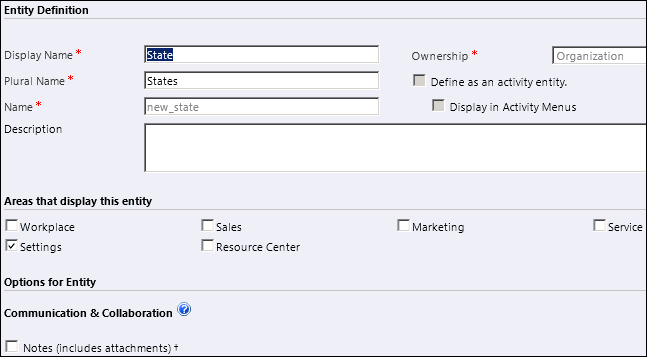
- Create a new custom entity called State.
- Configure the Ownership to Organization so it is readily available to all users.
- For Areas that display this entity, select Settings only. We do not want any users having direct access to this entity, but we want them to reference it only on the Contact forms.
- In the Options for Entity area, uncheck Notes as we do not want to have a Notes field associated. Your entity definition form should look as follows:
- Save your new entity.
- Once saved, open up the main form to configure it.
- Change the label of the Name field to
Stateby double-clicking on the field and changing the Label on the Display tab. - Add a new
State Codetext field to the form. - Add a new
Orderfield of typeWhole Numberto the form, with no format and a start value of0. - Save and publish your new entity. Once you refresh the browser window, in the Settings area your new entity should display as follows:
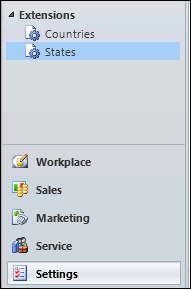
- Open up the States extensions and let's start adding some sample data. The form looks as follows:

- Once we have a few sample data records, we are ready to create our lookups.
- On the Contact form add a new lookup field. We will be pointing to the previously created States entity. Select the Type to be Lookup, and the Target Record Type to be State. Add the field to the form.
- Save and publish.
- Create a new JScript resource in your solution, named
JSLookup(new_JSLookup). - Add a function that reads the selected value in our newly created State field, and displays it in an alert. The script could look as follows:
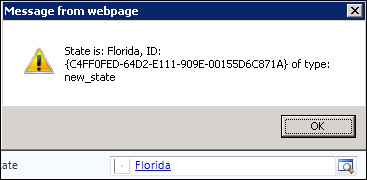
function ReadState() { var state = new Array(); state = Xrm.Page.getAttribute("new_state").getValue(); if(state != null) { var stateText = state[0].name; var stateId = state[0].id; var stateType = state[0].entityType; alert("State is: " + stateText + ", ID: " + stateId + " of type: " + stateType); } } - Do note that in our code we always check to make sure a value was indeed selected before we retrieve the properties.
- The name returns the actual text we see in the lookup, the ID returns the internal ID of the selection and the
entityTypereturns the type used. Note that the ID is what we will need later on when I show you how to programmatically populate this field. - Once we open the Contact form and we change the State field value, a popup will give us all the details about the selection we have made.
In order to retrieve the selection in a lookup, we create an array to store the returned values. As a lookup only holds a single selection value, the result will be a single element array, with the element at index 0.
One important aspect is, we always have to check and make sure that we have indeed a value returned in the array, otherwise we will get an error when trying to read the value at that index and there is nothing there. For this reason we are checking if the array is not null before reading the value.
While reading the value selected in a lookup constitutes one step, many times we need to push a value back into a lookup, either to clear it or to define a new selection on the form.
For us to clear a lookup, all we need to do is set its value to null. The following script does just that:
function ClearState()
{
     var state = Xrm.Page.getAttribute("new_state");
     if (state != null)
     {
      Xrm.Page.getAttribute("new_state").setValue(null);
     }
}
Associate this function with the OnLoad event of the form, so that every time we open a contact, the State field gets cleared.
There are circumstances when you want a certain lookup value to be programmatically assigned based on some other action on the form. This is relatively easy to achieve once you have identified the IDs of the values available.
Instead of assigning a null value like we did in the previous example, we have to build our input as demonstrated in the following function:
function SetStateToNY()
{
     var state = new Array();
     state[0] = new Object();
     state[0].id= "{BA0762E4-64D2-E111-909E-00155D6C871A}";
     state[0].name = "New York";
     state[0].entityType = "new_state";

     Xrm.Page.getAttribute("new_state").setValue(state);
}
Be aware that if your ID assigned does not map to the ID in the system, it will appear to process correctly, adding the value to the lookup, but when you try to save your form, the following message appears:

Tip
Downloading the example code
You can download the example code files for all Packt books you have purchased from your account at http://www.packtpub.com. If you purchased this book elsewhere, you can visit http://www.packtpub.com/support and register to have the files e-mailed directly to you.
Out of the box, Dynamics CRM allows the users to type any values in both the Country/Region and the State/Province fields. But oftentimes, we do not want to users to type and possibly misspell. For this reason we can implement filtered lookups in such way that once a Country is selected, the State/Province shows a trimmed-down list of only values relevant to that particular country.
In order not to break any internal functionality of CRM, including any pre-existing reports, we can still use the out of the box fields, but we'll put a different spin on it. Once a value is selected in the lookup, we can programmatically read that value, and assign it to the default text field. Also, we hide these default text fields so they don't overcrowd our form.
To take one step further, we can add an "Other" option to both Country and State lookups. When this value is selected, we can display the hidden fields allowing the user to type a value that is not already in the system.
The code could look similar to the following:
function setOTBState()
{
      var state = new Array();
      state = Xrm.Page.getAttribute("new_state").getValue();
      if(state != null)
      {
            var stateText = state[0].name;

            if(stateText != "Other")
            {
                  Xrm.Page.getAttribute("address1_stateorprovince").setValue(stateText);
                  Xrm.Page.ui.controls.get("address1_stateorprovince").setVisible(false);
            }
            else
            {
                  Xrm.Page.getAttribute("address1_stateorprovince").setValue("");
                  Xrm.Page.ui.controls.get("address1_stateorprovince").setVisible(true);
            }
      }
}
The new lines of code added in this example show you how to set a field as visible or hide it on a form.