
Even though we touched on bits and pieces of this recipe earlier in the previous chapters, I will be presenting here a top-to-bottom approach of replacing the standard out-of-the-box Country and Province fields with lookups. This solution will allow users to select these values from pre-defined available options, and eliminate the issues resulting from typical user input errors.
For this recipe, use one of the solutions created in earlier chapters, or create a new one. Add to your solution the Account and Contact entities where we will replace the fields with lookups.
Follow the same steps on both the Account and the Contact entities. I will only describe the process once. You can follow the same process if you create a custom Address entity, or anywhere else where you need to capture address information.
The end result will be a transformation of the following field set:

To the following:

- Open your existing solution.
- Add a new entity named
Country, with an internal name ofnew_country.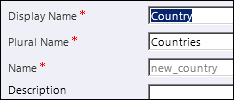
- Make it visible only on the Settings area:

- Save your new entity.
- Open the main form of the entity, and modify the form as follows:
- Add a field named
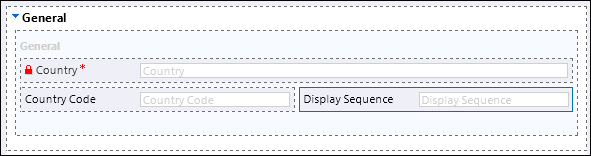
Country Code, with an internal name ofnew_countrycode. Format it as text, with a maximum length of3. This field will hold an abbreviated version such as USA, CA, and UK. - Add a field named
Display Sequence, with an internal name ofnew_displaysequence. Format it as a whole number, with a minimum value of0. I have set the maximum to500, but you could set it to the total number of countries, which at the time of this writing stands at 196. - Add these fields to your form for an end result as follows:
- Add a field named
- Add a new entity named
State, with an internal name ofnew_state.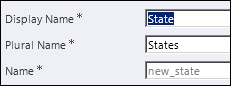
- Make it visible only on the Settings area.

- Save your new entity.
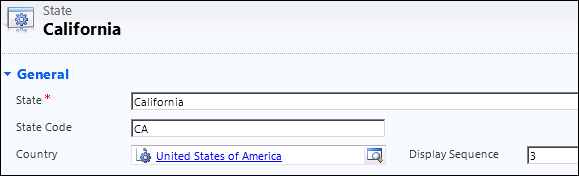
- Open the main form of the entity, and customize it as follows:
- Add a new field named
State Code, with an internal name ofnew_statecode. Format it as text, with a maximum length of5, or enough to capture a short name for the state. Usually for US and Canada two characters are enough. - Add a new field name
Display Sequence, with an internal name ofnew_displaysequence. Format it as a whole number, with a minimum value of0. Set the maximum depending on the number of provinces/states you intend to capture in the system. If unsure, set it to a value high enough for your initial phase. You can always change the maximum value at a later time. - Add a new field named
Country, with an internal name ofnew_country. Format it as type lookup, with a target record type pointing back to theCountryentity we have just created.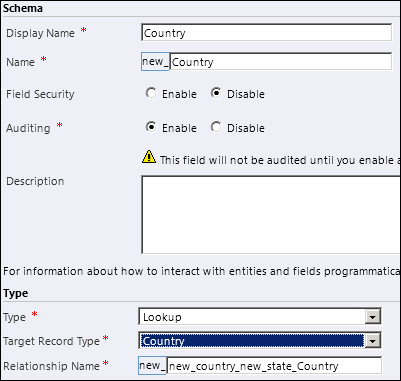
- Add these new fields to your form, for an end result as follows:

- Add a new field named
- Save your new entity.
- Publish all changes to this solution.
- Open your Account entity or the entity where we will replace the standard text fields with our new lookups. Open the main form for editing.
- Add a new field named
State, with an internal name ofnew_state. Make the field type lookup, with a target record type of State (the entity we created earlier). Add this field to our form right underneath our existing State/Province field.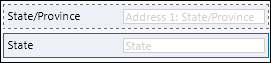
- Similarly, add a new field named
Country, with an internal name ofnew_country. Make the field type lookup, with a target record type ofCountry(the entity we created earlier). Add this field to our form. - Double-click the State field we just added, and on the Display tab, in the Related Records Filtering area, check the box next to Only show records where:.
- Configure as in the following image:

- Turn off the check box on Allow users to turn off filter, so that users will always get a listing of the provinces related to the country selected.
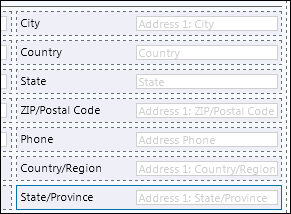
- In order to make the input work, move the country selection above the State. This allows the users to select a country first, and then get a listing of all state/provinces related to the country they already selected.
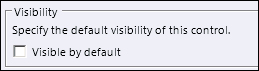
- Make the default fields for State/Province and Country/Region not visible, by opening the field properties window, and unchecking the Visible by default checkbox.
- I have arranged the fields on the form as follows:
- Save and Publish your entire solution.
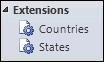
- Refresh your browser window to see the two new entities we have just created. Navigate to the Settings section. You should see them listed as follows in the Extensions area.
- Open first the Countries, and add a few sample records.
- Open next the States and add a few states/provinces for each of the added countries.
- Once you have some sample data, check the Account form to make sure the filtering indeed takes place.
- In order to keep the out-of-the-box functionality in place, and to allow some of the standard reports and views to function as expected, we will add two functions that will help us copy the values selected by the user in the lookup fields to the standard text fields that we have just marked as hidden.
- Add a JScript web resource, and insert the following two functions:
function UpdateCountry() { var _country = new Array(); _country = Xrm.Page.getAttribute("new_country").getValue(); if(_country != null) { Xrm.Page.getAttribute("address1_country").setValue(_country[0].name); } } function UpdateState() { var _state = new Array(); _state = Xrm.Page.getAttribute("new_state").getValue(); if(_state != null) { Xrm.Page.getAttribute("address1_stateorprovince").setValue(_state[0].name); } } - Associate the
UpdateCountry()function with theOnChangeevent of the new country lookup we created, and theUpdateState()function to theOnChangeevent of the newStatelookup. - Update a few records, and check using Advanced Find to make sure that the original fields are being also populated.
The process I am following in this recipe is relatively simple. We are creating the related lookups, and populating the selected values into the original fields using the JavaScript functions. We could have done this without copying the values into the original fields, but the reason I chose to do so is because now I can use all the views and reports as defined out of the box, and any future upgrades or other solutions that are referencing those fields will find them also populated with the current values.