
Working with e-mail fields has been greatly simplified. For the most part, we can just define the field as e-mail and, lo and behold, we need no customization and formatting.
There are exceptional cases to this. We might want to capture multiple e-mail fields, or validate other types of fields that are not defined as e-mail. For this purpose, we still need to pull out our JavaScript toolbox and draft some quick snippets of script. So let's get started.
By now we should have an environment created and proper permissions to tinker around with some customizations. Ideally we should have the permissions of a system customizer or a system administrator, or a similar custom role.
Generating a new e-mail field on a form using the simplistic UI wizard can easily be achieved by performing the following steps:
- Open an existing solution, or create a new one.
- Add the Contact entity to the solution, if not already added.
- Open the main information form for editing.
- Click on New Field to add a new e-mail field.
- Name the field
Other e-Mail, set the Type as Single Line of Text, and for Format select E-mail.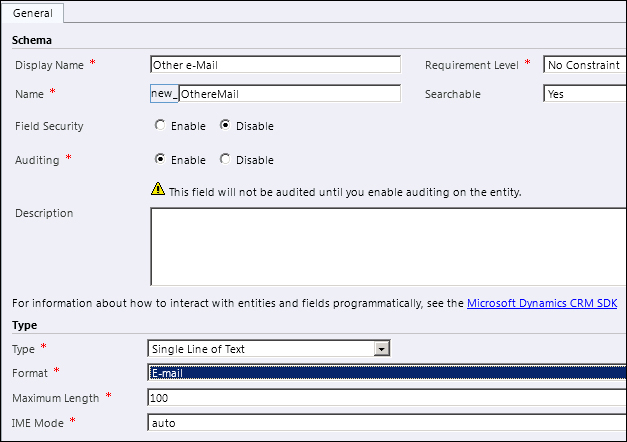
- Add the field to the form, Save and Publish your form.
This approach adds an e-mail field to your form with the required validation. On change, the input is verified to map to a valid e-mail address format. Additionally, once a correct e-mail is entered, it is presented back to the user as a mailto hyperlink.
Tip
One disadvantage of the e-mail field validation built is the actual format validation. While the validation formula does check for a valid block of letters, followed by the @ symbol and another block of letters, it fails to check for an extension. Thus, we can easily end up with e-mail addresses formatted like demo@demo instead of a proper [email protected].
For cases where we need to validate a proper e-mail address with a Fully Qualified Domain Name (FQDN) or if we need to accept only e-mail addresses from a specific domain, the following block of JavaScript code can come to the rescue:
function checkEmail(emailField)
{
   var email=/^([a-zA-Z0-9_.-])+@([a-zA-Z0-9_.-])+.([a-zA-Z])+([a-zA-Z])+/;
   if(email.test(emailField))
   {
      // alert("true");
      return true;
   }
}
We are using regular expressions to define the mapping format for an e-mail address.
The checkEmail() function we have just presented is meant to be used as a generic function we can call for any field we need to validate as e-mail. In order to validate the field we have just created we can create a new function, retrieve the value of the field, and pass it into our function. For reading from a single-line text field, refer to the respective recipe earlier in this book.
Once we define the regular expression, we can test the string from the user input against the expressions. If we have a match, we can raise an alert (commented out in our script with the // symbol, and then we can return true. The calling function can then process based on the return value.
One other case when dealing with e-mail addresses is a situation where either a single or multiline text field is meant to capture a listing of e-mail addresses separated by a key symbol. Let's define the separation symbol as a comma.
The way to validate the input in such a case is by reading the whole input, separating the individual e-mail addresses, loading them in an array, then running our check against each one using the same checkEmail() function.
Assuming inputField is a string holding the user input, the following function will split the string, load the array, and run the check.
function checkInput(inputField)
{
  var flag = true;
  var emailArray = inputField.split(",");
  for(var i = 0; i < emailArray.length; i++)
  {
    if(!checkEmail(emailArray[i]))
    {
      flag = false;
      break;
    }
  }
  return flag;
}There are a few tricks that enable us to handle erroneous input from the user. First off, we want to display a message back to the user, to let him/her know what is wrong with the input they provided and why we are rejecting it. This can be easily achieved using a simple alert.
alert("You have entered an incorrect email address!");Of course, you can be as creative as you want with the message you are passing back to the application user.
The other thing you might want to do is set the focus back on the field. You can achieve this with the following lines of code:
var field = Xrm.Page.ui.controls.get("fieldName");
field.setFocus();
While the first line gets a reference to the control, the second line actually sets the focus on it.
- For more details on the
Xrm.Pageobject model, refer to the MSDN documentation at http://msdn.microsoft.com/en-us/library/gg328474.aspx. - For field datatype descriptions, check out the Dynamics CRM documentation at http://rc.crm.dynamics.com/rc/2011/en-us/online/5.0/Help/ug_cust_entity_fields.htm.