
In this recipe, we will focus on executing a few operations triggered by the form load event. We can check the value of a specific field on the form, and based on that we can decide to hide a tab, hide a field, and prepopulate a text field with a predefined value.
Just as with any of the previous recipes, you will need access to an environment, and permissions to make customizations. You should be a system administrator, a system customizer, or a custom role configured to allow you to perform the following operations.
For the purpose of this exercise, we will add to the Contact entity a new tab called "Special Customer", with some additional custom fields. We will also add an option set that we will check to determine if we hide or not the fields, as well as two new fields: one text field and one lookup field. So let's get started!
- Open the contact's main form for editing.
- Add a new tab by going to Insert | Tab | One Column.
- Double-click on the newly added tab to open the Tab Properties window.
- Change the Label field of the tab to
Special Customer. - Make sure the show label is expanded by default and visible checkboxes are checked. Click on OK.
- Add a few additional text fields on this tab. We will be hiding the tab along with the content within the tab.
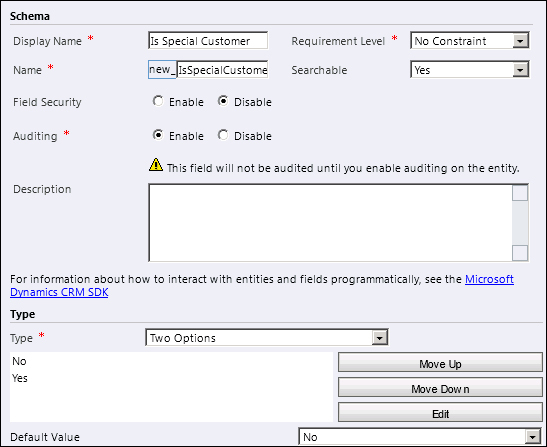
- Add a new field, named Is Special Customer (new_IsSpecialCustomer). Leave the default yes/no values.
- Add the newly created field to the general form for the contact.
- Add another new text field, named Customer Classification (new_CustomerClassification). Leave the Format as Text, and the default Maximum Length to 100, as shown in the following screenshot:

- Add the newly created text field to the general form, under the previously added field.
- Add a new lookup field, called Partner (new_Partner). Make it a lookup for a contact, as shown in the following screenshot:

- Add this new field to the general form, under the other two fields.
- Save and Publish the Contact form.
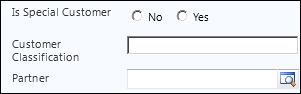
- Your form should look similar to the following screenshot:
- In your solution where you made the previous changes, add a new web resource named FormLoader (new_FormLoader). Set the Type to JScript.
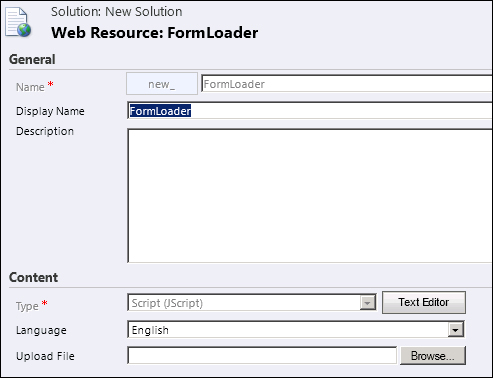
- Click on the Text Editor button and insert the following function:
function IsSpecialCustomer() { var _isSpecialSelection = null; var _isSpecial = Xrm.Page.getAttribute("new_isspecialcustomer"); if(_isSpecial != null) { _isSpecialSelection = _isSpecial.getValue(); } if(_isSpecialSelection == false) { // hide the Special Customer tab Xrm.Page.ui.tabs.get("tab_5").setVisible(false); // hide the Customer Classification field Xrm.Page.ui.controls.get("new_customerclassification").setVisible(false); // hide the Partner field Xrm.Page.ui.controls.get("new_partner").setVisible(false); } } - Save and Publish the web resource.
- Go back to the Contact form, and on the ribbon select Form Properties.
- On the Events tab, add the library created as web resource in the Forms Libraries section, and in the Event Handlers area, on the
Form OnLoadadd the function we created: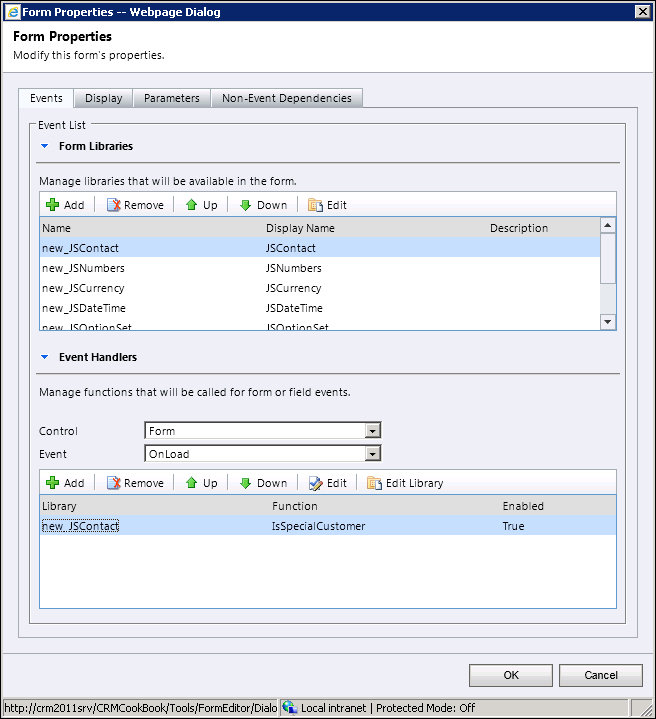
- Click on OK, then click on Save and Publish the form.
- Test your configuration by opening a new contact, setting the Is Special Customer field to No. Save and close the contact. Open it again, and the tab and fields should be hidden.
The whole idea of this script is not much different from what we have demonstrated in some of the previous recipes. Based on a set form value, we hide a tab and some fields. Where we capture the difference is where we set the script to execute. Working with scripts executing when the form loads gives us a whole new way of handling various scenarios.
In many scenarios, working with the form load events in conjunction with the other field events can potentially result in a very complex solution.