
In this recipe we will be focusing on using jQuery UI to alter the page CSS definition. I sometimes see requests for branding or customizing the color scheme of Dynamics CRM. By default this is not a supported customization. Using the jQuery library we can do some nice things with the standard look of CRM.
For this recipe you can either use one of the existing solutions you have previously created, or create a new one. Make sure you have at least the system customizer permission.
Follow these steps to add your own contact icon to the Contact form:
- Open your existing solution, or create a new one.
- Make sure the Contact entity is added to your solution.
- Add a new web resource of type png, and upload your contact icon or an image. If you want to replace the default logo of Microsoft Dynamics CRM, make sure your image is 32 x 32 px. Name it
crm_mylogo.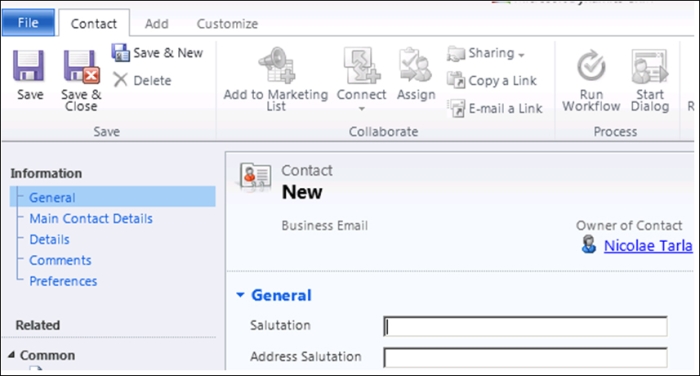
- Add a new JScript web resource. Name it
crm_logoswap. - Add the following function to your web resource:
function LogoSwap() { var _css = "/WebResources/crm_jqueryuicss"; var cssref = document.createElement("link"); cssref.setAttribute("rel", "stylesheet"); cssref.setAttribute("type", "text/css"); cssref.setAttribute("href", _css); $("head").append(cssref); var _csscustom = "/WebResources/crm_logoswapcss"; var _cssrefcustom = document.createElement("link"); _cssrefcustom.setAttribute("rel", "stylesheet"); _cssrefcustom.setAttribute("type", "text/css"); _cssrefcustom.setAttribute("href", _csscustom); $("head").append(_cssrefcustom); $("#ico_fhe_2").switchClass("ms-crm-ImageStrip-ico_fhe_2", "my-crm-ImageStrip-ico_fhe_2" ); } - Save your web resource.
- Add a new web resource of type CSS. Name it
crm_logoswapcss. - Add the following CSS definition:
.my-crm-ImageStrip-ico_fhe_2 { width: 32px; height: 32px; overflow: hidden; background-image: url("/WebResources/crm_mylogo"); background-repeat: no-repeat; background-position-x: 0px; background-position-y: 0px; background-color: #FF0000; } - Associate your function to the
OnLoadevent of the Contact form. - Save and Publish your solution.
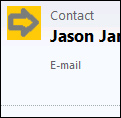
- Open a contact record and observe your change:
In this example, we take advantage of jQuery UI to swap a CRM CSS class with our own custom class. We need to add to our solution three elements:
..................Content has been hidden....................
You can't read the all page of ebook, please click here login for view all page.