ADF-BC is the data model layer for ADF. It has the following prime components:
- Entity Objects: They represent a row in the data source, and you can modify their attributes. They encapsulate business logic as well, to validate your data. Entity objects are defined by specifying a table as they represents its rows, and rows are identified based on row key.
- View objects: They encapsulate the SQL queries. You can create a read-only view object when updates to data are not necessary. You can create entity-based View objects, static View objects, and programmatically populated View objects, too. Custom View objects can also be created. It's the View objects that collaborate with Entity Objects.
- View Links: They are used to represent the master-detail relationship between two View objects.
- Application Module: It is a smart data service that contains the data model of master-detail-related queries that your client interface needs to work with. It's a transactional component used by UI to work with application data. It can contain procedures and functions (referred to as service methods) that are encapsulated within the service implementation.
ADF Business Components, known as ADF-BC, are used for creating complex Task Forms, and one can use ADF-BC View objects as facts in Oracle Business Rules. For ADF, the main data source, which is also called the data model, is based on ADF-BC.
Oracle JDeveloper provides a very easy way to bind components from the Business Services layer to your controller and view layers using an innovative binding layer approach. The data control palette provides a view into the Business Services layer. Developers can simply drag-and-drop Data objects and bind them to their user interface implementation.
The functionality of the process SalesToContract says that the salesrepresentative user will enter the quote, and based on Discount Check, the task will be guided to the businessanalyst user. You have created the Task UI earlier, using the Auto-generate mechanism, however here, you will also add some information about Opportunity, to the user interface presented to the businessanalyst user.
In this section, you will develop expertise in creating ADF-BC components and creating Task Forms based on ADF-BC components.
I. Create a table and a procedure based on it
- You will create a table named
ValidateOpportunity. This table will containOpportunityID, which is a part of the quote payload. When one queries the table based onOpportunityID, details aboutOpportunityIDdata are fetched. You will create a procedure that inputsOpportunityIDand results inOpportunityTypeandOpportunityRevision. - Create a table named
ValidateOpportunityin theDEV_SOAINFRAschema, or in any schema that you have configured for your DB connection, as follows:create table ValidateOpportunity (OpportunityID varchar2(20),OpportunityType varchar2(10),OpportunityRevision varchar2(1));
- Insert some demo data, as follows:
insert into ValidateOpportunity values('ABC1029','New','Y'), insert into ValidateOpportunity values('ABC1030','Old','Y'), - Create the procedure, as follows:
CREATE OR REPLACE PRODECURE CHECKOPPORTUNITY (
OPPID IN VARCHAR2,
OPPTYPE OUT VARCHAR2,
OPPREV OUT VARCHAR2) AS
BEGIN
SELECT OPPORTUNITYTYPE, OPPORTUNITYREVISION INTO OPPTYPE, OPPREV
FROM VALIDATEOPPORTUNITY
WHERE OPPORTUNITYID = OPPID;
END;
- You can use JDeveloper to create a table and procedure, or you can use any other tool such as TOAD or SQL*PLUS to achive the desired goal.
II. Create a Synchronous Service based on the procedure CHECKOPPORTUNITY
- Assuming you have basic knowledge about creating a BPEL service, we will not go into the details of service creation.
- Open JDeveloper in the default mode.
- Create a synchronous BPEL service that accepts
OpportunityIDand returnsOpportunityTypeandOpportunityRevision. - You can use the Oracle DB adapter in the BPEL process.
- Let the name of the service be
OpportunityCheckingService. - Deploy it to the WebLogic server on which you have SOA installed.
III. Create an ADF-BC View object, based on web service
- Go to JDeveloper and click the application containing the SalesToContractDemo project.
- Right-click the BusinessAnalystUI project, and click on Properties.
- In the Properties dialog, select Libraries and Class path.
- Add the library BC4J Service Runtime.
- Click OK.
- As your goal is to provide input to the UI form from the service, you will need to follow the ensuing steps:
- In the application navigator, right-click the BusinessAnalystUI project and select New
- In the New Gallery dialog, go to All Technologies | Business Tier | Data Controls and select Web Service Data Control
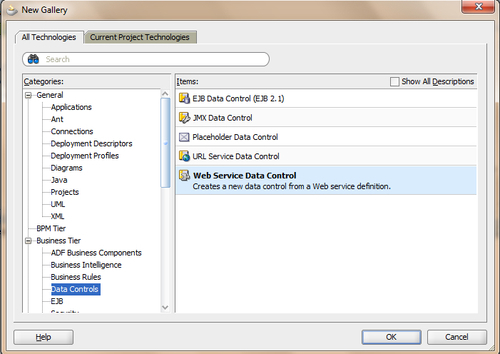
This will open the Create Web Service data control wizard.
- Enter
OpportunityVOas Data Source Name, andOpportunityCheckingService WSDLas the BPEL service in URL, and click Services - The service section will list the Service: OpportunityCheckingService. Select it and click Next

- Select the operation you want the data control to support and click Next
- Click Next twice and click Finish
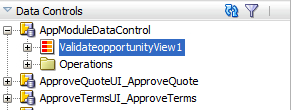
- To verify data control creation, go to Data Controls | OpportunityVO.
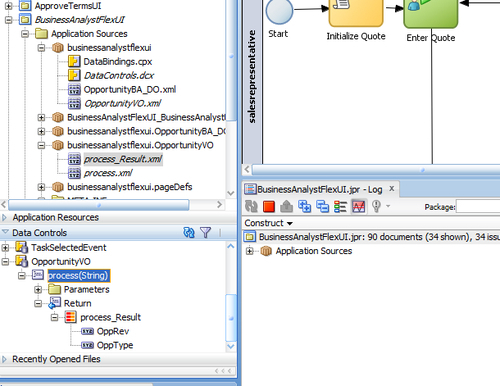
This confirms that you can include this data control in your UI ADF forms.
- Go to BusinessAnalystUI project | Web Content and click on the
taskDetails1.jspxpage. - Select the CONTENTS showDetailHeader.
- From the menu, select Design this Container.
- From Data Controls | OpportunityVo | Process | Return, drag-and-drop process_result into the contents container, as shown in the following screenshot:
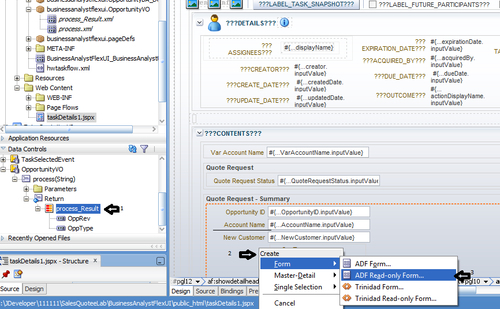
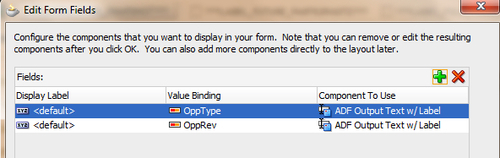
- Click on Form and select ADF Read-Only Form.
- This will open the Edit Form Fields dialog and will display Value Binding. Click OK.
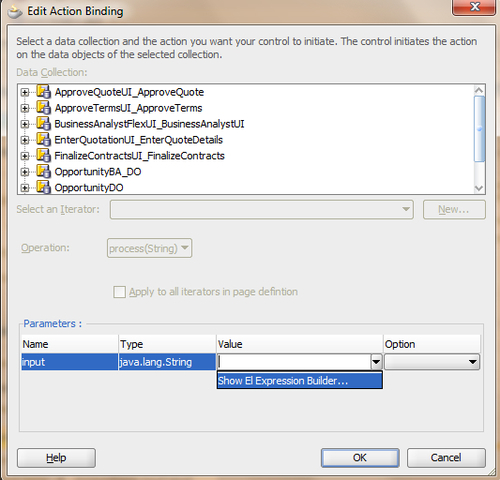
- In the Parameters section, in the Value field, select Show El Expression Builder.
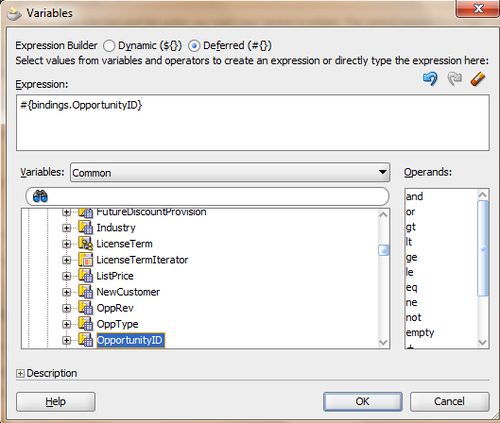
- The Variables dialog is displayed.
- Expand ADF Bindings, select OpportunityID, and click OK.
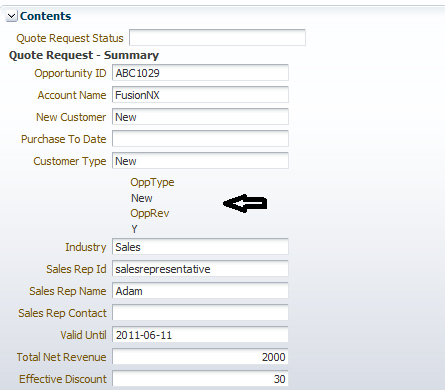
The content container will show the selected inputs.
- When you have completed the preceding steps, click Save.
Deploy the project and go to the Oracle BPM workspace as the salesrepresentative user and enter the value forEnter Quote. The quote will move to BusinessAnalyst user. Log in as the businessanalyst user in Oracle BPM workspace. You will find that OppType and OppRev are selected based on the Opportunity ID entered. In this case, the Opportunity ID enteredis ABC1029. Verify it with the data you have inserted into the preceding table. You will find an instance created for OpportunityCheckingService in the EM console, too.
This is useful when, say businessanalyst user needs more information about the opportunities available, to help him/her make a decision about either approving or rejecting the quote.
Let's learn to create entity and View objects in the following section.
You have created data control based on the web service. You can even create ADF-BC Entity objects and corresponding View objects, based on tables, and can use them via ADF Data Controls in the Task Form.
- Right-click the BusinessAnalystUI project, and in the New gallery dialog, go to Business Tier | ADF Business Components and select Business Components from Tables.
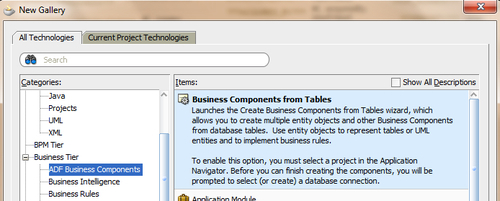
- Click OK.
- Specify the data connection information for the
Business Components.jpxfile and click OK.
- Enter the Package name, select the Schema, and click Query after entering a search string for the table.
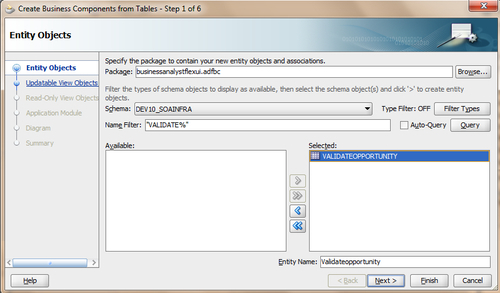
- You will find the VALIDATEOPPORTUNITY table in the available column. Select it and click Next.
- Click Next, without selecting anything.
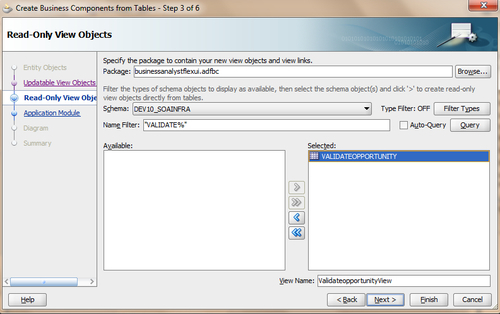
- In the Read-Only View Objects dialog, query again for the table and select it.
- Click Next.
- Click Next twice more.
- Click Finish.
- When you have completed the preceding steps, click Save.
- Go to Data Controls and check the data control, based on EO and VO created (which are based on the preceding table), which you can use in Task Forms.