
While testing, we will run the process as you will log in with various sample end users. You will initiate the process and then advance it to all possible paths, that is, you will test it across all possible flows by performing actions on the task in the work list and you will ensure that the expected paths are followed.
For each process in which you have been assigned a role, the Workspace displays your current tasks. The participants in the process and their roles and groups have already been created. Remember that the Enter Quote activity will be performed by the user SalesRepresentative, user and approval of terms and deals will be carried out by the users, Approver, and Contracts. You have not taken users with names such as 'Adam' as SalesRepresentative and so on. You have followed a generalized approach by making a role of SalesRepresentative to be assigned to a user created with the same name.
|
Role |
User |
Task |
|---|---|---|
|
SalesRepresentative |
salesrepresentative |
Enter Quote Activity |
|
BusinessAnalyst |
businessanalyst |
Business Review Activity |
|
Approvers |
approver |
Approve Deal Activity |
|
Contracts |
contracts |
Approve terms and Finalize Contacts activities |
As a user, you can log in to Workspace . It's the common place where end users log in to participate in the process.
- Go to the following URL to log in the Business Process Workspace:
http://localhost:8001/bpm/workspace/. - Log in with the credentials:
salesrepresentative/Welcome1. - Go to the Applications in Workspace and click on the Process name SalesToContract v1.0 that you have deployed.
- You have logged in as
salesrepresentative. This is the user that has the roleSalesRepresentative, which has an Initiator Task. When you click on the application, it will generate a task which will be available in the Inbox of the user,SalesRepresentative.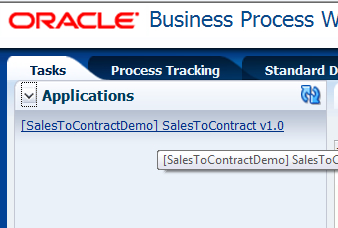
- You can find that Worklist Views has an Inbox. Click on Inbox, and the task assigned to you (when logged in as
SalesRepresentative)is listed on the right-hand side of the screen, that is, the Enter Quote task.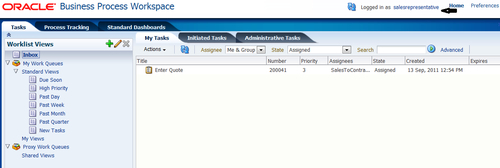
- Double-click on the Enter Quote task to open it in a new window.
- In the Enter Quote window modify quote Details. As you have used a script task to initialize the values of
Quote, they are available here. You can change them too, but keep them as it is for now.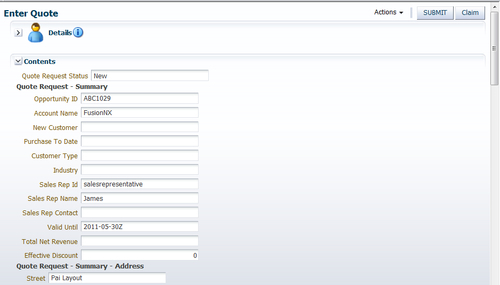
- Click on the Submit button.
- The task has now moved ahead and you will find that it has moved from the enlisted task in the Inbox of
salesrepresentative. - Log out of the
salesRepresentativeuser. - Log in with the Approver role with the user credentials:
approver/Welcome1. - The process now has now moved to the Approver role and the Contracts role for the Approve Deal and Approve Terms tasks respectively.
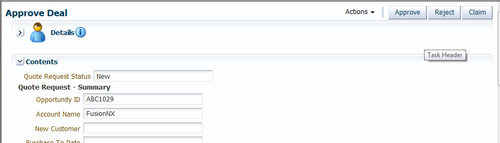
- Double-click on the Approve Deal task assigned to you when you log in as approver.

- Click on Approve to approve the Approve Deal task.
- The task will move from the task list of the Approver user.
- Log out of approver.
- Log in again with the credentials
contracts/Welcome1to perform the Approve Terms and Finalize Contract tasks. - Double-click on the Approve Terms task assigned to the
contractsuser.
- Click on the Approve button to approve the Approve Terms task.

- Double-click the Finalize Contracts task assigned to the
contractsuser. - You will find that as soon as you approve, the task moves out of the list. However, as the same user is also going to finalize the contract, as the Finalize Contracts task is assigned to the user Contracts:

- Click OK to finalize the contract.

- Go to the Output directory which you have given while configuring the service task
SaveQuote, which is a file adapter. In my case, it'sTEMP/QuoteOutput. You can find a quotation file created there.
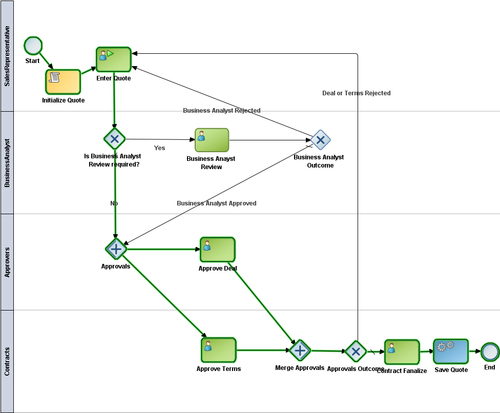
When you log in as the user salesrepresentative (the Initiator of the process) and click on the application name SalesToContractv1.0, the process gets triggered. The Enter Quote task is assigned to salesrepresentative. Once you submit the Enter Quote task, the token moves to another task.
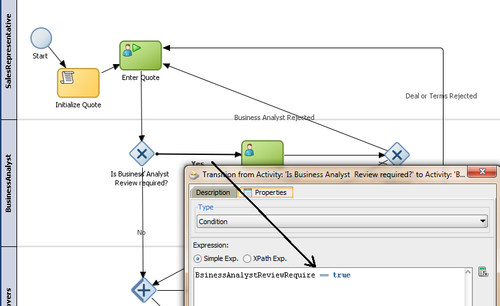
As you have already set the BusinessAnalystReviewRequired Data object to false() in the Script Task Initialize Quote, so when the token Is business Analyst Review Required? is switched on, it will not move to the Yes path but take the No Path, as shown in the following screenshot:
Hence the token will reach the Approve Deal and Approve Quote simultaneously, as you have used a parallel Gateway. Once both are approved, the contracts role user will finalize the contract and the SaveQuote service will save the quote in a file location.
Files can be attached to tasks and also you can add notes in the comments section.
In this section, you will learn to add files and notes to tasks as follows:
- Go to BPM Workspace and log in with the
salesrepresentativecredentials. - Open the assigned task from the task list is in the Inbox , double-click on it. It will open the
Enter Quotetask. - Scroll down to the Comments and Attachment section at the end.
- In the Attachment section, click on the green plus (+) sign to open the Add attachment file browser.
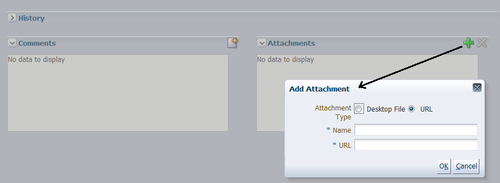
- You can browse the file to attach the file attachment . It will appear as a link for other participants.
- You can also add a note in the Comments section.
- Log in to Oracle BPM Workspace with the credentials
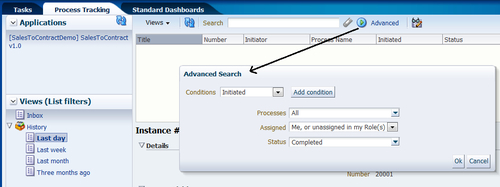
salesrepresentative/Welcome1. - Click on the Process Tracking tab.
- On the right-hand side, click on Advanced to search for the Process Instance.
- Enter the eligibility criteria for the search as follows:
- You can find the instance listed. Click on the instance row and you can find instance Details on the lower side of the window.
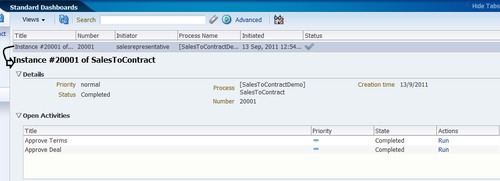
- Scroll down to the Audit Trail section and expand it.
- Choose the Graphical Radio to view the audit in graphical form.
- You can find that the screen lines on the sequence path show the path taken by the Process Token.
- Attachments and notes are also listed, if you scroll down a little.
You can also find an instance being created in the EM (Enterprise Manager) console and you can use it to view the Audit Trail of the process.
- Log in to the WebLogic EM Console with credentials
weblogic/Welcome1. - Go to SOA-INFRA | Default | SalesToContractDemo, where the partition is Default and SalesToContractDemo is the project you have deployed.
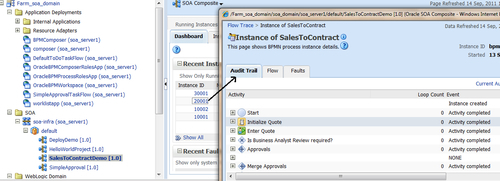
- Click on the Instance ID 20001. It's the same Instance ID that you have found in BPM Workspace too.
- The Instance window opens and you can check the flow, can find the fault details, if any, and trace the audit trail too.