
There are many ways to create a task display form for a Human Task, and one of them is using wizards. Wizard Driven is also an option in the .task file. However, there are more options available, such as temple and multi-row-column layout, which you will learn in this section.
In this section, you will create a task display form for the Business Analyst Human Task.
Let's create a task display form—using wizards, as follows:
- Open JDeveloper in the default role.
- Go to the BPM Project Navigator tab.
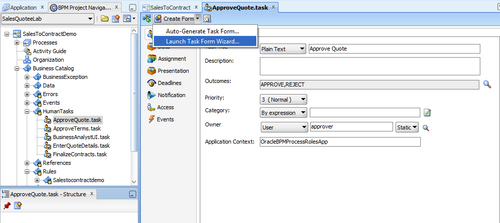
- Expand Business Catalog | Human Tasks and click Approve Quote.
- Click Create Form.
- From the drop-down menu, select Launch Task Form Wizard....
- Enter the name of the project. Let's keep the older ApproveQuoteUI project as it is and create a new project named ApproveQuoteDetailsUI.
- Click OK. This will open the wizard.
- In the Name dialog, enter
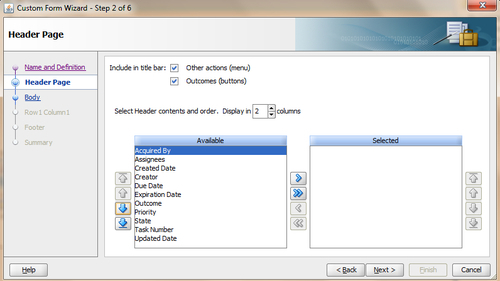
ApproveQuoteDetailsUIas the form name and click Next. - In the Header Page section, let the number of columns be 2, and select all the available header contents in the same order.
You can select the desired one and can even change the order from here.
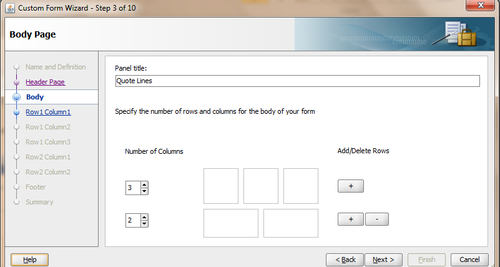
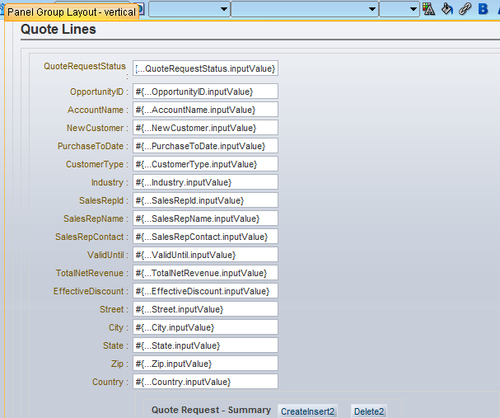
- In the Body page, enter
Quote Linesas Panel title. - Select number of columns as 3 and add rows as 2.
- Click Next.
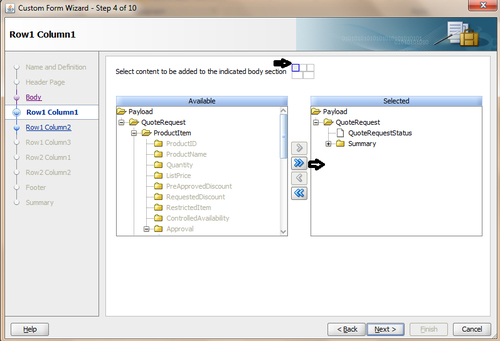
- For the Row 1 Column 1 dialog, select QuoteRequestStatus and Summary from the payload.
You will find that a position indicator also is displayed at the top.
- Click Next.
- For Row 1 Column 2, you can select Address from Payload | Summary and click Next.
- For Row 1 Column 3, you can select Contact from Payload | Summary and click Next.
- For Row 2 Column 1, select Product Items and click Next.
- For Row 2 Column 2, select License Terms and click Next.
- Enter
Quote Attachmentsas the title for Footer and select all the available fields.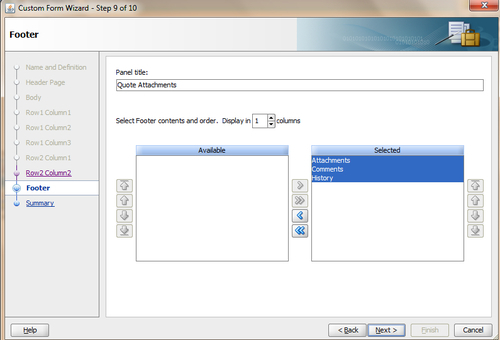
- Click Next.
- The last page summarizes your selection. Click Finish, if you are happy with the content.
- Click OK on the Edit Table Column dialog.
You will find that a new project called ApproveQuoteDetailsUI is created. You can verify the Task Form from /public_html/ApproveQuoteDetailsUI.jspx.
You can now deploy and test the Project.
You have just created an ApproveQuoteDetailsUI project, using wizards. You can deploy this UI project as a single EAR file. As you already have a ApproveQuoteDetailsUI project EAR file in the same root, you must undo deployment for that, first.
Let us explore how to deploy an ADF UI project:
- Create a Deployment Profile by clicking on Menu | Application | Application properties.
- Select Deployments and enter a Deployment Profile Name, say
ApproveQuoteDetailsUI.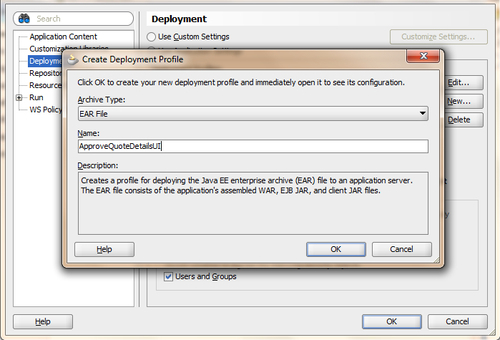
- Select Application Assembly and check the ApproveQuoteDetailsUI project, as shown in the preceding screenshot, and click OK.
- Now you can deploy it from Menu | Application | Deploy and select the Deployment Profile.