If you need a team-based site along with your enterprise portals, or if you wish to connect with people, collaborate content and business objects, the answer is the ready-to-use application Oracle WebCenter Spaces. With WebCenter Spaces you can customize the look and feel of your pages, create pages, add content, publish and edit content stored in Oracle Universal Content Management (UCM), manage tasks, projects, people, and their content, and much more. WebCenter Spaces has Process Spaces built on top of it.
Process Spaces provides Process Workspace, Process Modelling Spaces, and Process Instance Spaces:
- Process Workspace: This has a Process Tracking page to provide process-related information. You have witnessed all these features in Oracle BPM Workspace. It's quite similar to that. You can act on a task, filter a task, add documents to a task, participate in discussions, and view recent activities in a process space.
- Process Modelling Spaces: With this, you can collaborate on process definitions. It contains a process catalog, which displays processes represented as squares.
- Process Instance Spaces: This allows you to collaborate on a process instance. Here you can view all the instance details of the process, such as audit trail information, details of the instance, open activities, comments and attachments, calendars, and other stuff, such as initiate, filter, or cancel a instance from process workspaces.
In this section, you will create a team site where members can collaborate. FusionNX team with Sales Interest needs to exchange information in the form of ideas, opinions, and so on. To help groups to stay connected, you will use templates that cater your needs. These templates are provided by Oracle WebCenter Spaces. You will build a team site to explore WebCenter Spaces' social networking capabilities.
In this section, you will master the art of interacting with process spaces.
- Log in to Oracle WebCenter Spaces, at
http://localhost:8888/webcenter. - Click on Spaces, on the banner and click on Create Space. This will open a Create a Space dialog.
- Enter
FusionNXConnectas the name and a key to enable people to find this space. Let it beFusionNXConnect: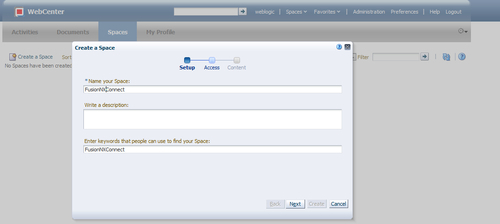
- Click on Next.
- On the Access dialog, enter a URL for the Space. Complete it by entering
FusionNXConnect. - Your direct URL to access the FusionNXConnect team site will be
http://localhost:8888/webcenter/spaces/FusionNXConnect: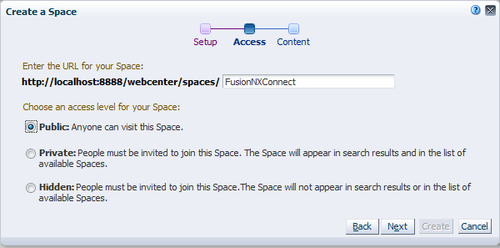
- Let the access level be Public.
- In the list of the templates, choose Team Site, as this template has services such as announcements, discussions, events, and so on, for a team to collaborate.
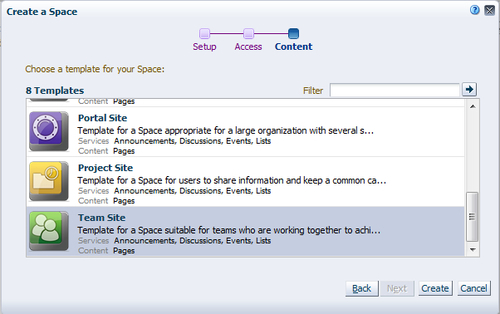
- Click on Create, and a team site is created.
II. Add members:
- You are in the FusionNXConnect Space. Click on Members in the left-hand navigation. This will open FusionNXConnect - Settings page
- Click on the Members tab
- Click on Add People to add members.
- Search for the
salesrepresentativeuser, and once it appears in the list of names, select Participant as a role and click on the Add button. - Repeat step 4 for the
businessanalystuser, too: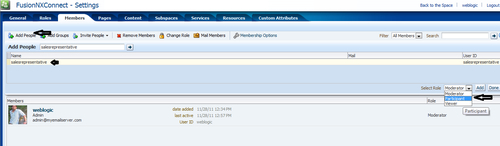
- Click on Back to the Space on the top-right of the banner, and you are back to the FusionNXConnect Space team site.
III. Create announcements to share thoughts and ideas:
- You must be aware that announcements must be used to share your thoughts and ideas on various social networking sites, such as Facebook, Orkut, LinkedIn, and so on. BPM WebCenter Spaces lets you do the same.
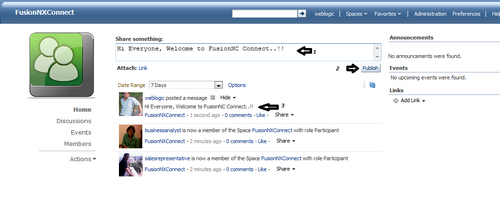
- You are at the FusionNXConnect Spaces home page. Write something to share with your members.
- Say
Hi Everyone, Welcome to FusionNX Connect..!!. - Click on the Publish button, as shown in the following screenshot.
- The message gets displayed in the banner:
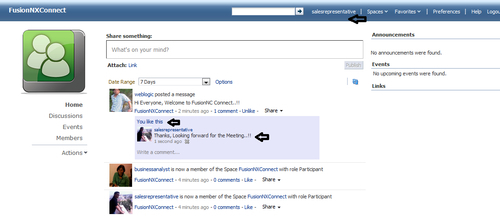
- Log in as the user salesrepresentative, to the FusionNXConnect Spaces team site, and click on Like to like the thought/idea/announcement.
- You can also comment on the shared content, as shown in the following screenshot:
IV. Create an announcement:
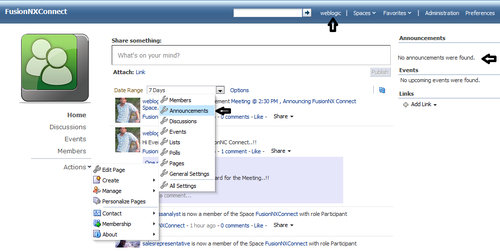
- Log back in to FusionNXConnect Spaces as the user weblogic.
- Click on Action | Manage and select Announcements. You will find that there are no announcements in the banner now:
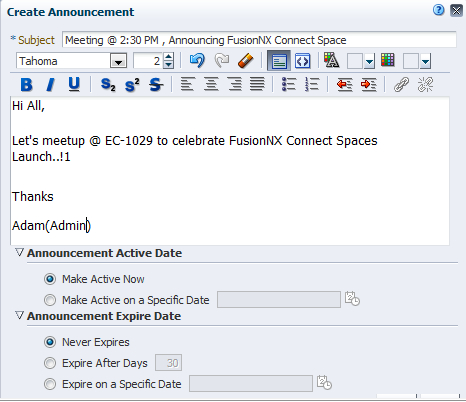
- In the Create Announcement dialog, enter the subject and an announcement, as shown in the following screenshot.
- You can fix a time when you want this announcement to be active and can even fix an expiry date for the announcement:
- Click on OK in the dialog
- Now, you can verify the announcement that appears on the FusionNXConnect banner.
V. Create Discussion:
- Log in as the user weblogic to the FusionNXConnect team site.
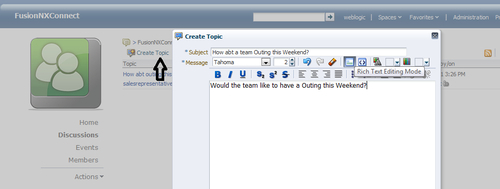
- Click on Discussions.
- Click on Create Topic and enter topic details, as shown in the following screenshot. Click on the Create button to create the discussion:
- Log out and then log in as the user businessanalyst.
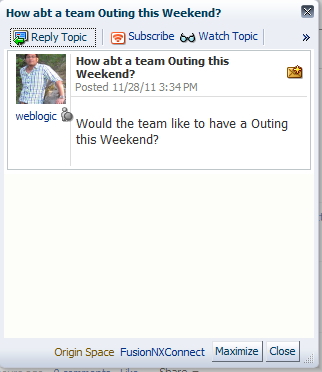
- You can find a link to this discussion on the banner. Click on it, and a dialog appears.
- You can click on Reply Topic to respond on this discussion:
Here, you have explored social networking features in WebCenter Spaces. With WebCenter Spaces, you can even build a portal site.
If you have UCM configured, a Document tab also appears in the same template. Also, you can create a wiki, blog, and so on.
To create a blog, follow the ensuing steps:
- Click on Blogs in the panel.
- Select the Team Blog page.
- Click on New Post, to create a new blog.
- Enter title and text, and click on the Create button.
- You will find that a new blog is created.
To create a poll, follow the ensuing steps:
- Click on Actions and choose Polls.
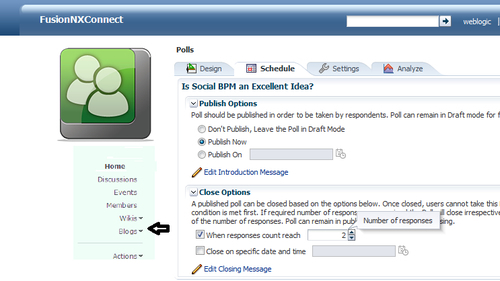
- Give a name to poll such as
Is Social BPM an Excellent Idea? - Use green icon on the right, to create a poll question in the Design tab.
- You can schedule the poll and perform settings for it.
Poll is an excellent mechanism to infuse polling in the space:
- On the FusionNXConnect page, click on Actions | General Settings.
- In the Display setting, browse for the icon and logo.
- You can apply a new skin and can even set a language for this page:
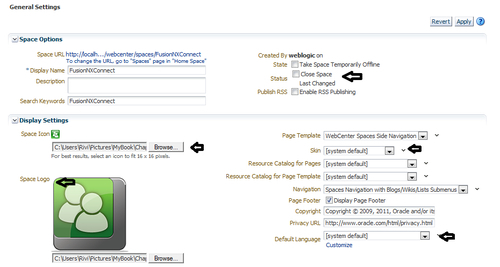
- Click on Apply, when you are finished with the changes.
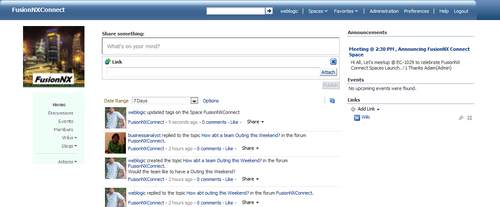
- The final team site with social collaboration, will look like the following screenshot: