
The twenty-first century has become the century of the digital lifestyle, with millions of computer users around the world embracing new technologies such as digital cameras, MP3 players, and other assorted multimedia gadgets. Whereas 10 years ago you might have had a collection of WAV files littering your Windows installation, nowadays you are more likely to have hundreds, if not thousands of MP3 files scattered across various computers. Along with video clips, animations, and other graphics, the demand for organizing and maintaining these vast libraries is driving development of applications. Popular proprietary applications such as iTunes and Google’s Picasa are coveted by Linux users, but open source applications are starting to appear that provide real alternatives, and for some the final reasons they need to move to Linux full time.
This chapter provides an overview of some of the basic multimedia tools included with Fedora. You will see how to create your own CDs, watch TV, rip audio CDs into the open source OGG audio format for playback, as well as manage your media library.
Note
Continuing a move that began with the release of Red Hat 9, The Fedora Project maintains a philosophy that has been controversial with many longtime users. Because of concerns of potential liability arising from copyright and patent issues in the United States, Red Hat and The Fedora Project have voluntarily removed any functionality that could violate the intellectual property rights of others or subject Red Hat to any penalties. That does not mean individual users would be violating those same rights, so we have provided resources to the reader as to how some of that functionality can be restored; the choice is yours.
By installing and using yum as described in Chapter 7, “Managing Software,” you can easily restore full multimedia functionality to Fedora.
Because Fedora uses UTF-8 language encoding, some non-Fedora applications will have display problems if they are not UTF-8 compliant. You can fix this by placing the following line in /etc/bashrc:
export LANG=en_US SUPPORTED="en_US"

LC_MESSAGES=C LC_ALL=C
Linux is distributed across the Internet by using ISOs that are waiting to be written to CDs or DVDs. Therefore learning how to burn discs is essential if you have to download and install a Linux distribution. Not only that, but you are likely to want to use CDs and, more commonly, DVDs to back up your music, family pictures, or other important files. With DVD writers being so cheap, the format has really taken off and more and more people use cheap DVDs as way of archiving simply due to the larger storage size available. Today’s high-resolution digital cameras can occupy upward of 3MB per shot, and music files can be anything from 1MB to 10MB+ in size. These file sizes make DVD the obvious choice, but there are still occasions when you need to write to a CD. You can use CDs and DVDs to
Record and store multimedia data, such as backup files, graphics images, and music, on to a CD or DVD.
Rip audio tracks from a music CD (ripping refers to extracting music tracks from a music CD) and compile your own music CD for your personal use.
Linux audio clients and programs support the creation and use of many different types of audio formats. Later sections of this chapter discuss sound formats, sound cards, music players, and much more. Because CD burning is used for many other purposes in Fedora, we cover the essentials of that process first in this chapter. To record multimedia data on a CD, you must have installed a drive with CD writing capabilities on your system. Chapter 4, “Post-Installation Configuration,” explains the rudiments of getting a CD writer configured and working properly. The hardware should have been set up properly during the initial Fedora installation or configured properly when detected by Kudzu. To make certain that your CD writer is working, use cdrecord -scanbus to get the information for using the CD drive under SCSI (small computer system interface) emulation:
# cdrecord -scanbus
Cdrecord-Clone 2.01a32-dvd (i686-pc-linux-gnu) Copyright (C) 1995-2001 Jörg
Schilling
Linux sg driver version: 3.5.27
Using libscg version 'schily-0.8'
scsibus0:
0,0,0      0) 'HL-DT-ST' 'RW/DVD GCC-4120B' '2.01' Removable CD-ROM
0,1,0      1) *
0,2,0      2) *
0,3,0      3) *
0,4,0      4) *
0,5,0      5) *
0,6,0      6) *
0,7,0      7) *
Here, we see that the CD writer (in this example, a CD writer/DVD reader) is present and is known by the system as device 0,0,0. The numbers represent the scsibus/target/lun (logical unit number) of the device. You need to know this device number when you burn the CD, so write it down or remember it.
Tip
An IDE drive used to create CDs and DVDs needs to be emulated as a SCSI drive. Fedora does this automatically when you first install it, but in case you need to do it manually, here are the few items you need to configure (assuming that the CD drive is at /dev/hdd):
Add the following line to the
/etc/modules.conffile:probeall ide-scsi
Edit the
/boot/grub/menu.lstfile to add the following to the kernel commands:hdd=ide-scsi
Reboot your computer.
These items load the appropriate modules and provide SCSI emulation. You would no longer refer to the CD drive as /dev/hdd, but as /dev/scd0. Check the symbolic for /dev/cdrom to make certain that it points to /dev/scd0.
However, because Fedora now uses the 2.6 kernel, SCSI emulation is not necessary, although it is useful information should something not work correctly.
In Linux, creating a CD is a two-step process. You first create the iso9660-formatted image, and you then burn or write the image onto the CD. The iso9660, as you will learn in Chapter 38, “Managing the File System,” is the default file system for CD-ROMs.
Use the mkisofs command to create the ISO image. The mkisofs command has many options (see the man page for a full listing), but use the following for quick burns:
$ mkisofs -r -v -J -l -o /tmp/our_special_cd.iso /source_directory
The options used in this example are as follows:
-r—. Sets the permission of the files to more useful values.UIDandGID(individual and group user ID requirements) are set to zero, all files are globally readable and searchable, and all files are set as executable (for Windows systems).-v—. Displays verbose messages (rather than terse messages) so that you can see what is occurring during the process; these messages can help you resolve problems if they occur.-J—. Uses the Joliet extensions toISO9660so that our Windows-using buddies can more easily read the CD. The Joliet (for Windows), Rock Ridge (for UNIX), and HSF (for Mac) extensions to theiso9660standard are used to accommodate long filenames rather than the eight-character DOS filenames that theiso9660standard supports.-l—. Allows 31-character filenames; DOS does not like it, but everyone else does.-o—. Defines the directory where the image will be written (that is, the output) and its name. The/tmpdirectory is convenient for this purpose, but the image could go anywhere you have write permissions./source_directory—. Indicates the path to the source directory; that is, the directory containing the files we want to include. There are ways to append additional paths and exclude directories (and files) under the specified path—it is all explained in the man page, if you need that level of complexity. Our simple solution is to construct a new directory tree and populate it with the files we want to copy, and then make the image using that directory as the source.
Many more options are available, including options to make the CD bootable.
After you have created the ISO image, you can write it to the CD with the cdrecord command:
$ cdrecord -eject -v speed=12 dev=0,0,0 /tmp/our_special_cd.iso
The options used in this example are as follows:
-eject—. Ejects the CD when the write operation is finished.-v—. Displays verbose messages.speed=—. Sets the speed; the rate depends on the individual drive’s capabilities. If the drive or the recordable medium is poor, you can use lower speeds to get a good burn.dev=—. Specifies the device number of the CD writer (the number I told you to write down earlier).
Note
You can also use the blank= option with the cdrecord command to erase CD-RW disks. The cdrecord command has fewer options than mkisofs does, but it offers the -multi option, which enables you to make multisession CDs. A multisession CD enables you to write a data track, quit, and then add more data to the CD later. A single=session CD can be written to only once; any leftover CD capacity is wasted. Read about other options in the cdrecord man page.
Current capacity for CD media is 700MB of data or 80 minutes of music. (There are 800MB/90-minute CDs, but they are rare.) Some CDs can be overburned; that is, recorded to a capacity in excess of the standard. The cdrecord command is capable of overburning if your CD-RW drive supports it. You can learn more about overburning CDs at http://www.cdmediaworld.com/hardware/cdrom/cd_oversize.shtml/.
There are several competing formats for DVD (digital versatile disk), and with prices rapidly falling, it is more likely that DVD-writing drives will become commonplace. The formats are as follows:
DVD+R
DVD-R
DVD+RW
DVD-RW
Differences in the + and − formats have mostly to do with how the data is modulated onto the DVD itself with the + format having an edge in buffer underrun recovery. How this is achieved impacts the playability of the newly created DVD on any DVD player. The DVD+ format also has some advantages in recording on scratched or dirty media. Most drives support the DVD+ format. As with any relatively new technology, your mileage may vary.
We focus on the DVD+RW drives because most drives sold support that standard. The software supplied with Fedora has support for writing to DVD-R/W (rewritable) media as well. It will be useful for you to review the DVD+RW/+R/-R[W] for Linux HOWTO at http://fy.chalmers.se/~appro/linux/DVD+RW/ before you attempt to use dvd+rw-tools, which you need to install to enable DVD creation (also known as mastering) as well as the cdrtools package. You can ignore the discussion in the HOWTO about kernel patches, compiling the tools.
Tip
The 4.7GB size of DVD media is measured as 1000 megabytes per gigabyte, instead of the more commonly used 1024 megabytes per gigabyte, so do not be surprised when the actual formatted capacity, about 4.4GB, is less than you anticipated. dvd+rw-tools does not allow you to exceed the capacity of the disk.
You need to have the dvd+rw-tools package installed (as well as the cdrtools package). The dvd+rw-tools package contains the growisofs application (that acts as a front end to mkisofs) as well as the DVD formatting utility.
You can use DVD media to record data in two ways. The first way is much the same as that used to record CDs in a session, and the second way is to record the data as a true file system using packet writing.
To record data in a session, you use a two-phase process:
Format the disk with
dvd+rw-format /dev/scd0(only necessary the first time you use a disk).Write your data to the disk with
growisofs -Z /dev/scd0 -R -J /your_files.
The growisofs command simply streams the data to the disk. For subsequent sessions, use the -M argument instead of -Z. The -Z argument is used only for the initial session recording; if you use the -Z argument on an already used disk, it simply erases the existing files.
Caution
Some DVDs come preformatted; formatting them again when you use them for the first time can make the DVD useless. Always be sure to carefully read the packaging your DVD comes in to ensure that you are not about to create another coaster!
Tip
Writing a first session of at least 1GB helps maintain compatibility of your recorded data with other optical drives. This is because the DVD players calibrate themselves by attempting to read from specific locations on the disk; you need data there for the drive to read it and calibrate itself.
Also, because of limitations to the ISO9660 file system in Linux, do not start new sessions of a multisession DVD that would create a directory past the 4GB boundary. If you do so, it causes the offsets used to point to the files to “wrap around” and point to the wrong files.
Packet writing treats the DVD disk like a hard drive in which you create a file system (like ext3) and format the disk, and then write to it randomly like a conventional hard drive. This method, although commonly available on MS Windows–based computers, is still experimental for Linux and is not yet covered in detail here.
Tip
DVD+RW media are capable of only about 1,000 writes, so it is very useful to mount them with the noatime option to eliminate any writing to update their inodes or simply mount them read-only when it’s not necessary to write to them.
It is possible to pipe data to the growisofs command:
# your_application | growisofs -Z /dev/scd0=/dev/fd/0
It is also possible to burn from an existing image (or file, named pipe, or device):
# growisofs -Z /dev/scd0=image
The dvd+rw-tools documentation, found at /usr/share/doc/dvd+rw-tools-*/index.html, is required reading before your first use of the program. We also suggest that you experiment with DVD-RW (rewritable) media first, as DVD-R (record once) media is not yet as inexpensive as CD-R media.
Although adequate for quick burns and use in shell scripting, the command-line technique for burning CDs and DVDs is an awkward choice for many people until they become proficient at it and learn all the arcane commands. Fortunately, Fedora provides several graphical clients.
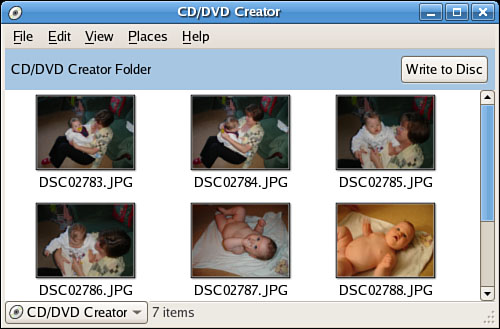
With Fedora, enhanced functionality has been included in the default file browser, Nautilus. Under the Places menu item is a CD/DVD Creator selection. To use it, insert a blank CD or DVD into your CD-R/DVD-R drive. You must have two Nautilus windows open: one that shows the files you want to save to the CD, and a second one open to the burn:/// location. Click on the Write to Disc button as shown in Figure 10.1 to bring up the Write dialog; at the next dialog box, choose what format you want to write the disc to. Nautilus CD/DVD Creator supports writing to a disc image file, commonly known as ISO. You can also give your new disc a label and tell Nautilus what speed you want to write the disc at. Finally click the Write button to start the burning process—it is that simple!
The following sections describe X-CD-Roast, an additional CD/DVD creation tool as well as a number of other graphical clients for burning audio and data CDs.
Tip
An excellent Internet site for CD-related information is http://www.cdmediaworld.com/.
The Gracenote CDDB Music Recognition Service licenses a database service to software developers so that they can include additional functionality in their application by accessing the database and having their application display information about the music CD, including the artist and song title, the CD’s track list, and so on. The database server at cddb.cddb.org, when contacted by the appropriate software, identifies the appropriate CD and sends the information to be displayed locally. Many CD player applications provide this functionality. The service is interactive: If you have a CD that is not in the CDDB database, the website tells you how you can add the information to the database.
Each GUI application for burning CDs has different strengths and weaknesses. You should experiment with all the different graphical tools and try your hand at command-line burning—you will have a significantly richer multimedia experience with Fedora.
X-CD-Roast, shown in Figure 10.2, is a standalone CD and DVD creator provided with Fedora, but is not installed by default. When installed using yum, it can be found in the System Tools menu as the CD Writer menu item, or it can be launched from the command line, like this:
$ xcdroast &
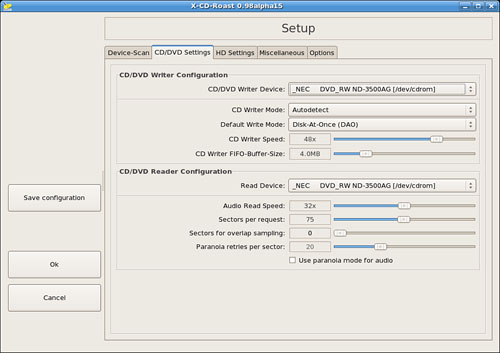
When you first start it, X-CD-Roast is deceptively plain, giving little indication of the true power of this application. The very first time it is run, it begins with a dialog warning you to enter the Setup dialog, which is the only button presented to you in the next screen (other than Exit). The application auto-detects your CD drive, but you must tell it which drive (if you have more than one) is the CD-RW drive and select the users who are allowed to use the application. The dialogs for setting this information are straightforward and easy to follow. Make certain that you choose a default directory for temporary image storage that offers enough room to store several images.
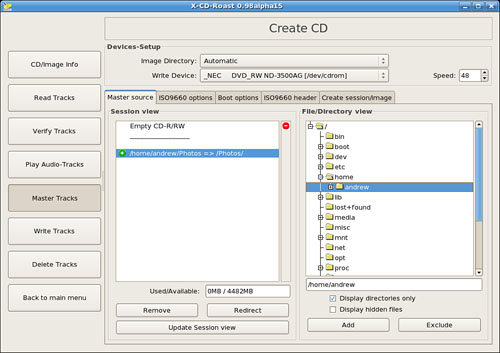
The main X-CD-Roast menu offers you the choice to duplicate or create CDs or DVDs. The latter operation is shown in Figure 10.3.
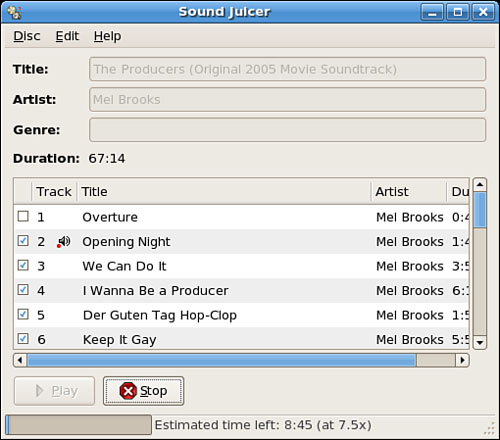
Fedora provides the Sound Juicer CD Extraction tool to allow you to rip tracks from your favorite CDs and transfer them directly into Fedora. Sound Juicer can rip and play your CDs and tries to obtain artist and CD information from the Internet service MusicBrainz. You can launch and use Sound Juicer by selecting it in the Sound and Video menu under the Applications menu. To alter the format and location of where Sound Juicer stores the outputted music files, choose the Preferences option under the Edit menu. Sound Juicer is shown in Figure 10.4.
Linux historically had a reputation of lacking good support for sound and multimedia applications in general. However, great strides have been made in recent years to correct this, and support is now a lot better than it used to be. (It might make you smile that Microsoft no longer supports the Microsoft Sound Card, but Linux users still enjoy support for it, no doubt just to annoy the folks in Redmond.) UNIX, however, has always had good multimedia support as David Taylor, UNIX author and guru, points out:
“The original graphics work for computers was done by Evans & Sutherland on Unix systems. The innovations at MIT’s Media Lab were done on Unix workstations. In 1985, we at HP Labs were creating sophisticated multimedia immersive work environments on Unix workstations, so maybe Unix is more multimedia than suggested. Limitations in Linux support doesn’t mean Unix had the same limitations. I think it was more a matter of logistics, with hundreds of sound cards and thousands of different possible PC configurations.”
That last sentence sums it up quite well. UNIX had a limited range of hardware to support; Linux has hundreds of sound cards. Sound card device driver support has been long lacking from manufacturers, and there is still no single standard for the sound subsystem in Linux.
In this section, you learn about sound cards, sound file formats, and the sound applications provided with Fedora Linux.
Fedora supports a wide variety of sound hardware and software. Two models of sound card drivers compete for prominence in today’s market:
ALSA, the Advanced Linux Sound Architecture, which is entirely open source
OSS, the Open Sound System, which offers free and commercial drivers
Fedora uses ALSA because ALSA is the sound architecture for the 2.6 series kernels.
ALSA supports a long list of sound cards. You can review the list at http://www.alsa-project.org/alsa-doc/. If your sound card is not supported, it might be supported in the commercial version of OSS. You can download a trial version of commercial software and test your sound card at http://www.opensound.com/download.cgi.
Fedora detects most sound cards during the original installation. If you add or replace a sound card after the initial install, the Kudzu New Hardware Configuration utility automatically detects and configures it at the next reboot. To configure the sound card at any other time, use the system-config-soundcard graphical tool. The graphical tool can be found under the Administration menu as the Soundcard Detection menu item. For additional details about configuring your sound card, refer to Chapter 4.
Fedora provides a number of tools that enable you to control volume, mix, and other sound recording functions. The Kmix sound mixer (available when you install the KDE window manager) acts as a virtual mixing board, taking sound inputs from different sources, enabling you to adjust their individual volumes, mute them, and listen to them through your sound card.
If you need to control sound from the command line, use the alsamixer command, which can be used to adjust balance or volume in text mode using the left and right cursor keys to select a channel and the up and down keys to adjust the volume.
$ alsamixer
A number of formats exist for storing sound recordings. Some of these formats are associated with specific technologies, and others are used strictly for proprietary reasons. Fedora supports several of the most popular sound formats, including
raw (
.raw)—. More properly known as headerless format, audio files using this format contain an amorphous variety of specific settings and encodings. All other sound files contain a short section of code at the beginning—a header—that identifies the format type.MP3 (
.mp3)—. A popular, but commercially licensed, format for the digital encoding used by many Linux and Windows applications. MP3 is not supported by any software included with Fedora (which advises you to use the open source Ogg-Vorbis format instead).WAV (
.wav)—. The popular uncompressed Windows audio-visual sound format. It is often used as an intermediate file format when encoding audio.Ogg-Vorbis (
.ogg)—. Fedora preferred audio encoding format. You enjoy better compression and audio playback, and freedom from lawsuits when you use this open-source encoding format for your audio files.
Note
Because of patent and licensing issues, Fedora has removed support for the MPEG, MPEG2, and MPEG3 (MP3) file formats in Fedora Linux. Although we cannot offer any legal advice, it appears that individuals using MP3 software are okay; it is just that Fedora cannot distribute the code because it sells its distribution. It seems—at this point—perfectly all right for you to obtain an MP3-capable version of Xmms (for example), which is a Winamp clone that plays MPEG1/2/3 files. (You learn more about Xmms in the “Music Players” section later in this chapter.) You can get Xmms directly from http://www.xmms.org/ because that group has permission to distribute the MP3 code.
You can also enable the MP3 codec within Fedora by using the livna.org yum repository. You do this by installing the gstreamer-plugins-mp3 package, which enables the MP3 codec in all the GNOME applications.
Another alternative is to use the Ogg-Vorbis format; it is completely free of restrictions. A ripper for CD music is available from http://www.thekompany.com/projects/tkcoggripper/ and an MP3-to-Ogg converter is available from http://faceprint.com/code/. Or, you could download and install the non-crippled versions of multimedia applications from FreshRPMs at http://www.freshrpms.net/.
Fedora includes software (such as the sox command used to convert between sound formats) so that you can more easily listen to audio files provided in a wide variety of formats, such as AU (from NeXT and Sun), AIFF (from Apple and SGI), IFF (originally from Commodore’s Amiga), RA (from Real Audio), and VOC (from Creative Labs).
Tip
To learn more about the technical details of audio formats, read Chris Bagwell’s Audio Format FAQ at http://www.cnpbagwell.com/audio.html.
Fedora also offers utilities for converting sound files from one format to another. Conversion utilities come in handy when you want to use a sound in a format not accepted by your current application of choice. A repository of conversion utilities resides at http://ibiblio.org/pub/linux/apps/sound/convert/!INDEX.html and includes MP3 and music CD–oriented utilities not found in Fedora. You have to know how to compile and install from source, however. If you see something useful, have a look at http://www.rpmfind.net/ to locate a binary RPM if you don’t feel up to the task.
Fedora does provide sox, a self-described sound translator that converts music among the AIFF, AU, VAR, DAT, OGG, WAV, and other formats. It also can be used to change many other parameters of the sound files.
Timidity is a MIDI-to-WAV converter and player. If you are interested in MIDI and musical instruments, Timidity is a handy application; it handles karaoke files as well, displaying the words to accompany your efforts at singing.
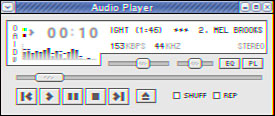
Fedora provides music players. One of the most popular is Xmms, a Winamp clone, which in the full version can play not only music, but MPEG1/2/3 video as well. Xmms (see Figure 10.5) supports a number of plug-ins that can add dancing, lighted oscilloscope-like displays, redirect its output to other devices, support unusual file formats, sync animations to the music, and otherwise increase its geek appeal exponentially. Xmms used to be included in the base Fedora distribution, but has now been shifted to Extras, so you have to use yum to install it.
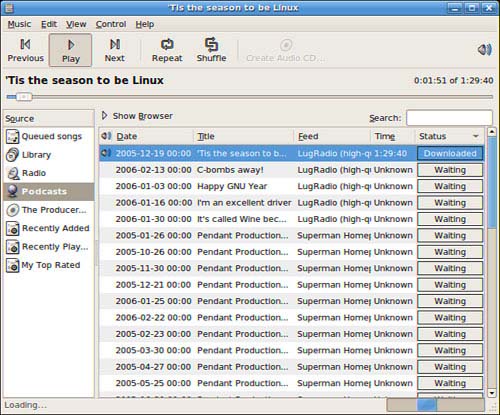
The default music player is Rhythmbox, which is designed to play music files from playlists and Internet radio stations much like Xmms. It is found in the Sound & Video menu as the Music Player menu item. You can also use it to subscribe to podcasts available through the Internet. Figure 10.6 shows Rhythmbox working with podcasts.
Kmid, found in the More Sound & Video Applications submenu, is a karaoke and MIDI mapper; it supports external synthesizers. MIDI mappers enable you to map MIDI channels to the synthesizer instruments you want them to control. If you enjoy karaoke, Kmid also enables you to change the tempo of songs without changing the pitch, and permits the organization of your songs into collections with a selectable play order.
Gnome-CD is the CD Player menu item found in the Sound & Video menu. As the default CD player application, it provides a basic GUI interface for playing CDs in your CD-ROM drive.
Other music and sound-related applications can be found in the Sound & Video menu, and, of course, you are free to install your own selection of applications as well. You might have a problem adding them to the menu, however, so we provide the following tip to enable menu editing in Fedora.
Streaming audio is for playing games, listening to Internet radio, and other online audio content. Streaming audio is designed to produce an uninterrupted sound output, but it requires the system to perform a content juggling act. Essentially, the system’s audio buffer is continually filled with audio information, which is fed to the buffer through the system’s Internet connection. Because of server and connection capabilities, the rate of input might vary. Because audio is used at a constant rate, the trick to managing streaming audio is to always keep the buffer full, although you might not be able to fill it at a constant rate.
Streaming audio is handled in Fedora in the .m3u format. The MPEG formats are also used for streaming audio. Although Xmms supports streaming audio, another popular application is Real Player, available from http://www.real.com/linux/. An excellent resource for music and sound in Linux is http://linux-sound.org/. The Network Audio section of that website contains an extensive list of streaming audio applications.
The Icecast application, not provided with Fedora, is a popular streaming audio server. You can use Icecast to serve your MP3 music collection over your home LAN. You can learn more about Icecast at http://www.icecast.org/. A nice tutorial on Icecast is available at http://www.linuxnetmag.com/en/issue4/m4icecast1.html.
Tip
You can also read Chapter 18, “Network Connectivity,” to see how to use the Network File System (NFS) to mount a remote directory of music files over your network.
You can use Fedora tools and applications to view movies and other video presentations on your PC. This section presents some TV and motion picture video software tools included with the Fedora Linux distribution you received with this book.
In addition to the information you read here, you should review Chapter 3, “Installing Fedora,” and Chapter 6, “The X Window System,” to learn more about installing and configuring your video graphics card.
To watch TV and video content on your PC, you must install a supported TV card or have a video/TV combo card installed. A complete list of TV and video cards supported by Fedora is at http://www.exploits.org/v4l/. See the Gatos Project at http://gatos.sourceforge.net for information on ATI video combo cards.
Freely available Linux support for TV display from video cards that have a TV-out jack is poor. That support must come from the X11 driver, not from a video device that Video4Linux supports with a device driver. Some of the combo TV-tuner/video display cards have support, including the Matrox Marvel, the Matrox Rainbow Runner G-Series, and the RivaTV cards. Many other combo cards lack support, although an independent developer might have hacked something together to support his own card. Your best course of action is to perform a thorough Internet search using Google.
Many of the TV-only PCI cards are supported. In Linux, however, they are supported by the video chipset they use, and not by the name some manufacturer has slapped on a generic board (the same board is typically sold by different manufacturers under different names). The most common chipset is the Brooktree Bt*** series of chips; they are supported by the bttv device driver.
If you have a supported card in your computer, it should be detected during installation. If you add it later, the Kudzu hardware detection utility should detect it and configure it. You can always configure it by hand.
To determine what chipset your card has, use the lspci command to list the PCI device information, find the TV card listing, and look for the chipset that the card uses. For example, the lspci output for our computer shows
# lspci
00:00.0 Host bridge: Advanced Micro Devices [AMD] AMD-760 [IGD4-1P] System Controller (rev 13)
00:01.0 PCI bridge: Advanced Micro Devices [AMD] AMD-760 [IGD4-1P] AGP Bridge
00:07.0 ISA bridge: VIA Technologies, Inc. VT82C686 [Apollo Super South] (rev 40)
00:07.1 IDE interface: VIA Technologies, Inc. VT82C586B PIPC Bus Master IDE (rev 06)
00:07.2 USB Controller: VIA Technologies, Inc. USB (rev 1a)
00:07.3 USB Controller: VIA Technologies, Inc. USB (rev 1a)
00:07.4 SMBus: VIA Technologies, Inc. VT82C686 [Apollo Super ACPI] (rev 40)
00:09.0 Multimedia audio controller: Ensoniq 5880 AudioPCI (rev 02)
00:0b.0 Multimedia video controller: Brooktree Corporation Bt878 Video Capture (rev 02)
00:0b.1 Multimedia controller: Brooktree Corporation Bt878 Audio Capture (rev 02)
00:0d.0 Ethernet controller: Realtek Semiconductor Co., Ltd. RTL-8029(AS)
00:0f.0 FireWire (IEEE 1394): Texas Instruments TSB12LV23 IEEE-1394 Controller
00:11.0 Network controller: Standard Microsystems Corp [SMC] SMC2602W EZConnect
01:05.0 VGA compatible controller: nVidia Corporation NV15 [GeForce2 Ti] (rev a4)
Here, the lines listing the multimedia video controller and multimedia controller say that our TV board uses a Brooktree Bt878 Video Capture chip and a Brooktree Bt878 Audio Capture chip. This card uses the Bt878 chipset. Your results will be different, depending on what card and chipset your computer has. This card happened to be an ATI All-in-Wonder VE (also known as ATI TV-Wonder). (The VE means Value Edition; hence, there is no TV-out connector and no radio chip on the card; what a value!) The name of the chipset tells us that the card uses the bttv driver.
In the documentation directory, we find a file named CARDLIST, and in that file is the following entry, among others:
card=64 - ATI TV-Wonder VE
There are 105 cards listed as well as 41 radio cards, including
card=0 - *** UNKNOWN/GENERIC ***
which is what we would have used had we not known the manufacturer’s name for our card.
The file named Modules.conf, located in the same directory, gives us the following example of information to place in our /etc/modules.conf file:
# i2c
alias char-major-89    i2c-dev
options i2c-core       i2c_  debug=1
options i2c-algo-bit   bit_test=1

# bttv
alias char-major-81    videodev
alias char-major-81-0  bttv
options bttv           card=2 radio=1
options tuner          debug=1
All we need do is enter this information into /etc/modules.conf and change the value for card=2 to card=64 to match our hardware. We can delete the reference to the radio card (radio=2) because we do not have one and leave the other values alone. Then we must execute
# depmod -a
to rebuild the modules dependency list so that all our modules are loaded automatically. When finished, all we need do is execute
# modprobe bttv
and our TV card should be fully functional. All the correct modules will be automatically loaded every time we reboot. Fedora is clever enough to detect and configure a supported TV card that is present during installation.
Tip
Other useful documentation can be found in /usr/src/linux-2.6/Documentation/_video4linux. After you have identified a driver for a device, it does not hurt to look at the source code for it because so little formal documentation exists for many drivers; much of it is in the source code comments.
The development of support for TV cards in Linux has coalesced under the Video4Linux project. The Video4Linux software provides support for video capture, radio, and teletext devices in Fedora.
Fedora recognizes a variety of video formats. The formats created by the MPEG group, Apple, and Microsoft dominate, however. At the heart of video formats are the codecs—the encoders and decoders of the video and audio information. These codecs are typically proprietary, but free codecs do exist. Here is a list of the most common video formats and their associated file extensions:
.mpeg—. The MPEG video format; also known as.mpg.qt—. The QuickTime video format from Apple.mov—. Another QuickTime video format.avi—. The Windows audio visual format
Tip
An RPM that provides a Divx codec for Linux can be found at http://www.freshrpms.net/. Divx is a patented MPEG-4 video codec that is the most widely used codec of its type. It allows for compression of MPEG-2 video by a factor of 8. See http://www.divx.com/ for more information.
The GetCodecs application is a Python script with a GUI interface that downloads, installs, and configures your Fedora system with multimedia codecs not provided by Fedora, such as MP3, Divx, and DVD codecs. The script can be obtained from http://sourceforge.net/projects/getcodecs/.
If you need to convert video from one format to another, you use encoder applications called grabbers. These applications take raw video data from a video device such as a camera or TV card, and convert it to one of the standard MPEG formats or to a still image format, such as JPEG or GIF. Fedora does not supply any encoder applications (other than ppmtompeg which encodes MPEG-1 video), but you can find them at http://www.freshrpms.net/ or another online source (see the “Reference” section at the end of this chapter).
Because of the patent and licensing issues mentioned earlier, the capability to play video files has been removed from Fedora. This functionality can be restored if you install the full version of the applications described in this section from FreshRPMs at http://www.freshrpms.net/. There you can find multimedia applications such as Ogle, Xine, AlsaPlayer, Gstreamer, Grip, Mplayer, VCDImager, VideoLAN-client, Xmms, and Zapping.
You can use Linux software to watch TV, save individual images (take snapshots) from a televised broadcast, save a series of snapshots to build animation sequences, or capture video, audio, or both. The following sections describe some of the ways in which you can put Linux multimedia software to work for you.
The noatun viewer is provided with Fedora to use as an embedded viewer in the Konqueror browser. noatun is set up as the default association for the video file formats it plays. Open a video file in Konqueror or Nautilus, and the video is shown in the viewer if it is supported. The viewer provides basic start, stop, and fast-forward VCR-type functions.
You can watch MPEG and DVD video with Xine. Xine is a versatile and popular media player that is not included with Fedora. Xine is used to watch AVI, QuickTime, OGG, and MP3 files (the latter disabled in Fedora).
Another interesting video viewer application is MPlayer (not provided by Fedora), a movie player for Linux. MPlayer can use Win32 codecs and it supports a wider range of video formats than Xine, including Divx and some RealMedia files. MPlayer also uses some special display drivers that support Matrox, 3Dfx, and Radeon cards and can make use of some hardware MPEG decoder boards for better MPEG decoding. Look for Fedora packages at http://www.MPlayerHQ.hu/homepage/; a Win32 codec package is also available, as well as other codec packages and a GUI interface.
You can configure a number of video input sources to feed television images to your computer. You can use any supported TV device as described previously to connect cable TV, an Xbox, Sega Dreamcast, PS/2, or even an external television antenna to your computer and view the images on your video display.
Fedora provides the tvtime TV viewing application to enable you to watch Battlestar Galactica without leaving your computer.
Note
The kdetv application (formerly known as QtVision) is steadily growing in terms of both popularity and features and is worth a look. It can be downloaded from http://www.kdetv.org/.
Start tvtime from the command line:
$ tvtime &
Right-clicking on it toggles the display of the Options menu. Adjust the settings to suit your hardware.
$ scantv
The tvtime configuration file details are contained in the man page for tvtime.
An alternative TV-viewing application available at FreshRPMs.Net is Zapping, a GNOME viewer that supports Vide4Linux, Vide4Linux2, and Xvideo and is extensible in functionality through plug-ins. The home page is http://zapping.sourceforge.net/.
The best reason to attach a television antenna to your computer, however, is to use the video card and the computer as a personal video recorder.
The commercial personal video recorder, TiVo, uses Linux running on a PowerPC processor to record television programming with a variety of customizations. TiVo has a clever interface and wonderful features, including a record/playback buffer, programmed recording and pause, slow motion, and reverse effects. Fedora does not provide any of the many applications that attempt to mimic the TiVo functionality on a desktop PC running Linux. However, several such applications, including DVR, The Linux TV Project, and OpenPVR, are listed at http://www.exploits.org/v4l/. These projects are in development and do not provide .rpm files, so you have to know how to download from CVS and compile your own binaries. For something a little easier, check out MythTV at http://www.mythtv.org/; a Fedora .rpm file should be available from FreshRPMs.Net.
You can now easily play DVDs using Fedora as long as you install the appropriate software. (Fedora doesn’t provide any.) Browse to http://www.videolan.org/, and then download, build, and install the vlc client.
You must have a CPU of at least 450MHz and a working sound card to use a DVD player. The default Fedora kernel supports the DVD CD-ROM file system. As mentioned earlier, Xine and MPlayer do a great job of playing DVD files.
Note
The VideoLAN HOWTO found at http://videolan.org/ discusses the construction of a network for streaming video. Although you might not want to do that, a great deal of useful information about the software and hardware involved in the enterprise can be generalized for use elsewhere, so it is worth a look. The site also contains a link to a HOWTO about cross-compiling on Linux to produce a Windows binary.
http://www.cdcopyworld.com/—A resource for technical information about CD media and CD writers.
http://hardware.redhat.com/hcl/—A database of supported hardware.
http://www.opensound.com/download.cgi—The commercial OSS sound driver trial version download.
http:/www.xmms.org/—Home to the Xmms audio player.
http://www.thekompany.com/projects/tkcoggripper/—A free (but not GPL) OGG CD ripper.
http://faceprint.com/code/—An MP3-to-OGG converter named mp32ogg.
http://www.ibiblio.org/pub/linux/apps/sound/convert/!INDEX.html—Home to several sound conversion utilities.
http://linux-sound.org/—An excellent resource for Linux music and sound.
http://www.cnpbagwell.com/audio.html—The Audio Format FAQ.
http://www.icecast.org/—A streaming audio server.
http://www.linuxnetmag.com/en/issue4/m4icecast1.html—An Icecast tutorial.
http://linuxselfhelp.com/HOWTO/MP3-HOWTO-7.html—The MP3 HOWTO contains brief descriptions of many audio applications and, although it focuses on the MP3 format, the information is easily generalized to other music formats.
http://www.exploits.org/v4l/—Video for Linux resources.
http://fame.sourceforge.net/—Video encoding tools.
http://teletext.mb21.co.uk/faq.shtml—The Teletext FAQ.
http://xine.sourceforge.net/—Home of the Xine DVD/video player.
http://www.MPlayerHQ.hu/homepage/—Home to the MPlayer video player.
http://www.videolan.org/—A VideoLAN project with good documentation.
http://fy.chalmers.se/~appro/linux/DVD+RW/—The DVD+RW/+R/-R[W] for Linux, a HOWTO for creating DVDs under Linux.