
Publishing to the Internet
The World Wide Web has taken the world by storm. Everyone wants either to receive or to disseminate information via the Web. PowerPoint makes it easier than ever to convert your presentation into a format that can be viewed by Web browsers, such as Internet Explorer or Netscape Navigator.
Before doing so, however, you should consider the following:
A Web version of your presentation can be viewed by anyone who has access to your Web server. Unless your server is limited to your company (such as a corporate intranet), anyone from anywhere in the world can look in.
A Web version enables your viewers to see the presentation at their convenience. This can be particularly important for global audiences in vastly different time zones.
You have less control over a Web version of your presentation. No longer can you dictate the sequence of the slides, nor can you add clarifying comments if they are needed.
In the case of classroom presentations, will a Web version encourage students to skip class, knowing they can get the presentation off the Web at another time?
Will your potential Web audience have the necessary computer hardware and software to view your presentation the way you intend it to appear?
After you determine that you really want to publish your presentation to the Web, you next need to be sure that the slideshow is well designed for Web use. Consider the following:
Use good presentation design principles. If the slideshow works for an audience that sits before you, it will probably work well on the Web.
Because the presentation will be viewed unattended, be sure you have abundant navigational aids so that viewers don't get lost. Include a table of contents or Home, Back, and Forward buttons to assist the viewer.
Be more judicious in your use of graphics, animations, and other multimedia effects. What works well from a hard disk or over a local area network might be deadly slow over a modem connection. Keep such elements small or eliminate them altogether, if they don't really add to the presentation.
Be aware of issues related to accessibility for disabled users. For example, consider whether you need an alternative text-based page for the visually impaired who use special voice readers.
Do you have the right folders in the right place on your Web server, but some of your files are not appearing in the Web slideshow? See “Restoring Missing Files” in the “Troubleshooting” section near the end of this chapter.
Caution
Be careful to understand and follow copyright laws and guidelines when publishing your slideshow to the Web. If any of your material is copyrighted by someone else, you may be required to limit access to the material or not even use it at all if you don't first obtain permission.
Saving a Presentation as a Web Page
PowerPoint not only enables you to save your work directly in HTML format, but also lets you open your HTML slideshows directly into PowerPoint, edit them, and save them again in HTML. As you will see, this is not only easy, but it saves lots of time and space because you don't have to keep an original PowerPoint show and convert it each time.
Publishing your show to the Internet involves two steps: saving the presentation in HTML format and transferring the resulting files to a Web server. If you're lucky enough to be connected directly to your Web server over a company intranet, you don't even have to worry about transferring files because you can save the show directly at the Web site.
To save a slideshow as a Web page, follow these steps:
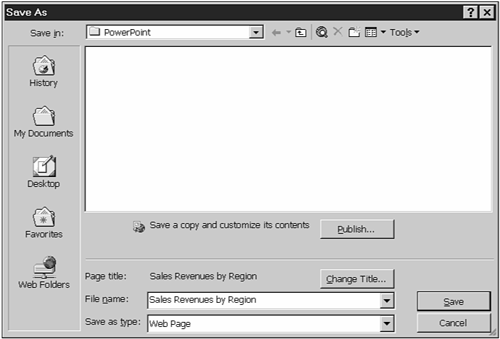
Choose File, Save as Web Page, and PowerPoint displays a somewhat modified Save As dialog box (see Figure 16.14).
Figure 16.14. Saving a PowerPoint presentation as a Web page can be quite simple, or you can customize the Web page.
Browse to the location where you want to save your presentation, displayed in the Save In field.
Note
Saving your show as a Web page generates several separate files. To make it easier to locate these files, to delete them, or to transfer them to a Web server, it's a good idea to create a separate folder for the Web version of your slideshow. Click the Create New Folder button and supply the name of the folder for your Web files.
Edit the filename if you want. Note that the filename ends in .htm, a standard extension for HTML files.
Click the Change Title button to change the page title in the Set Page Title dialog box. This title appears in the browser's title bar.
Click Save to save your presentation as a Web page.
Note
If you know that PowerPoint's Web options are set the way you want them, you can save time by choosing Save. By default, this gives you a frame-based Web page that includes an outline, navigation buttons, and other tools, along with the slide. The HTML file is also optimized for use with Internet Explorer 4.0 or later.
If you want to customize the way you present your slideshow as a Web page, follow these steps:
Choose File, Save as Web Page.
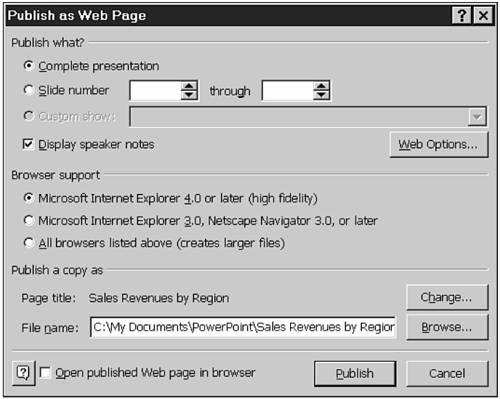
In the Save As dialog box (refer to Figure 16.14), click Publish to customize the Web page display. PowerPoint displays the Publish as Web Page dialog box (see Figure 16.15).
Figure 16.15. Publishing a presentation as a Web page enables you to customize how the page will appear on the Web.
Choose the options you want (see the next section, “Customizing a Web Presentation”).
Click Publish to save your presentation as a series of HTML files that work together to display your slides on the Web.
Customizing a Web Presentation
The many options for saving your presentation as a Web page enable you to tailor your Web page to match the needs of your viewers. For example, some browsers won't be able to view animations, while others can.
To customize a Web presentation, you must first decide exactly what you want to publish to the Web: the entire presentation, selected slides, a custom show, and/or speaker's notes (refer to Figure 16.15).
You can also optimize the Web presentation for browsers that audience members are likely to use by selecting the following options under Browser Support:
To attain the highest fidelity to your original presentation, publish the presentation for use by selecting Microsoft Internet Explorer 4.0 or Later (High Fidelity). This option enables viewers with the latest browsers to see animations and to experience other multimedia features.
Tip from
You must decide whether to ignore users with older browsers or force them to upgrade to view your Web page. If you're pretty sure that most browsers are up to date, optimize for the highest quality. Otherwise, you might want to choose an option that allows all browsers to view the Web page.
To enable users of older Web browsers to view your Web page content, choose Microsoft Internet Explorer 3.0, Netscape Navigator 3.0, or Later. Some of the pizzazz of your PowerPoint presentation may be lost with this conversion.
All Browsers Listed Above is a special dual-HTML feature that enables viewers to see the best presentation they can, based on the browser they use. This option creates larger files, which means slower downloads, but it helps you avoid having to guess which browsers your audience members are going to use.
The Web Options button takes you to the Web Options dialog box (shown in Figure 16.16), where you have many other options.
Figure 16.16. General Web options determine how the Web page is to be laid out and whether animations will be active.
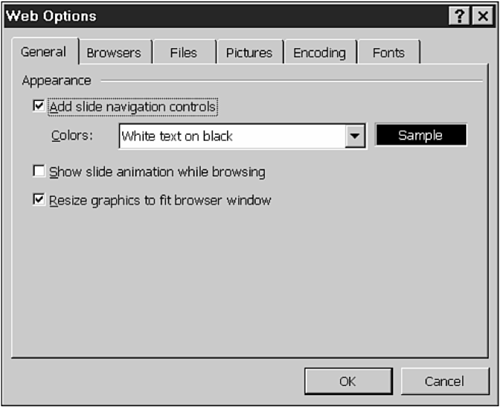
On the General tab, you can set several appearance options, including the capability to add slide navigation controls, show slide animation while browsing, or resize graphics to fit the browser window.
Note
The options on the General tab affect only those slideshows prepared for and viewed by Internet Explorer 4.0 or later. However, navigation control color options, even when turned off, do affect the navigational outline in Web pages targeted for Internet Explorer 3.0 and Netscape Navigator 3.0 or later.
On the Browsers tab (see Figure 16.17), you can choose the browser your viewers will use.
Figure 16.17. Set the optimal browser viewing options on this tab.
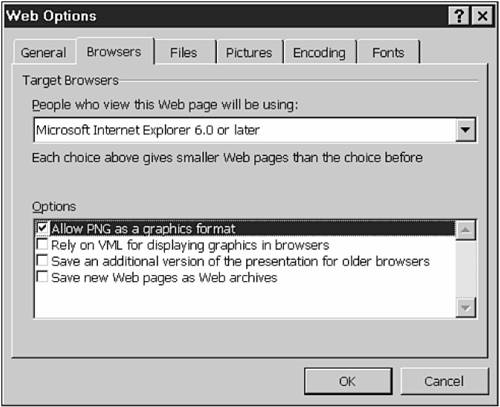
The earlier the browser version you choose, the smaller your Web pages will be. However, an earlier browser version might not support all the functionality of PowerPoint 2002, such as animations. You can also set a browser preference in the Publish as Web Page dialog box.
Based on your browser selection, the Options check boxes have the following default options selected:
Allow PNG as a Graphics Format PNG (Portable Network Graphics) is a Web graphics format that is smaller in size and can have better color and transparency control. However, older browsers (pre–Internet Explorer 4.0) don't support this type of graphic format.
Rely on VML for Displaying Graphics in Browsers VML (Vector Markup Language) is a method for describing 2D graphics in a text format. VML works only with the latest browsers, such as Internet Explorer 5.0. If your audience might be using older browsers, do not use this option.
Save an Additional Version of the Presentation for Older Browsers This option ensures that the maximum number of viewers can view your presentation clearly, but it increases the space required for your presentation.
Save New Web Pages as Web Archives Saves in a Web archive format, which enables you to store all parts of your Web site into a single file (text, graphics, other content, and so on). This option uses the MHTML (MIME encapsulated aggregate HTML) file format, which is supported by Internet Explorer 4.0 and later.
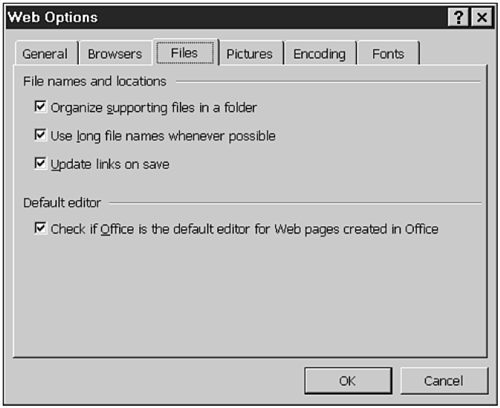
Click the Files tab in the Web Options dialog box to access file naming and location options. Here you can specify to organize supporting files in a folder, use long filenames, and update links on save (see Figure 16.18).
Figure 16.18. File options enable you to specify how files will be named, how they'll be organized, and whether you can edit the resulting HTML files in PowerPoint.
The Pictures tab provides the option to target monitor screen size. If you have chosen the Internet Explorer 4.0 Browser Support and the Resize Graphics to Fit Browser Window options, changing this setting has no effect. However, if you publish your presentation for use on older browsers, this option enables you to specify how large the slides should be.
Tip from
Using a screen size that matches the target browser screen setting usually results in a slide that is too small for the available screen. If you want to fill up the browser window with a larger slide, select the next-highest resolution (for example, select 1024 × 768 if the target screen is 800 × 600).
Finally, the Encoding and Fonts tabs enable you to modify the output for use in browsers that support other languages.
→ For more information on the use of other languages in your presentations, see Appendix B, “Using PowerPoint's Foreign Language Capabilities.”
Transferring Your Web Page to a Web Server
Typically, you create your presentation and save it as a Web page on your local hard disk. Working offline saves time and, in some cases, dial-up connection charges. When you're finally ready to make your presentation available to the rest of the world, you must transfer your files from your own computer to the Web server that will host your Web page.
If you are connected to a company intranet, you may be able to publish your Web page directly to the Web server. Check with your network specialist to find out if this is possible and how to do it.
If you aren't connected directly to your Web server, you will have to transfer files to it following the instructions provided by your Internet service provider (ISP), just as you would any other Web site or pages.
Testing Your Web Page
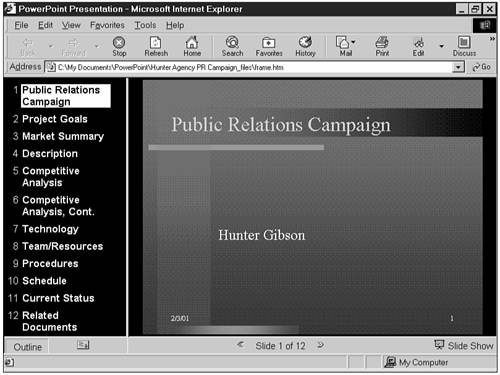
More likely than not, you will test your Web page as you go. At the bottom of the Publish as Web Page dialog box, you can check the Open Published Web Page in Browser option so that each time you publish your presentation, your default browser starts and displays the page using files saved on your local computer (see Figure 16.19). If you find something wrong or want to try other options, simply return to PowerPoint and publish the presentation again.
Figure 16.19. A Web page published for Internet Explorer 4.0 or later includes an outline, the slide, and several navigation buttons.
After you transfer your files to your Web server, you should again test your presentation in your browser over the Internet. Some things you should check for are the following:
All files should be in their proper place. If you find missing pages or graphics, be sure you have transferred files to folders and locations that correspond exactly to the folders on your hard disk.
Links should be tested individually to be sure they work as you expect.
Caution
The World Wide Web is a dynamic, constantly changing medium. Links that work today might not work tomorrow. If your Web page contains links, you should check periodically to be sure they're still active.
If some of your intended audience use dial-up connections, test how long it takes to download your presentation using a modem. You might discover that certain slides simply take too long to download because of large graphics, sound, or even video elements. You have to determine just how important those elements are and consider eliminating them to speed up the presentation.
Not all browsers are created equal! You should test your Web page using both Internet Explorer and Netscape Navigator, including new and older versions of those programs. If you want, you can download older versions of browsers from the Microsoft and Netscape Web sites.
Not all computers and screen settings are the same, either. Test your pages on standard VGA screens (640 × 480), on Super VGA (800 × 600), and on XGA screens (1024 × 768).
Test your Web page on Macintosh screens (or any other operating system you anticipate your audience might use). Screen resolution and colors sometimes are very different on the Macintosh.
Note
If your intended audience uses the same browser and has the same type of computers (for example, in a corporate intranet setting), you might not need to perform such extensive testing. If you have a wider audience and you want to look good on a wide variety of computer screens (for example, in a university setting), you can't assume everyone uses the same computer and browser that you do.
Modifying or Updating Your Web Page
If you find during testing that you need to change your Web page, or if at a later date you want to update the information in your presentation, you can still use PowerPoint to edit the presentation.
The easiest way to edit a PowerPoint Web page is to open the main HTML page directly into PowerPoint. Because it uses XML and other advanced HTML processes, the HTML page retains all of PowerPoint's special features, including the use of animations and other multimedia objects.
Tip from
You don't need to keep both a PowerPoint (PPT) and an HTML version of your presentation on your local computer. Keep only the HTML copy, which you can open, edit, and play just as you do any regular PowerPoint presentation.
After you make the changes you want, simply save the presentation again as a Web page and transfer the resulting files to your Web server, if necessary.