
Setting PowerPoint Options
PowerPoint enables you to change many basic options, such as how you edit, save, or print your presentations, as well as how you view PowerPoint screens.
Note
Changes you make in the Options dialog box become your new default settings until you change them again.
Tip from
Whenever you use a new program or an update to a program, your first inclination is to try to make the program do things the “old way” or the way you're used to doing them. Although it can be tempting to jump right in and make changes to PowerPoint's default settings, you probably should use PowerPoint “as is” for a while, at least, until you decide whether those default settings might actually be better.
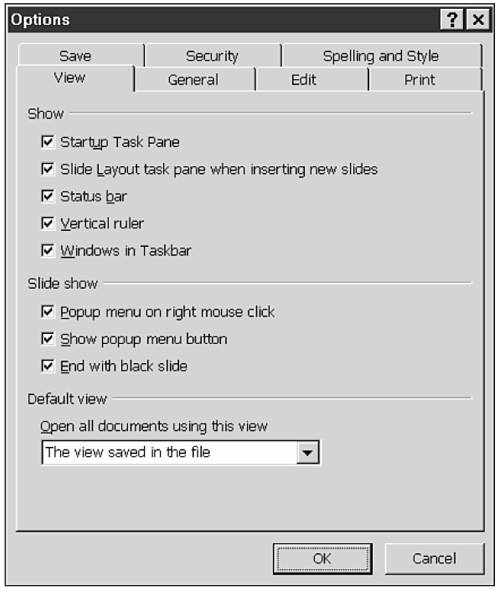
To access the Options dialog box, choose Tools, Options (see Figure 21.29).
Figure 21.29. The Options dialog box is used to change many of PowerPoint's default settings.
Setting View Options
Click the View tab to display options that affect what you see as you create and edit a slideshow, as well as what you see when you play the slideshow.
Show options include the following:
Slide Layout Task Pane When Inserting New Slides Displays the Slide Layout task pane when you insert a new slide into your presentation.
Status Bar Displays the status bar at the bottom of the screen. Although the status bar does take up a bit of territory, it shows you which slide you're editing as well as the design you're using. Also, the spelling button appears with a red x if anything on the current slide is misspelled.
Note
If you double-click the design name on the status bar, PowerPoint displays the Slide Design task pane, enabling you to quickly change the design template. Double-clicking the spelling button begins the spelling feature.
Vertical Ruler Displays a vertical ruler along with the horizontal ruler if you choose to display rulers (View, Ruler).
Windows in Taskbar Displays a separate Taskbar icon for each open Office window. If you remove this check box, only a single icon will display. Note that this option isn't available for Windows NT 4.0.
Slide Show options include the following:
Popup Menu on Right Mouse Click When presenting a slideshow, you need an easy way to access navigation and other options. With this option, you can right-click on the slide to display a menu of options.
Show Popup Menu Button By default, when you play a PowerPoint slideshow, PowerPoint displays a small button at the lower-left corner of the slide. Clicking this button gives you the same menu as the one you get when you right-click the slide. If you don't want this button on the screen, deselect this option.
End with Black Slide If you deselect this option, PowerPoint returns to the PowerPoint editing screen when you conclude your slideshow. Leaving this option active makes for a cleaner ending.
You can also specify your default view from the Open All Documents Using This View drop-down list. Options include the following:
The view saved in the file
Normal—outline, notes, and slide
Normal—thumbnails, notes, and slide
Normal—outline and slide
Normal—thumbnails and slide
Normal—notes and slide
Normal—slide only
Outline Only
Slide Sorter
Setting General Options
Click the General tab to change information about yourself and other items not easily grouped into a specific category (see Figure 21.30). General options include the following:
Provide Feedback with Sound to Screen Elements To add sound effects for menus, buttons, and other screen elements, select this option.
Figure 21.30. The General tab of the Options dialog box offers miscellaneous PowerPoint settings.

Note
Changing this option in PowerPoint changes it for all Office XP applications. However, you may have to restart Windows for this option to take effect. Also, you may find that other sound schemes take precedence over these sound effects.
Recently Used File List: n Entries By default, PowerPoint displays the four most recently opened files at the bottom of the File menu. You can increase this number up to nine or reduce it to none.
Link Sounds with File Size Greater than nn Kb PowerPoint normally saves sound files as part of the PowerPoint presentation itself. However, large sound files can make a presentation unwieldy. Selecting this option means that files larger than the size specified are not included with the slideshow, but instead are linked from their current file location.
Name Whenever you use options that require your name, such as in the Properties Summary (File, Properties), PowerPoint automatically uses the name found here.
Initials Whenever user initials are required—for example, during a NetMeeting—PowerPoint automatically uses the initials found here.
Web Options Opens the Web Options dialog box where you can set various Web output options, including formatting, graphic formats, and the like.
→ For more information on Web options, seeChapter 16.
Setting Edit Options
Click the Edit tab to change options for editing text and charts (see Figure 21.31). These options include the following:
Show Paste Options Buttons Displays a Paste Options button that enables you to make choices about how you want to paste a copied object or text, such as whether to keep source or target design template formatting.
Figure 21.31. The Edit tab of the Options dialog box offers options for text and chart editing.

Use Smart Cut and Paste The spacing around added or deleted text adjusts to add a space between words or to remove a space before a period, unless you deselect this option.
When Selecting, Automatically Select Entire Word If you want to select only portions of words when using a mouse, deselect this option.
Drag-and-Drop Text Editing Clicking selected text and dragging it to a new location is the same as cutting and pasting. If you find this happens accidentally too often, you may need to deselect this option.
New Charts Take on PowerPoint Font If you clear this option, charts will use a generic default font (for example, Arial) instead of the font and style being used in the current slide.
Tip from
Although it might seem like a good idea to use the default PowerPoint fonts when creating a new chart, more generic fonts may actually look better. You might want to create test charts using both font methods before actually developing the data or making other modifications.
Maximum Number of Undos: nn By default, you can undo the last 20 actions. You can decrease the number of undos to as few as three or increase it to as many as 150.
Caution
Increasing the number of undos increases the size of your document and also increases the risk of corrupting your document. Unless you really need more, stay with the default number, or fewer.
Taking too long to save or perform other tasks? See the “Troubleshooting” section near the end of this chapter.
New Animation Effects Disables the new animation effects in PowerPoint 2002. This is useful if you're going to share presentations with users of previous versions of PowerPoint that employ a different kind of animation effects.
Multiple Masters Disables the use of multiple slide masters which can cause problems when opened with a previous version of PowerPoint.
Password Protection Disables the use of password protection, so that users of previous PowerPoint versions not supporting password protection can still open your presentations.
Changing Print Options
To change general printing defaults or to change settings for the current document only, click the Print tab (see Figure 21.32).
→ For details on printing PowerPoint presentations, seeChapter 10, “Creating and Printing Presentation Materials.”
General printing options include the following:
Background Printing This option enables you to continue editing your slide presentation while PowerPoint prints slides in the background. Depending on the printer you're using, it might already be set up for background printing. If so, your printer will print in the background regardless of your selection here. If your printer isn't already set up to do background printing, the selection in this check box determines whether background printing occurs or not.
Print TrueType Fonts as Graphics If your printer has trouble printing the fonts used in your presentation, it could be that your printer cannot recognize them or you are using too many fonts for your printer to keep track of. Choosing this option sends text to the printer as graphics, thus bypassing the downloading of fonts to your printer. However, this option generally makes printing much slower.
Print Inserted Objects at Printer Resolution This helps match graphic resolutions to the printer that's printing them. For example, your graphic image might have been created at only 72 dots per inch (dpi), but your printer can print at a much crisper 600 dpi. Selecting this option may slow printing.
Figure 21.32. The Print tab of the Options dialog box offers several default printing options.

When you print your current document using the Print button on the Standard toolbar, by default you use the most recently used PowerPoint print settings. You can also choose to Use the Following Print Settings:
Print What Enables you to choose exactly what you want to print and its format. Options include
Color/Grayscale Enables you to choose the color option for print. Choices include Color, Grayscale, or Pure Black and White.
Note
To preview your printout in another color format, click the Color/Grayscale button on the Standard toolbar and choose Color, Grayscale, or Pure Black and White from the menu.
Scale to Fit Paper If you're using other than standard-sized paper, this option enables PowerPoint to scale the slides to fit that size paper.
Frame Slides This option places a single, thin-line border around the entire printed slide.
Print Hidden Slides If you have hidden slides in your PowerPoint presentation, you can choose to include them in the printed version.
Note
Don't forget that print options selected from the Options menu apply only to automatic printing from the Print button on the Standard toolbar. Choosing File, Print still enables you to choose specific print options before printing.
→ For details on printing PowerPoint presentations, seeChapter 10.
Setting Save Options
Click the Save tab to view and change Save options (see Figure 21.33).
Figure 21.33. The Save tab of the Options dialog box helps change default file saving options.

These include
Allow Fast Saves By default, PowerPoint saves only the changes made to a presentation since the last time it was saved, which obviously takes less time than saving the full presentation. However, this also requires more disk space, so if your computer is already fast enough, you might want to consider deselecting this option.
Prompt for File Properties The Summary, found in File, Properties, helps document the authorship and revision history of your slide presentation. If this is important to you, select this option, which automatically brings up the Properties screen the first time the document is saved or whenever it is saved with a different name.
Save AutoRecover Info Every nn Minutes This is the automatic backup provision that saves a temporary copy of your presentation (typically in the WindowsTemp folder) as frequently as you specify with this option. If you exit your document properly, the automatic backup file is erased. If you don't exit properly (for example, due to a power failure), PowerPoint automatically opens this file the next time you use PowerPoint so that you can determine whether it contains data you didn't save.
Convert Charts When Saving as Previous Version When saving the presentation to an earlier version of PowerPoint, use this option to convert charts to a format also understood by earlier versions of PowerPoint.
Save PowerPoint Files As By default, PowerPoint saves its files in the PowerPoint presentation format, which can't be opened in earlier versions of PowerPoint, such as Office 95.
However, PowerPoint 2002 can open presentations created in earlier versions. If you work in an environment where not everyone is using PowerPoint 2002, you may need to agree upon a common format to be used by everyone. Then, change this option to one of the following formats:
PowerPoint presentation, which can be opened and edited in PowerPoint 2002, 2000, or 97
PowerPoint 97-2002 & 95 Presentation
Web Page
Web Archive
Caution
Be aware that saving a PowerPoint 2002 presentation in an earlier format may result in the loss of certain features available only in PowerPoint 2002.
Default File Location PowerPoint saves your presentations in the folder you specify. Initially this is usually C: My Documents, but that may vary depending on how PowerPoint was installed.
Embed TrueType Fonts Select this option if you want to embed TrueType fonts in the current document. Options include embedding only characters in use to reduce file size or embedding all characters so that others can edit.
Setting Security Options
The Security tab (see Figure 21.34) enables you to set a variety of security options for PowerPoint, which can be useful if you share your presentations with other users or place them on a network, intranet, or the Internet.
Figure 21.34. Protect your presentations using the Security tab.

Options include the ability to
Set a password to open a presentation Protect your file by entering a password in the Password to Open field. You, or anyone else, will need to enter this password to open the file again. To set further encryption options, click the Advanced button.
Set a password to modify a presentation Another option is to set a password specifically to modify a presentation. Anyone can still view your presentation, but it will take a password to make changes to it. Enter a modification password in the Password to Modify field.
Caution
If you forget your password, you'll no longer be able to open and/or modify your presentation, so be sure to choose a password that's easy for you to remember, or write it down in a secure location.
View or modify digital signatures If you plan to use digital signatures with your PowerPoint presentations, click the Digital Signatures button to view these options. PowerPoint 2002 uses Microsoft Authenticode technology to enable digital signatures using a digital certificate. A digital signature is an electronic, encrypted signature stamp that's attached in a certificate to vouch for its authenticity. The average PowerPoint user won't normally set up digital certificates; this is the domain of an organization's IT department.
Set privacy options If you're very concerned about privacy, you can specify that PowerPoint remove any personal information (such as your name) that it stores by selecting the Remove Personal Information from This File on Save check box. Note that this option doesn't remove personal information you add to your presentation yourself (for example, entering your name and address on a slide), but information PowerPoint stores by default.
Set macro security If you regularly receive presentations that include macros, you might want to set special security options to protect from macro viruses. Options include the ability to accept only signed macros from sources you specify, to choose whether or not to accept files with macros, or to disable macro protection. Macros aren't as commonly used with PowerPoint as they are with other Office programs, but you should still set at least some form of macro protection if you're going to share files with others. Click the Macro Security button to set these options.
Setting Spelling and Style Options
Click the Spelling and Style tab to change default spelling and style options.
→ For detailed information on checking spelling and style, see“Checking Spelling and Style” in Chapter 3, “Working with Text.”