
Using the Outline Tab
No matter which method you use to create your outline, you'll probably want to use PowerPoint's Outline tab to organize this information at some point. In Normal view, the outline appears on the left side of the window and shares the desktop with the slide itself and related notes.
Note
You can change the size of any pane in PowerPoint by dragging its border to a new location. This can be done when the cursor changes to a double-headed arrow.
 To view the Outline tab, click the Normal View button in the lower-left corner of the PowerPoint window. The Outline tab is selected by default, and your presentation's outline will appear on the left side of the window. Figure 5.1 shows the Outline tab.
Figure 5.1. The Outline tab offers a flexible approach to creating an outline.
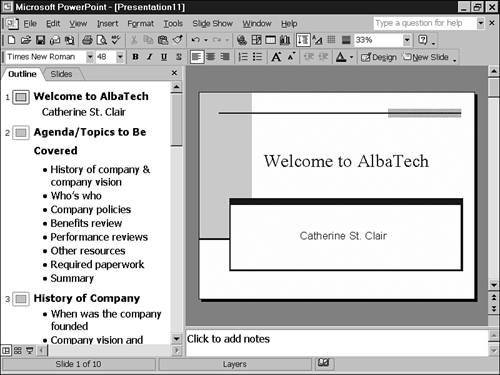
Each slide in your presentation is numbered and followed by a slide icon and the title text. The body text is listed under each slide, up to five levels. This body text includes bulleted and indented lists, as well as other text information. The title text is also referred to as the outline heading and each individual point in the body text as a subheading. Clip art, tables, charts, and other objects don't appear in the outline.
Note
Any text that you enter other than in the Click to Add Title or the Click to Add Text placeholder doesn't display in the outline.
Adding new outline information is simple. Enter the content and press the Enter key to move to the next point. To delete a point you no longer need, select it and press the Delete key.