
During the course of this chapter, we'll create several prototypes based on ideas for a social sports app. The application allows you to propose, discover, and coordinate sporting activities with your contacts with the aim of keeping you healthy, while having fun with your friends.
One of the main elements of the app is the list of the available activities for you to join. In this first example, we'll focus on a basic navigation for this process--moving from the list of different activities to the details of one of them.
The general steps we'll go through are as follows:
- Creating images for each view.
- Adding the images to new scenes in a prototype.
- Defining the interactions to navigate between those scenes.
In order to prototype this navigation, we need images of the two views involved. The list view contains different sporting activities with a brief description. The detail view provides a more elaborate description for an activity--for example, a tennis match--as well as several actions. In Sketch, we define the two views as separate artboards and make them exportable to obtain the images.

Once we have the images available, we need to combine them into a prototype with Hype. When we start Hype, we'll get a new document with a default scene. We need to adjust the size of the scene to the dimensions of our prototype--360x640 px, in this case. Since we want all the scenes in the prototype to be the same size, make sure that you leave the Apply changes to all scenes selected.
The initial scene will be the list of activities. You can add the image for the list by just dragging it from your filesystem. Alternatively, you can also access the Elements menu on the top toolbar and select the Image... option.
To complete our initial scene, we just need to give it a name. From the scene list on the left, we can rename our initial scene to Activities by double-clicking on the scene title or using the Rename option from the contextual menu that appears when right-clicking on the scene thumbnail.

Our navigation interaction requires moving between two screens, thus we need to add a new scene. We can click on the "+" in the scene list header to create a new untitled scene. We can then add the image to the second scene and rename the scene as Activity Details, as we did for the previous scene.
Once we have the two scenes, we need to define the navigation interactions. This will be supported in the following two steps:
- Defining the active area that users are required to touch for the interaction to happen.
- Specifying the resulting interaction.
To define interactive areas, we'll use a transparent rectangle. From the elements menu, we can create a new rectangle.

We'll adjust its size and position to cover the first item in the list of the Activities scene. In order to make it transparent, we'll adjust the style for the Element tab on the properties panel and set both the Fill Style and the Border | Style to None. In this way, we'll have an area that is invisible but can react to user interactions.
Since the active area is an invisible element, we rename it in the layer list to make it easier for us to find later. In the example, we have used the act- prefix to identify active areas, naming the current one as act-tennis since it is the active area representing the Tennis Match item.

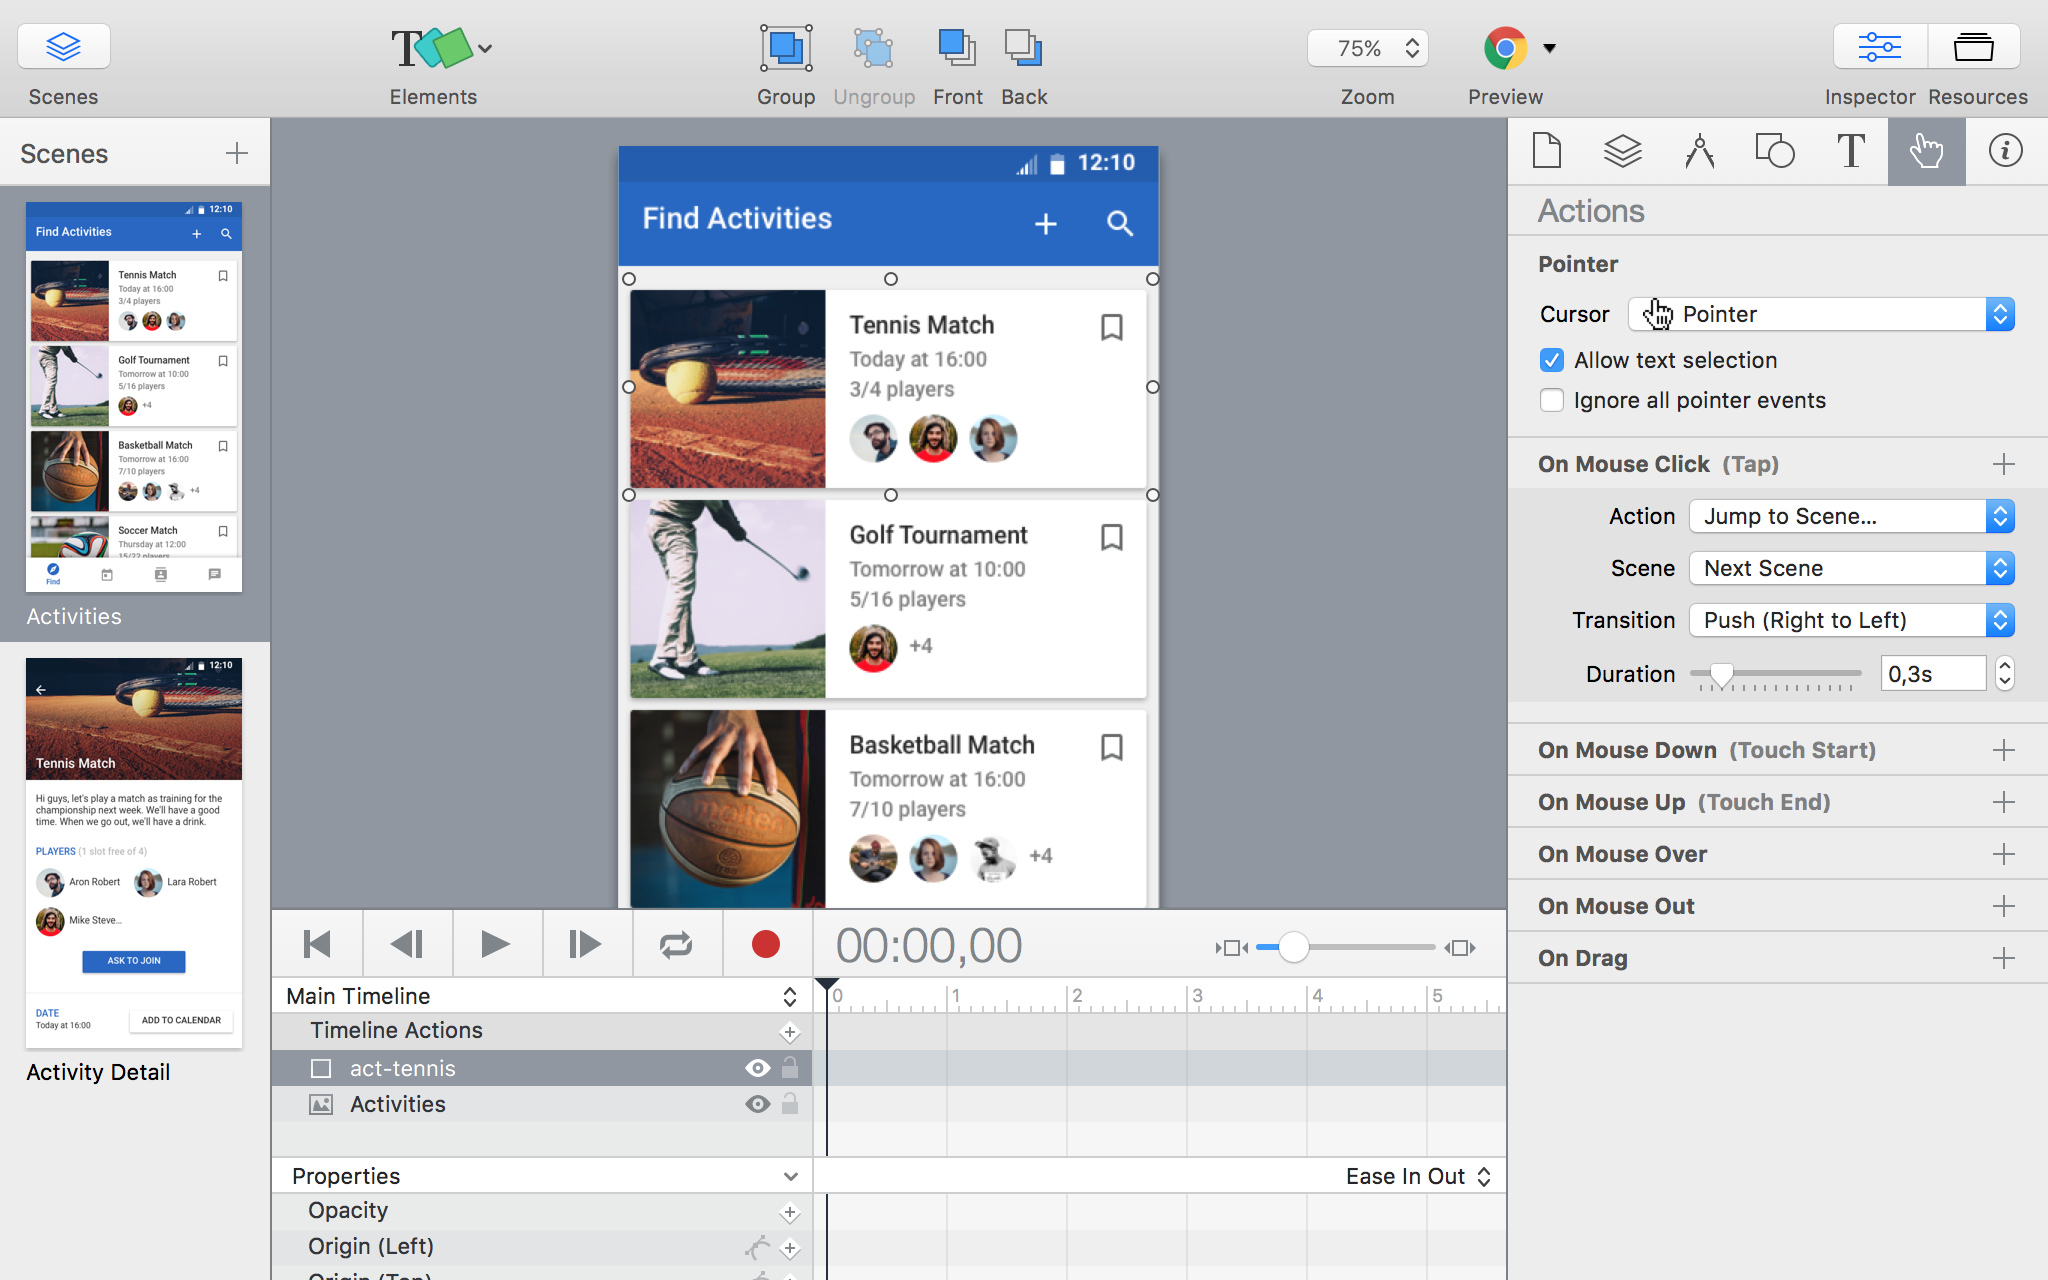
Now that we have defined an active area, we can set an interaction for it. The actions section of the property inspector allows you to define interactions of different kinds for the selected element. In this case, we want to change the current scene when the user taps on the first item in the list.
We will add a new interaction on the On Mouse Click (Tap) section using the + icon, which is next to it. This is the event we'll use to react to the user clicks--when using a mouse or similar method or tapping--when using a touch device. From the different types of actions, we select the Jump to Scene... since it fits our purpose of navigating between scenes.
We also need to specify the target scene that we will navigate to and also the transition for the change. By default, the target is the next scene with an immediate transition.
To get better continuity, we'll use a Push style transition instead of the default one. With this transition, one view moves out of the current viewport as the new one enters. We'll adjust the speed for the transition to feel more fluent, setting it to 0.3 seconds.
At this point, you can preview your prototype and try the navigation. By clicking on the preview option, you will see your prototype in a browser. In the prototype, you should be able to move from the list view to the detail view. However, once you reach the detail view, it is not possible to go back to the original list view, yet.

The next step is to create a navigation back from the detail view. For this, we'll follow a similar process as we did to set up the previous interaction. We'll create a transparent rectangle over the back arrow area and specify a new transition. In this case, we will select the Activities scene as the target--or Previous Scene if you prefer--and use the push approach too; however, in this case, we will follow the opposite direction--using left to right.

If you try the prototype at this point, you'll now be able to navigate back and forth between the two views. With this, we have reached our goal for the first prototype by supporting navigation between these two views, but let's just add a final touch to the prototype.
We saw how to add interactions to individual elements to trigger a change of scene. However, it is also possible to add interactions to the whole scene. We'll use this approach to provide an alternative way to return to the list using a touch gesture.
Select the scene menu for the Activity Detail scene, and create a new action for the On Swipe Right event. You can define the same transition you created before to switch scenes. In this way, when you are in the detail view, you'll be able to return to the list by quickly dragging your finger to the right.

Try previewing your prototype with different kinds of transitions and adjust their speed. When you are happy with the result, you can export the prototype as an HTML document to share with the world. The Export as HTML5 option in the File menu will allow you to get a version of the prototype that can be viewed with any web browser.

Combining scenes and transitions provides a quick way to prototype the navigation, but it is a limited approach. Quite often, you will need the various different parts of your views to move independently.