
It doesn't matter how great your graphics are: an underwater scene is never realistic enough without the muffled sound caused by submersion. In this recipe, we will learn how to simulate that effect whenever our player is under water.
For this recipe, we have prepared a basic scene including a camera controlled by the up and down arrow keys. The scene is available inside the AudioFilterScene package, within the 0423_11_04 folder, where you can also find the OceanSound.wav audio file.
To simulate underwater ambience, perform the following steps:
- Import the AudioFilterScene package and the OceanSound.wav audio file into your Unity project.
- Open the FilterScene level, inside the 11_04 AudioFilter folder in the Project view.
- From the Project view, drag the OceanSound asset into the Daylight Simple Water game object in the Hierarchy view.
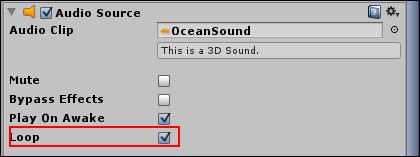
- In the Hierarchy view, select Daylight Simple Water and select the Loop option of the Audio Source component:
- In the Hierarchy view, select the Main Camera. Then, add an Audio Low Pass Filter component to it (Component | Audio | Audio Low Pass Filter).
- Change the component's Cutoff Frequency value to
1000:
- Create a new C# script and rename it as
UnderwaterSound. - Open the UnderwaterSound script in your editor and replace everything with the following code:
using UnityEngine; using System.Collections; public class UnderwaterSound : MonoBehaviour { public GameObject oceanObject; public float falloff = 1.0f; private AudioLowPassFilter filter; void Start(){ filter = GetComponent<AudioLowPassFilter>(); filter.enabled = false; } void Update() { if (transform.position.y < oceanObject.transform.position.y){ filter.enabled = true; filter.cutoffFrequency = 1000 - (transform.position.y * falloff); }else{ filter.enabled = false; } } } - Save your script and attach it to the Main Camera by dragging it from the Project view into the game object in the Hierarchy window.
- Drag the Water3Example game object from the Project view into the Ocean Object slot of the Underwater Sound component. Also, change the Falloff parameter to
20:
- Play the scene and press the down arrow key to move the camera down. The filter should be activated as the camera goes below the water level, dampening the sound.
Once Audio Low Pass Filter has been attached, all we need to do is detect whether the camera is below the water level to enable it, also amplifying its effect by raising the Cutoff Frequency of the filter as the camera goes down even further.